Cat Collector Adding a Third Model
Learning objective: By the end of this lesson, learners will be able to implement a new model in Django, and perform CRUD operations using class-based views.
Now it’s time to introduce the third and final model for this application: Toys! We’ll establish a complete set of class-based views to enable full CRUD operations on this new model. Then, we’ll link Cats to Toys using a many-to-many relationship.
Toy model
Let’s start by adding the Toy model to our project.
Add the following at the bottom of models.py:
# Add the Toy model
class Toy(models.Model):
    name = models.CharField(max_length=50)
    color = models.CharField(max_length=20)

    def __str__(self):
        return self.name

    def get_absolute_url(self):
        return reverse('toy-detail', kwargs={'pk': self.id})
This new model with have only two properties for toys name and color.
We’ll also include get_absolute_url(self). This method uses Django’s reverse function to generate a URL for the specific instance of the Toy model. This URL is meant to point to a detailed view of the toy, identified by its primary key (pk). This is useful in redirecting users to the toy’s detail page after operations such as creating or updating a toy.
Register the new toy model
A new model means a new entry in admin.py. Add the toy model below Cat and Feeding.
from django.contrib import admin

from .models import Cat, Feeding, Toy  # import the model

admin.site.register(Cat)
admin.site.register(Feeding)
# Add the Toy model
admin.site.register(Toy)
A new model also means we need to make migrations and migrate in our terminal:
python3 manage.py makemigrations
python3 manage.py migrate
Adding Toys
Lets’ create our first Class-Based View for adding new toys.
Start by adding the URL path for create in main_app/urls.py.
path('toys/create/', views.ToyCreate.as_view(), name='toy-create'),
This will cause an error with our server temporarily, because we have not created the view for this new path.
Add the CBV to create a Toy in main_app/views.py. Make sure you import the Toy model at the top!
from .models import Cat, Toy

# Other view functions above

class ToyCreate(CreateView):
    model = Toy
    fields = '__all__'
And finally create a new template toy_form.html and add the model form:
touch main_app/templates/main_app/toy_form.html
To save time, we’ll add some conditional logic to set this form up for edit functionality as well, so we don’t need to return to it later.
{% extends 'base.html' %}
{% load static %}
{% block head %}
  <link rel="stylesheet" href="{% static 'css/form.css' %}" />
{% endblock %}
{% block content %}
  <div class="page-header">
    {% if object %}
      <h1>Edit {{object.name}}</h1>
    {% else %}
      <h1>Add a Toy</h1>
    {% endif %}
    <img src="{% static 'images/nerd-cat.svg' %}" alt="A cat using a computer" />
  </div>
  <form action="" method="post" class="form-container" autocomplete="off">
    {% csrf_token %}
    <table>
      {{ form.as_table }}
    </table>
    <button type="submit" class="btn submit">Submit!</button>
  </form>

{% endblock %}
Finally let’s update the base.html with a new link so that we can get to our new page.
<ul>
  <li><a href="{% url 'cat-index' %}">All Cats</a></li>
  <li><a href="{% url 'cat-create' %}">Add a Cat</a></li>
  <!-- Add a new link -->
  <li><a href="{% url 'toy-create' %}">Add a Toy</a></li>
  <li><a href="{% url 'about' %}">About</a></li>
</ul>
Test it out!
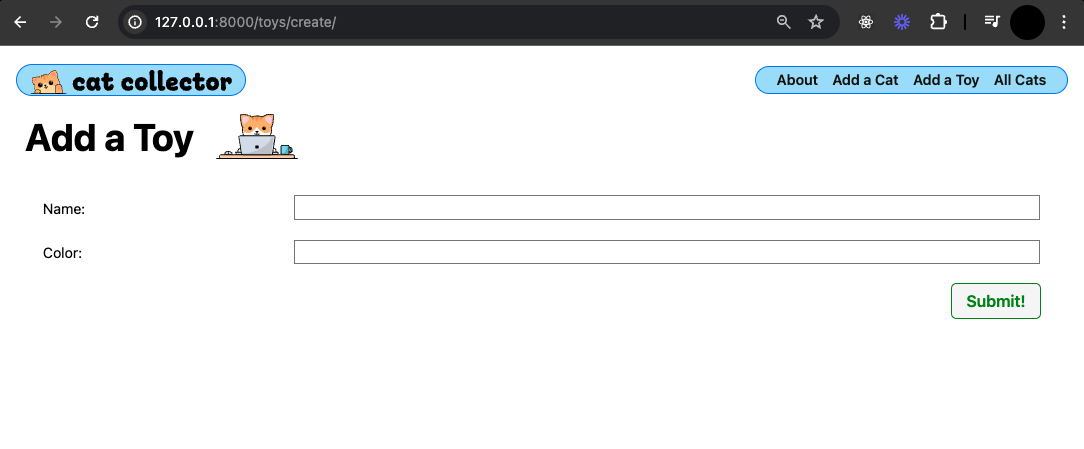
Got an error? Not a problem. Our create operation was successful, but our view function has a redirect to a page that doesn’t exist yet.
You can confirm the creation of new toys in the Admin dashboard.
The next step is to create a place in our UI to view toys and give the server a proper place to redirect.
Viewing Toys
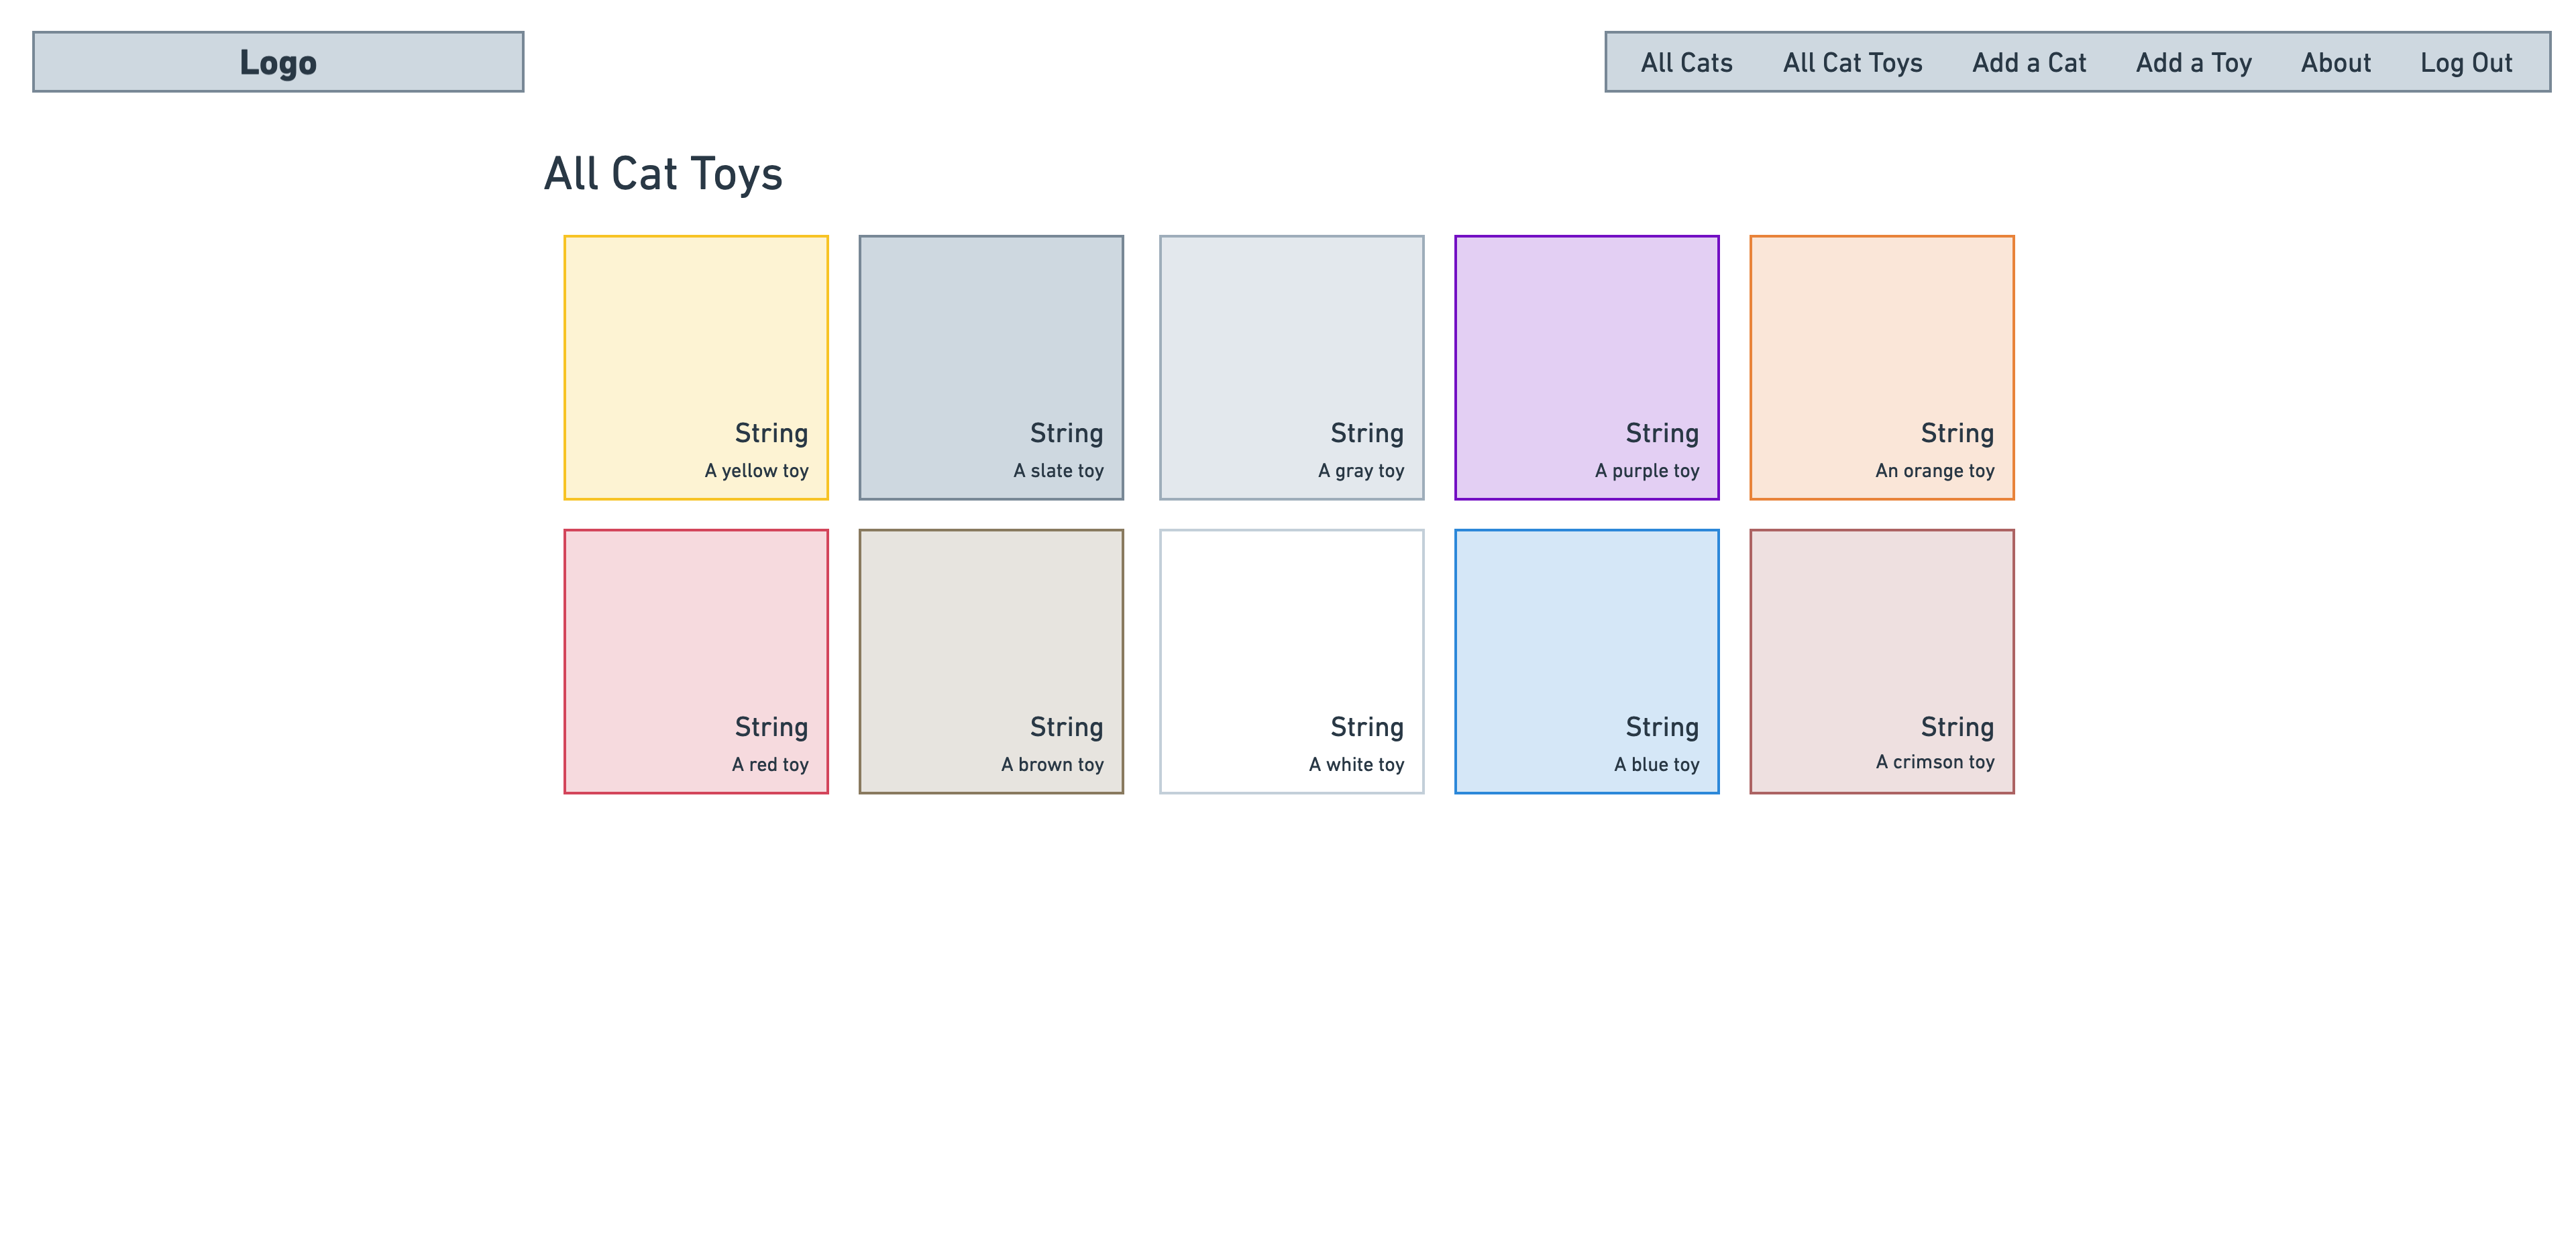
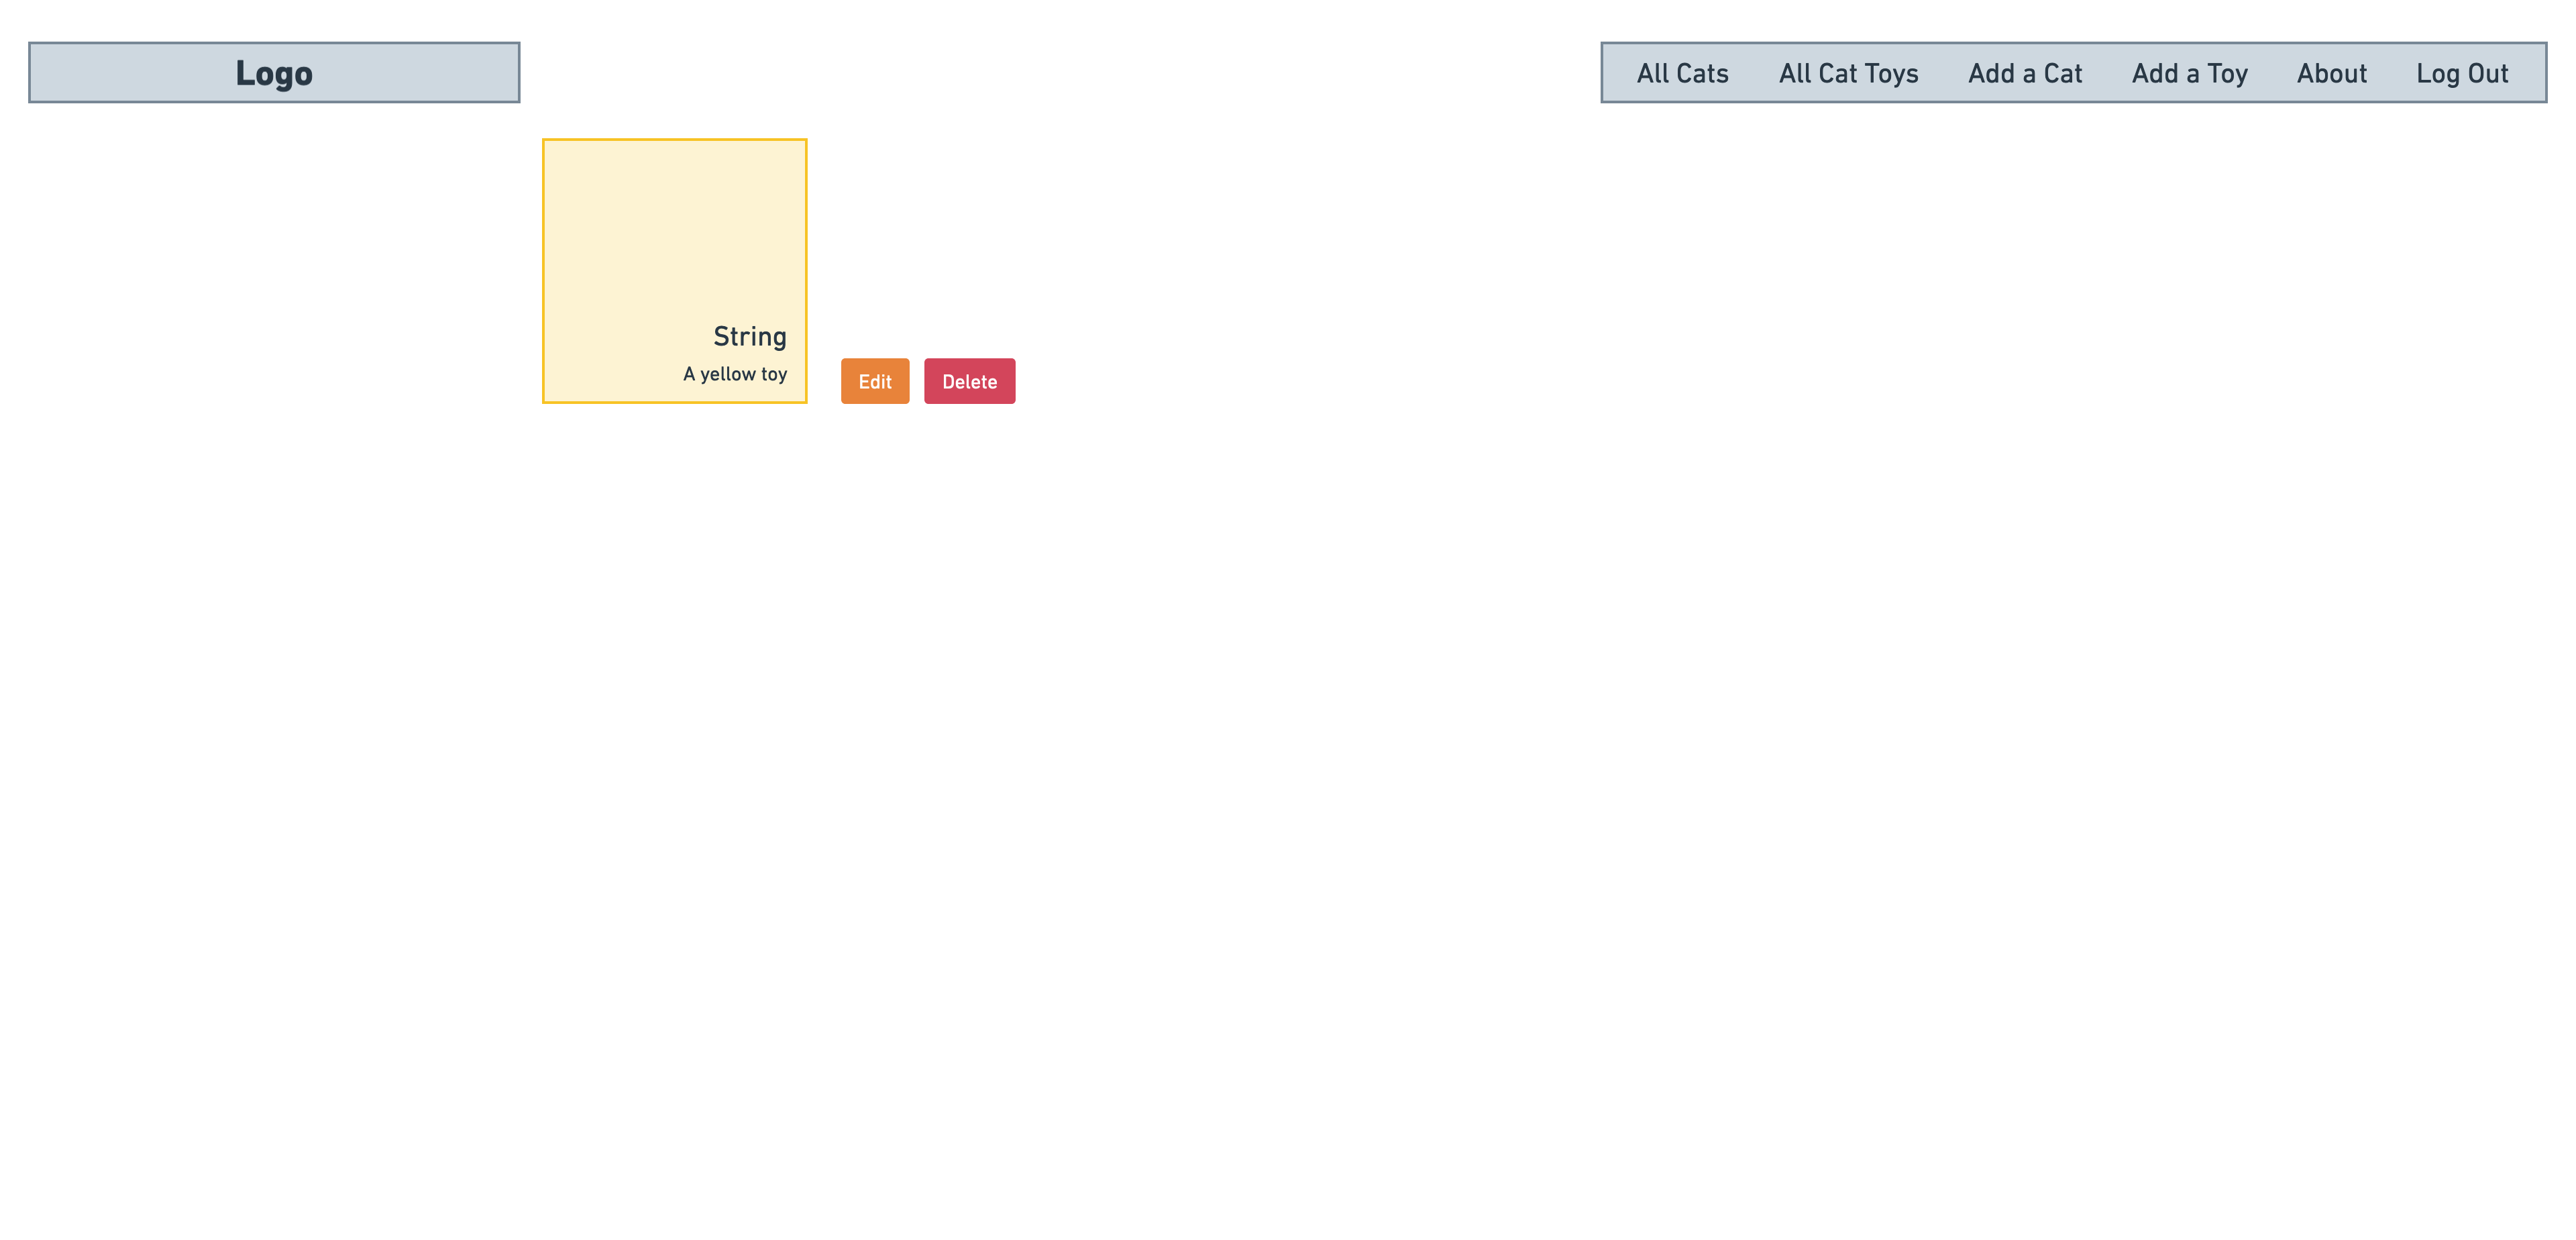
We have prepared two wireframes for the toy sections of our application: one for the index page, which lists all toys, and another for the detailed view page of each toy.
Here are some wireframes for what we will build in the next sections.
Toy Index Page
Toy Detail Page
Let’s start by setting up the URLs needed for these views:
path('toys/<int:pk>/', views.ToyDetail.as_view(), name='toy-detail'),
path('toys/', views.ToyList.as_view(), name='toy-index'),
This will cause an error with our server temporarily, because we have not created the views for these new paths.
Now, let’s create the views that will render the list of toys and the details of each toy. These views are defined using Django’s class-based views:
from django.views.generic.edit import CreateView, UpdateView, DeleteView
from django.views.generic import ListView, DetailView # add these

# Other view functions above

class ToyList(ListView):
    model = Toy

class ToyDetail(DetailView):
    model = Toy
Next, let’s add a link to our “All Toys” index view in the nav bar so we can easily browse all toys:
<ul>
  <li><a href="{% url 'cat-index' %}">All Cats</a></li>
  <!-- Add new link -->
  <li><a href="{% url 'toy-index' %}">All Toys</a></li>
  <li><a href="{% url 'cat-create' %}">Add a Cat</a></li>
  <li><a href="{% url 'toy-create' %}">Add a Toy</a></li>
  <li><a href="{% url 'about' %}">About</a></li>
</ul>
Lastly, we need templates for these views. Create the template files by running the following commands in the terminal:
touch main_app/templates/main_app/toy_list.html main_app/templates/main_app/toy_detail.html
Next we’ll add some markup to our toy_list template
All Toys index page
Add the following markup in toy_list.html:
{% extends 'base.html' %}
{% load static %}
{% block head %}
<link rel="stylesheet" href="{% static 'css/toys/toy-index.css' %}" />
{% endblock %}
{% block content %}

<section class="page-header">
  <h1>All Cat Toys</h1>
  <img src="{% static 'images/string.svg' %}" alt="A ball of string" />
  <img src="{% static 'images/mouse.svg' %}" alt="A mouse" />
  <img src="{% static 'images/post.svg' %}" alt="A scratching post" />
  <img src="{% static 'images/fish.svg' %}" alt="A fishy toy" />
</section>

<section class="card-container">
  {% for toy in toy_list %}
    <div class="card" style="border-color: {{ toy.color }}">
      <div class="card-bg" style="background-color: {{ toy.color }}"></div>
      <a href="{% url 'toy-detail' toy.id %}">
        <div class="card-content">
          <h2>{{ toy.name }}</h2>
          <p>A {{ toy.color }} toy</p>
        </div>
      </a>
    </div>
  {% endfor %}
</section>

{% endblock %}
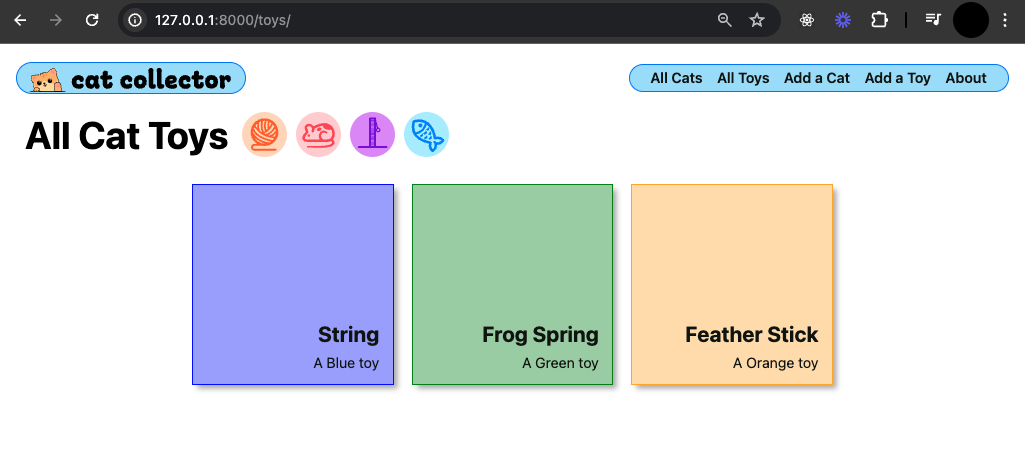
This markup includes a cute page header with some cat toy images, as well as a programmatically rendered list of toys from our database.
Test the link in the nav to see the new page.
Toy index CSS
Let’s also create a custom CSS directory for this new Model and a file for its index page:
mkdir main_app/static/css/toys
touch main_app/static/css/toys/toy-index.css
add the following styles in toy-index.css:
.card-container {
  padding: 0 40px;
  display: flex;
  justify-content: center;
  flex-wrap: wrap;
}

.card {
  width: 224px;
  height: 224px;
  margin: 10px;
  border: solid 2px;
  box-shadow: var(--card-box-shadow);
  position: relative;
}

.card-bg {
  opacity: 0.4;
  position: absolute;
  display: inline-flex;
  top: 0;
  left: 0;
  width: 100%;
  height: 100%;
}

.card-content {
  padding: 15px;
  height: 100%;
  width: 100%;
  display: flex;
  align-items: flex-end;
  justify-content: flex-end;
  flex-direction: column;
}

.card > a {
  position: absolute;
  top: 0;
  left: 0;
  width: 100%;
  height: 100%;
  display: inline-block;
  text-decoration: none;
  color: var(--text-color);
}

.card h2 {
  margin: 7px 0;
  font-size: var(--font-xl);
}

.card p {
  margin: 0;
  font-size: var(--font-reg);
}

.page-header > img {
  margin-left: 10px;
}

.page-header > img:first-of-type {
  margin-left: 15px;
}
Refresh to see the final index page!
One Toy detail page
Now let’s add the markdown for the toy_detail.html page:
{% extends 'base.html' %}
{% load static %}
{% block head %}
<link rel="stylesheet" href="{% static 'css/toys/toy-detail.css' %}" />
{% endblock %}
{% block content %}

<div class="card" style="border-color: {{ toy.color }}">
  <div class="card-bg" style="background-color: {{ toy.color }}"></div>
  <div class="card-content">
    <h2>{{ toy.name }}</h2>
    <p>A {{ toy.color }} toy</p>
  </div>
</div>
<a href="" class="btn warn">Edit</a>
<a href="" class="btn danger">Delete</a>

{% endblock %}
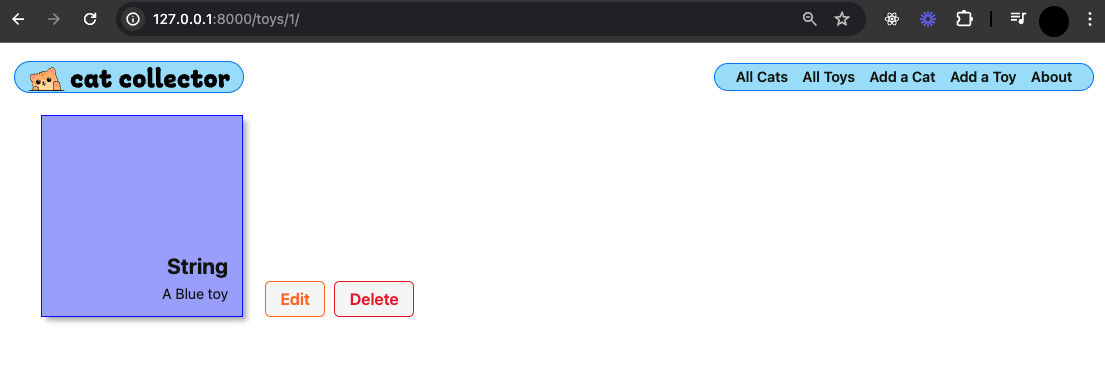
This markdown contains specific details about one toy, as well as buttons to edit and delete a toy. We’ll connect update and delete functionality to those later.
Notice also how we use properties of the toy model to set styles in our CSS. Neat.
Toy detail CSS
Let’s add another custom CSS file for our details page:
touch main_app/static/css/toys/toy-detail.css
Add the following styles to your new CSS file:
main {
  display: flex;
  align-items: flex-end;
  justify-content: flex-start;
  min-height: auto;
}

.card {
  width: 224px;
  height: 224px;
  margin: 25px 25px 15px 40px;
  border: solid 2px;
  box-shadow: var(--card-box-shadow);
  position: relative;
}

.card-bg {
  opacity: 0.4;
  position: absolute;
  display: inline-flex;
  top: 0;
  left: 0;
  width: 100%;
  height: 100%;
}

.card-content {
  padding: 15px;
  height: 100%;
  width: 100%;
  display: flex;
  align-items: flex-end;
  justify-content: flex-end;
  flex-direction: column;
  color: var(--text-color);
}

.btn {
  margin-bottom: 15px;
}

.card h2 {
  margin: 7px 0;
  font-size: var(--font-xl);
  z-index: 1;
}

.card p {
  margin: 0;
  font-size: var(--font-reg);
  z-index: 1;
}
Refresh to see your styled details page.
Nice work!
Update and Delete Toys
We’re almost finished with our CBV’s, we just need to add the final update and delete functionality for individual toys.
First we’ll create the paths:
In urls.py:
    #Existing urls above
    path('toys/<int:pk>/update/', views.ToyUpdate.as_view(), name='toy-update'),
    path('toys/<int:pk>/delete/', views.ToyDelete.as_view(), name='toy-delete'),
Now we add the views in views.py:
class ToyUpdate(UpdateView):
    model = Toy
    fields = ['name', 'color']

class ToyDelete(DeleteView):
    model = Toy
    success_url = '/toys/'
Update the Edit and Delete buttons on the toy-detail.html page with their new URLs:
<a href="{% url 'toy-update' toy.id %}" class="btn warn">Edit</a>
<a href="{% url 'toy-delete' toy.id %}" class="btn danger">Delete</a>
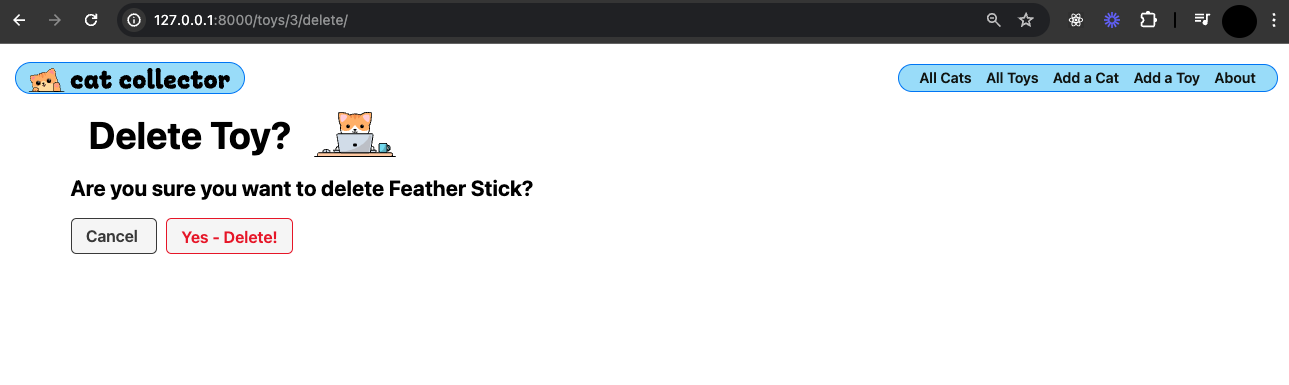
Update is now complete. You can test this functionality now. Our delete functionality needs one final step.
Create delete confirmation page
Let’s make a template that will confirm the delete.
Run the following in the terminal:
touch main_app/templates/main_app/toy_confirm_delete.html
And add the following markdown:
{% extends 'base.html' %}
{% load static %}
{% block content %}

<div class="page-header">
  <h1>Delete Toy?</h1>
  <img src="{% static 'images/nerd-cat.svg' %}" alt="A cat using a computer" />
</div>
<h2>Are you sure you want to delete {{ object.name }}?</h2>

<form action="" method="post" class="form">
  {% csrf_token %}
  <a href="{% url 'toy-detail' toy.id %}" class="btn secondary"> Cancel </a>
  <button type="submit" class="btn danger">Yes - Delete!</button>
</form>

{% endblock %}
Test your new delete confirmation page.
Great job!