Cat Collector Django Class-Based Views
Learning objective: By the end of this lesson, students will be able to create new pages using Django’s built in Class-based Views.
What are class-based views?
Class-based Views (CBVs) in Django provide a structured approach to creating views by using classes rather than functions. These classes are built into Django’s views module, enabling you to organize your views and reuse code by extending Django’s predefined base classes. Let’s step away from cat collector for a moment and think about an application performing CRUD on a Book resource.
For example, let’s say we wanted to implement index (view all) functionality using class-based views. First, we would import and extend the built in ListView class:
from django.views.generic import ListView

class BookList(ListView):
    model = Book
Here, ListView is a predefined generic class-based view that abstracts common patterns into a reusable format. We extend ListView to create our own BookList class, and tell it which model to use:
model = Book
This tells BookList to fetch all records from the Book model.
Next, we connect this class-based view to a URL in urls.py using the as_view() method of the CBV (which returns a view function) and connect it to a route as usual:
from django.urls import path
from books.views import BookList

urlpatterns = [
    path('books/', BookList.as_view(), name='book-index'),
]
Notice that there’s no call to render? Unlike function-based views, CBVs don’t require explicit render calls. By default, ListView will look for a template named templates/<app_name>/book_list.html, but this can be customized with additional attributes.
Types of class-based views
In addition to the ListView used to display the index page for a Model, there are also:
DetailView- used to implement the “detail” page for an instance of a ModelCreateView- used to create an instance of a ModelDeleteView- used to delete an instance of a ModelUpdateView- used to update an instance of a Model
Everything you would need to perform full crud on a resource!
In this lesson, we will be utilizing the CreateView, UpdateView and DeleteView CBVs to complete our our C U D functionality on cats! We could also replace the existing cat_index and cat_detail view functions with Class-based Views (CBVs). However, we will keep these as function-based views to serve as examples of their structure and functionality.
Why use Class-based Views?
Django developed class-based views to minimize the redundancy of common view patterns found in web applications, effectively DRYing up our code base. You can read more about the rationale from Django’s documentation on class-based views. Much of the code we write in CRUD applications repeats certain patterns again and again. As you saw in the above example, we can leverage CBVs to avoid having to write the same repeating code.
CBVs can save time, making us more productive developers. CBVs are also highly configurable by adding class attributes or overriding methods and using decorators.
For example, to change the default template for a list view, set the template_name attribute:
class BookList(ListView):
    model = Book
    template_name = 'books/index.html'
Creating Data Using a CBV
Let’s explore class-based views as we add create functionality for cats!
In Django, the naming convention for class-based views (CBVs) that handle creating objects typically involves using the name of the model followed by the type of action the view handles. For creating objects, the common practice is to append “Create” to the model name. For a model called Cat the convention would be CatCreate.
Add the Route
In an Express application, you typically need to define two separate routes and their corresponding controller actions to handle a form:
- A
GETroute (cats/new) to serve the form page. - A
POSTroute (/cats) to process the form data and add a new cat to the database.
In Django, using the class-based view CreateView simplifies this process by combining these steps:
- Automatically handles form creation: Django uses a ModelForm to automatically generate form inputs based on the Model.
- Renders the form template on a
GETrequest: When accessed via aGETrequest, it displays a template containing the<form>. - Processes the form on a
POSTrequest: On aPOSTrequest, it automatically captures the form data to create a new database entry and then redirects to a specified URL.
Let’s add a new URL pattern to main_app/urls.py for this classed-based view:
urlpatterns = [
    path('', views.home, name='home'),
    path('about/', views.about, name='about'),
    path('cats/', views.cat_index, name='cat-index'),
    path('cats/<int:cat_id>/', views.cat_detail, name='cat-detail'),
    # new route used to create a cat
    path('cats/create/', views.CatCreate.as_view(), name='cat-create'),
]
The
path()function still needs a view function as its second argument, not a class, and that’s what a CBV’sas_view()method returns.
💡 Did you notice that we didn’t have to put that route above the
cats/<int:cat_id>/? Unlike Express, Django won’t match that route unless there’s something that looks like an integer in the second segment, therefore it ignorescats/create/
Now we need to add the views.CatCreate CBV to make the server happy, but first let’s add a link to the nav for adding a cat…
Update the UI
Now that we know the path used to both:
- View a form for entering cat info; and
- Create the cat when the form is submitted
Let’s update base.html to add a link to the nav:
<ul>
  <li><a href="{% url 'cat-index' %}">All Cats</a></li>
  <li><a href="{% url 'cat-create' %}">Add a Cat</a></li>
  <li><a href="{% url 'about' %}">About</a></li>
</ul>
On to the view!
Extending the generic CreateView
First, to use any class-based view in Django, it needs to be imported:
from django.shortcuts import render
# Add the following import
from django.views.generic.edit import CreateView
from .models import Cat
Now we can inherit from CreateView to create our own CBV used to create cats:
# main-app/views.py

class CatCreate(CreateView):
    model = Cat
    fields = '__all__'
The fields attribute is required and can be used to limit or change the ordering of the attributes from the Cat model are generated in the ModelForm passed to the template.
We’ve taken advantage of the special '__all__' value to specify that the form should contain all of the Cat Model’s attributes. Alternatively, we could have listed the fields in a list like this:
# main-app/views.py

class CatCreate(CreateView):
    model = Cat
    fields = ['name', 'breed', 'description', 'age']
This is all the code necessary to display a template containing a form that’s automatically provided, and to create a Cat when the form is submitted (when the request is a POST rather than a GET).
On to the template!
Create the template for creating cats
Consider the following wireframe:
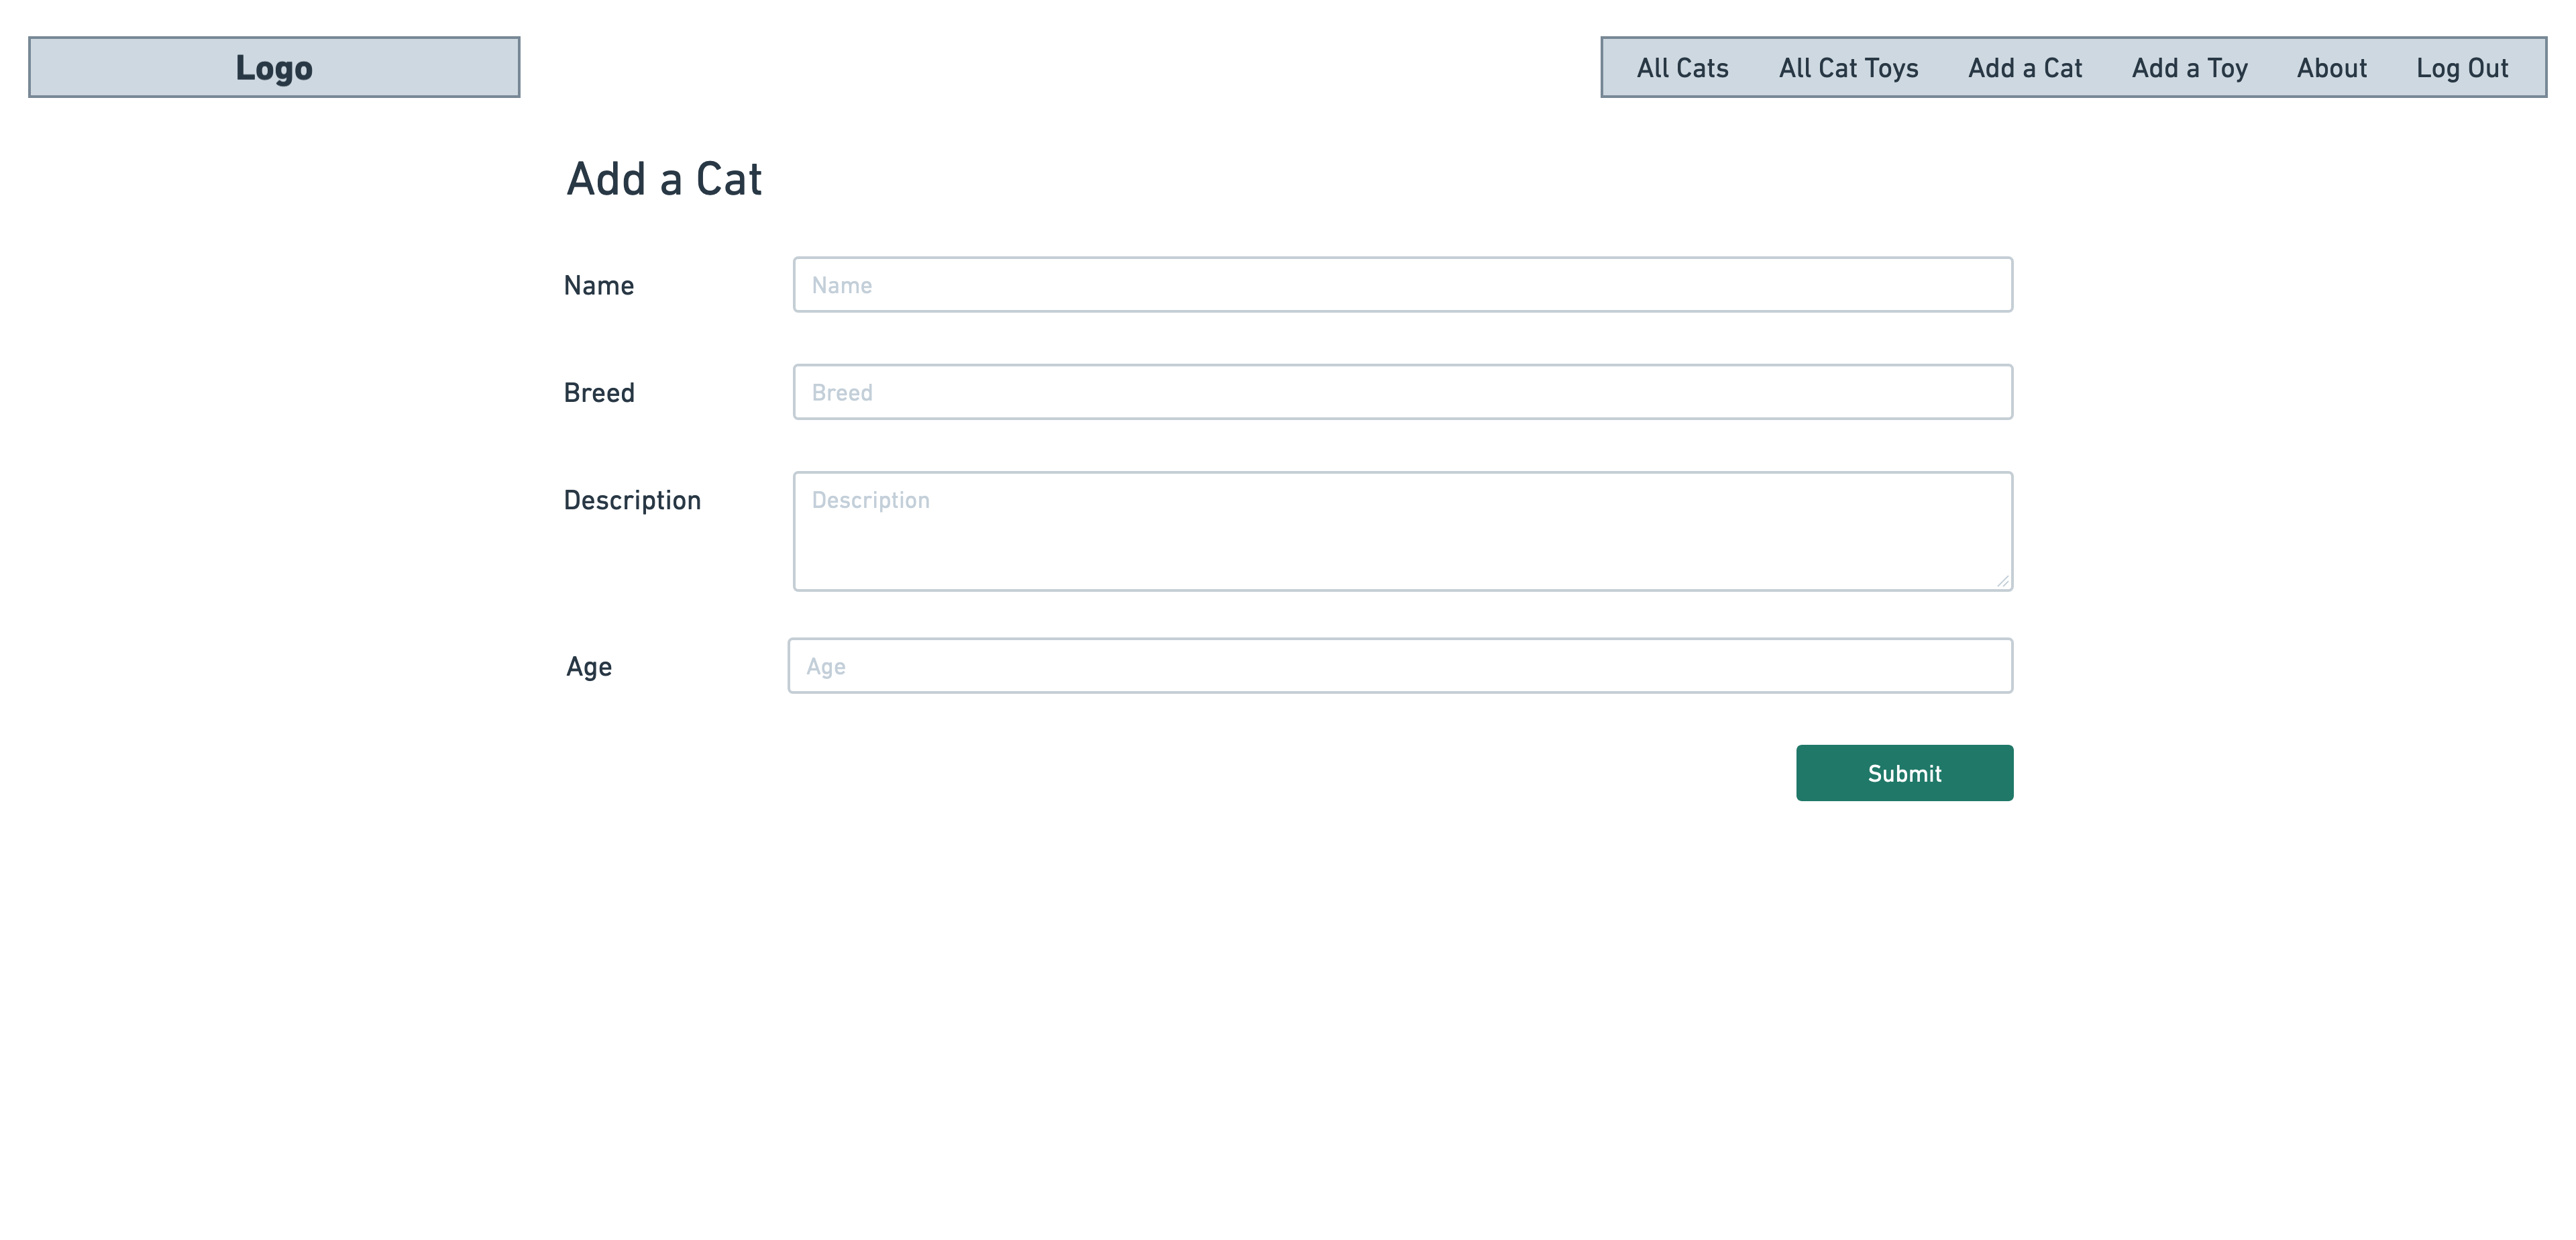
By convention, the CatCreate CBV will look to render a template named templates/main_app/cat_form.html.
All CBVs by default will use a folder inside of the templates folder with a name the same as the app, in our case main_app.
Let’s give CatCreate the template it wants by first creating the templates/main_app folder in the terminal:
mkdir main_app/templates/main_app
Now create the template file in the terminal:
touch main_app/templates/main_app/cat_form.html
The CreateView expects a template named <model_name>_form.html by default, where <model_name> is the lowercase name of the model. This convention is suggested in the Django documentation to standardize form templates. You can customize this by explicitly setting template_name in your view class.
We’ll discuss the following code as we type it:
{% extends 'base.html' %}
{% load static %}
{% block head %}
<link rel="stylesheet" href="{% static 'css/form.css' %}" />
{% endblock %}
{% block content %}

<div class="page-header">
  <h1>Add a Cat</h1>
  <img src="{% static 'images/nerd-cat.svg' %}" alt="A cat using a computer" />
</div>

<form action="" method="post" class="form-container">
  {% csrf_token %}
  <table>
    {{ form.as_table }}
  </table>
  <button type="submit" class="btn submit">Submit!</button>
</form>

{% endblock %}
-
Setting the action attribute to an empty string (
action="") means the form will submit to the same URL that served it. This is typical forCreateView, which handles both displaying the form (on GET requests) and processing the form submission (on POST requests). -
The
{% csrf_token %}template tag is a security measure that makes it difficult to perform a cross-site-request-forgery by writing a CSRF (pronounced “see-surf”) token that is validated on the server. -
The
formvariable represents a DjangoModelForminstance that is automatically created byCreateView. This form is linked directly to your model and includes all the fields specified in the form’s Meta class or passed explicitly to the view.{{ form.as_table }}renders the form fields within a table layout. This method is one of several Django provides for rendering forms (others includeas_pfor paragraph tags andas_ulfor unordered lists).
Add page styles
A new page means new CSS! We’ll be using this same form CSS throughout this app, so we’re just going to put it in the main css directory for this application. Run the following command in the terminal:
touch main_app/static/css/form.css
Add the following styles to that file:
.form-container {
  display: flex;
  flex-direction: column;
  width: 100%;
}

table {
  padding: 0 40px;
  width: 100%;
  border-spacing: 0 20px;
}

th {
  text-align: left;
  padding: 6px 20px 0 0;
  font-weight: normal;
  vertical-align: top;
  font-size: var(--font-reg);
}

td {
  max-width: 60%;
}

td > * {
  width: 100%;
  padding: 2px 4px;
  font-size: var(--font-l);
}

td > textarea {
  height: calc(4 * var(--font-l) + 8px);
  font-family: inherit;
}

.btn {
  align-self: flex-end;
  margin-right: 40px;
}
Let’s refresh the browser and click the Add a Cat link.
Looks great!
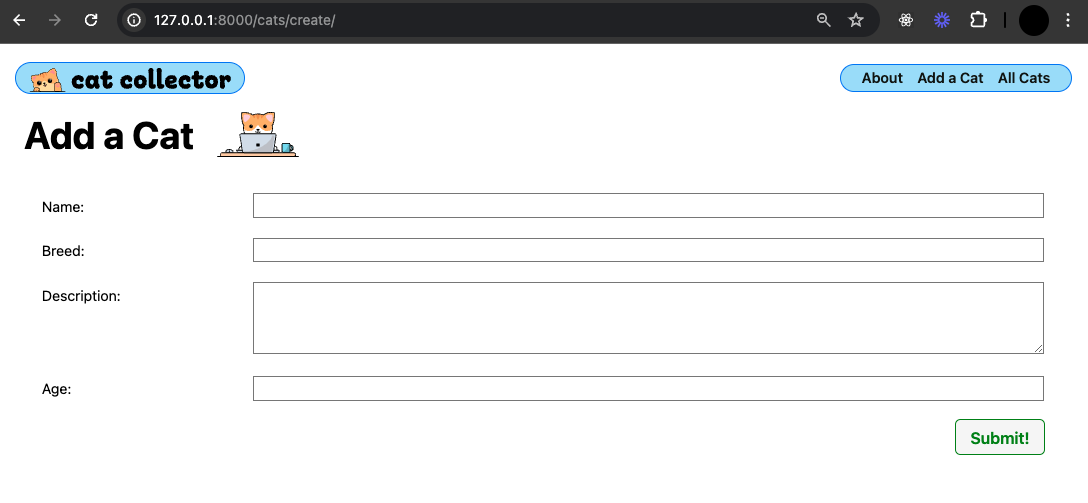
Use the devtools to explore the DOM. You’ll see how Django’s ModelForm wrote the inputs in table rows and columns because we used {{ form.as_table }}.
Other options include:
{{ form }}- No wrapper around the<label>&<input>tags{{ form.as_p }}- Wraps a<p>tag around the<label>&<input>tags{{ form.as_ul }}- Wraps an<li>tag around the<label>&<input>tags
Note: To ease custom styling, you can add an id or class to your
<table>and/or<form>tags. Also note how Django automatically assigns an id to each input.
Redirecting
Currently, if you submit the form to create a new cat, while the cat will be successfully created, you will encounter an error. This error occurs because Django does not know where to redirect the user after the form submission.
To resolve this, you need to specify a success_url attribute in your class-based view (CBV). This attribute tells Django the URL to redirect to once the form has been successfully processed.
class CatCreate(CreateView):
    model = Cat
    fields = '__all__'
    success_url = '/cats/'
However, this approach always redirects users to the general /cats/ page after a cat is created. Instead, it is often more useful to redirect to the specific page of the cat that was just created.
Redirecting to a newly created cat object
Rather than redirecting to a static page, Django allows us to dynamically redirect to the newly created object using the get_absolute_url method on the model.
Let’s update the Cat model to include this method:
from django.db import models
from django.urls import reverse

class Cat(models.Model):
    name = models.CharField(max_length=100)
    breed = models.CharField(max_length=100)
    description = models.TextField(max_length=250)
    age = models.IntegerField()

    def __str__(self):
        return self.name

    # Define a method to get the URL for this particular cat instance
    def get_absolute_url(self):
        # Use the 'reverse' function to dynamically find the URL for viewing this cat's details
        return reverse('cat-detail', kwargs={'cat_id': self.id})
The reverse method above will return the correct path for the cat-detail named route. However, since that route requires a cat_id route parameter, its value must be provided as an argument.
Don’t forget to import reverse in models.py:
from django.db import models
# Import the reverse function
from django.urls import reverse
Since CreateView automatically calls get_absolute_url on the model instance if success_url is not explicitly set, we must remove the previously added success_url from the CatCreate view:
class CatCreate(CreateView):
    model = Cat
    fields = '__all__'
    # Remove success_url so Django uses get_absolute_url from Cat
By removing success_url, Django will now use the get_absolute_url method defined in the Cat model, ensuring the user is redirected to the newly created cat’s detail page.
Updating & deleting cats with class-based views
Let’s implement the following user stories using class-based view:
- AAU, when viewing a cat’s detail page, I want to click EDIT to update that cat’s information.
- AAU, when viewing a cat’s detail page, I want to click DELETE to remove that cat from the database.
Add the routes
Let’s add two new routes for update and delete in main_app/urls.py:
    path('cats/create/', views.CatCreate.as_view(), name='cat-create'),
    # Add the new routes below
    path('cats/<int:pk>/update/', views.CatUpdate.as_view(), name='cat-update'),
    path('cats/<int:pk>/delete/', views.CatDelete.as_view(), name='cat-delete'),
By convention, CBVs that work with individual model instances will expect to find a named parameter of
pkfor “primary key”. This is why we didn’t usecat_idas we did in the detail entry.
Update the UI
Now we need to add EDIT and DELETE links on a cat’s details page.
Let’s update templates/cats/detail.html by adding a new <div> we’ll label with the class "cat-actions". This will contain our link buttons to Edit and Delete routes.
Add the new “cat-actions” <div> inside the detail.html template:
<div class="cat-details">
  <h1>{{ cat.name }}</h1>
  {% if cat.age > 0 %}
    <h2>A {{ cat.age }} year old {{ cat.breed }}</h2>
  {% else %}
    <h2>A {{ cat.breed }} kitten.</h2>
  {% endif %}
  <p>{{ cat.description }}</p>

  <div class="cat-actions">
    <a href="{% url 'cat-update' cat.id %}" class="btn warn">Edit</a>
    <a href="{% url 'cat-delete' cat.id %}" class="btn danger">Delete</a>
  </div>
</div>
Now for the views!
Create subclasses from Django’s UpdateView & DeleteView
We’ve referenced new CatUpdate and CatDelete views in the routes so we need to create them in views.py.
First, import Django’s UpdateView and DeleteView CBVs to extend from:
# Add UdpateView & DeleteView
from django.views.generic.edit import CreateView, UpdateView, DeleteView
Now we can utilize these minimal view classes:
class CatUpdate(UpdateView):
    model = Cat
    # Let's disallow the renaming of a cat by excluding the name field!
    fields = ['breed', 'description', 'age']

class CatDelete(DeleteView):
    model = Cat
    success_url = '/cats/'
Note that when we delete a cat, we’ll need to redirect to the cats index page since that cat doesn’t exist anymore.
Now we should be able to refresh the page and see our buttons rendered.
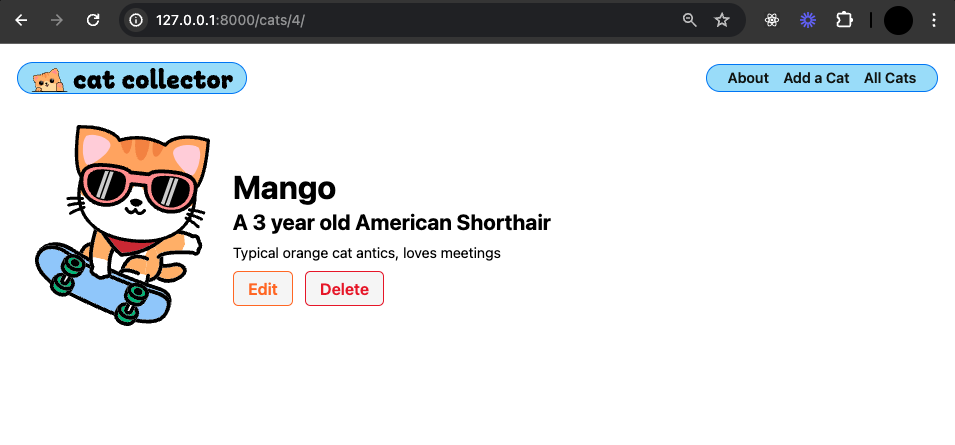
Adding the templates
At this point, the UPDATE functionality is ready for testing, but to fully implement the DELETE functionality, we need to take a few more steps. For both UPDATE and DELETE actions, if we want to introduce customizations or confirmations, modifications to existing templates are necessary.
Instead of creating a new template for the UPDATE action, we will edit the existing cat_form.html template to add custom UI elements. This ensures consistency across different actions like UPDATE and DELETE, where DELETE will require a separate confirmation template to safeguard against accidental deletions.
Customize the cat_form.html Template
Since we didn’t include 'name' in the fields list in CatUpdate, the name attribute isn’t listed in the form.
We’re going to customize cat_form.html to show the name of the Cat being edited, and learn a little more about Django in the process:
-
When using Django’s
UpdateViewfor editing model instances, like acat, certain context variables are automatically available in the template. These variables help determine whether you’re creating a new instance or editing an existing one. -
Django passes the model instance being edited as
objectand also by the lowercase name of the model, which in this case iscat. -
When using
CreateView, these variables (object or cat) will beNonebecause there’s no existing instance to edit.
Let’s leverage this new knowledge to modify templates/main_app/cat_form.html to show the cat’s name only when we are editing, not creating, a cat:
<div class="page-header">
  <!-- Check if a cat object exists to determine if we're editing -->
  {% if cat %}
    <h1>Edit {{ cat.name }}</h1>
  {% else %}
    <h1>Add a Cat</h1>
  {% endif %}
</div>
We could also do:
<div class="page-header">
  <!-- Using the generic 'object' variable -->
  {% if object %}
    <h1>Edit {{ object.name }}</h1>
  {% else %}
    <h1>Add a Cat</h1>
  {% endif %}
</div>
These two blocks are functionally equivalent and we could use either.
Refresh the browser to see your changes. Looks great!
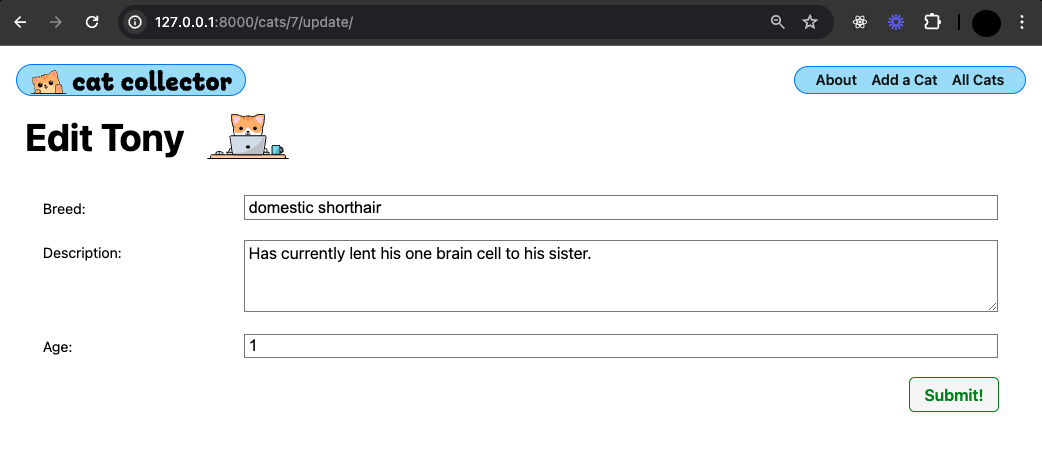
Creating a confirmation template for deleting a cat
When you want to delete data, it’s best practice to ask for confirmation to prevent accidental deletions. Django simplifies this process in its class-based DeleteView by looking for a specific confirmation template.
First, create the necessary confirmation template. By default, Django expects this template to be named following a particular convention. For a model named Cat, the template should be named cat_confirm_delete.html.
Run the following in the terminal:
touch main_app/templates/main_app/cat_confirm_delete.html
Next, define the contents of the template. This template will extend your base layout and include a confirmation form:
{% extends 'base.html' %}
{% load static %}
{% block content %}

<div class="page-header">
  <h1>Delete Cat?</h1>
  <img src="{% static 'images/nerd-cat.svg' %}" alt="A cat using a computer" />
</div>

<h2>Are you sure you want to delete {{ cat.name }}?</h2>

<form action="" method="post" class="form">
  {% csrf_token %}
  <a href="{% url 'cat-detail' cat.id %}" class="btn secondary">Cancel</a>
  <button type="submit" class="btn danger">Yes - Delete!</button>
</form>

{% endblock %}
Note how we are allowing the user to cancel the delete by providing a link back to the detail page.
Let’s check our progress by refreshing the browser and hitting the delete button.
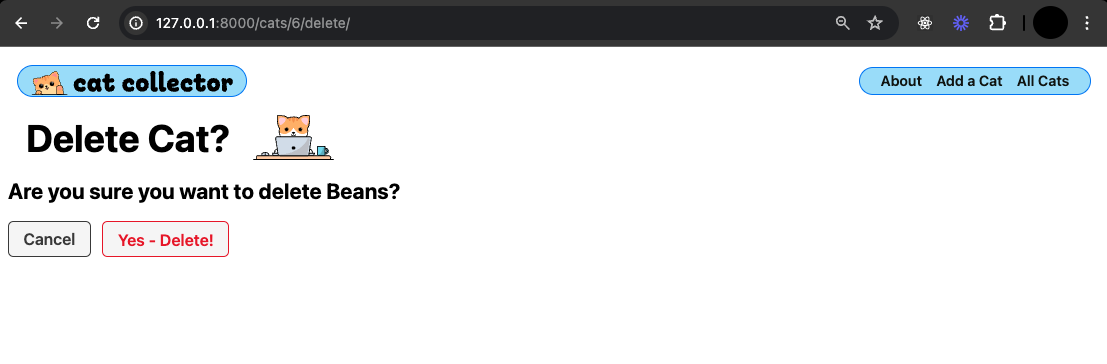
🎉 Congrats, you have implemented full CRUD for cats!