Cat Collector Using Django's ORM in the App
Learning objective: By the end of this lesson, learners will be able to integrate Django’s ORM capabilities into their web applications to perform CRUD operations, utilize Django’s administrative dashboard to manage data, and understand how to dynamically generate detail views for objects within a web application.
Updating the catcollector views
It’s time to integrate Django’s ORM capabilities into our Cat Collector app!
First, update main_app/views.py by removing the class Cat... definition and the hardcoded cats list, as we’ll now be retrieving real data from the database.
Fetching cat data with the ORM
Import the Cat model at the beginning of your views file and modify the cat_index function to fetch cat data using the ORM:
from django.shortcuts import render
from .models import Cat

def cat_index(request):
    cats = Cat.objects.all()  # look familiar?
    return render(request, 'cats/index.html', {'cats': cats})
Refresh the page in your browser to see real cats from your Database
I am the admin!
Hold on to your cats, because there’s something REALLY neat about Django—it comes with a built-in administrator dashboard! Remember seeing django.contrib.auth listed in your INSTALLED_APPS? Well, it’s time to put it to work!
Becoming a super user
A super user is essentially the administrator of your site. Once logged in as a super user, you can access the Admin app, where you’re empowered to add users, manage data, and more.
Create your super user account
Run the following command in your terminal and follow the prompts:
python3 manage.py createsuperuser
Django asks for a strong password (at least 8 characters and complex), but if you want to keep things simple for now, just press y when warned about password strength.
Explore the admin portal
After setting up your super user, head over to /admin on your web browser to access the administration portal!
Forgot your password? No problem!
If you forgot or mistyped your password when setting up your admin account, no problem. Just run this command to reset it:
python3 manage.py changepassword <user_name>
Registering models
But I don’t see Cats data! To manage Cat data via the admin, you first need to register the Cat Model with the admin portal:
- Open
main_app/admin.py. - Register your
Catmodel by adding the following code:
from django.contrib import admin
from .models import Cat

admin.site.register(Cat)
There’s no need to restart your server after registering a model. Just refresh your admin page, and you’ll see the changes.
Now you can add, edit, and remove cat data anytime you need to, all from the /admin route. Neat!
Adding a cat details page
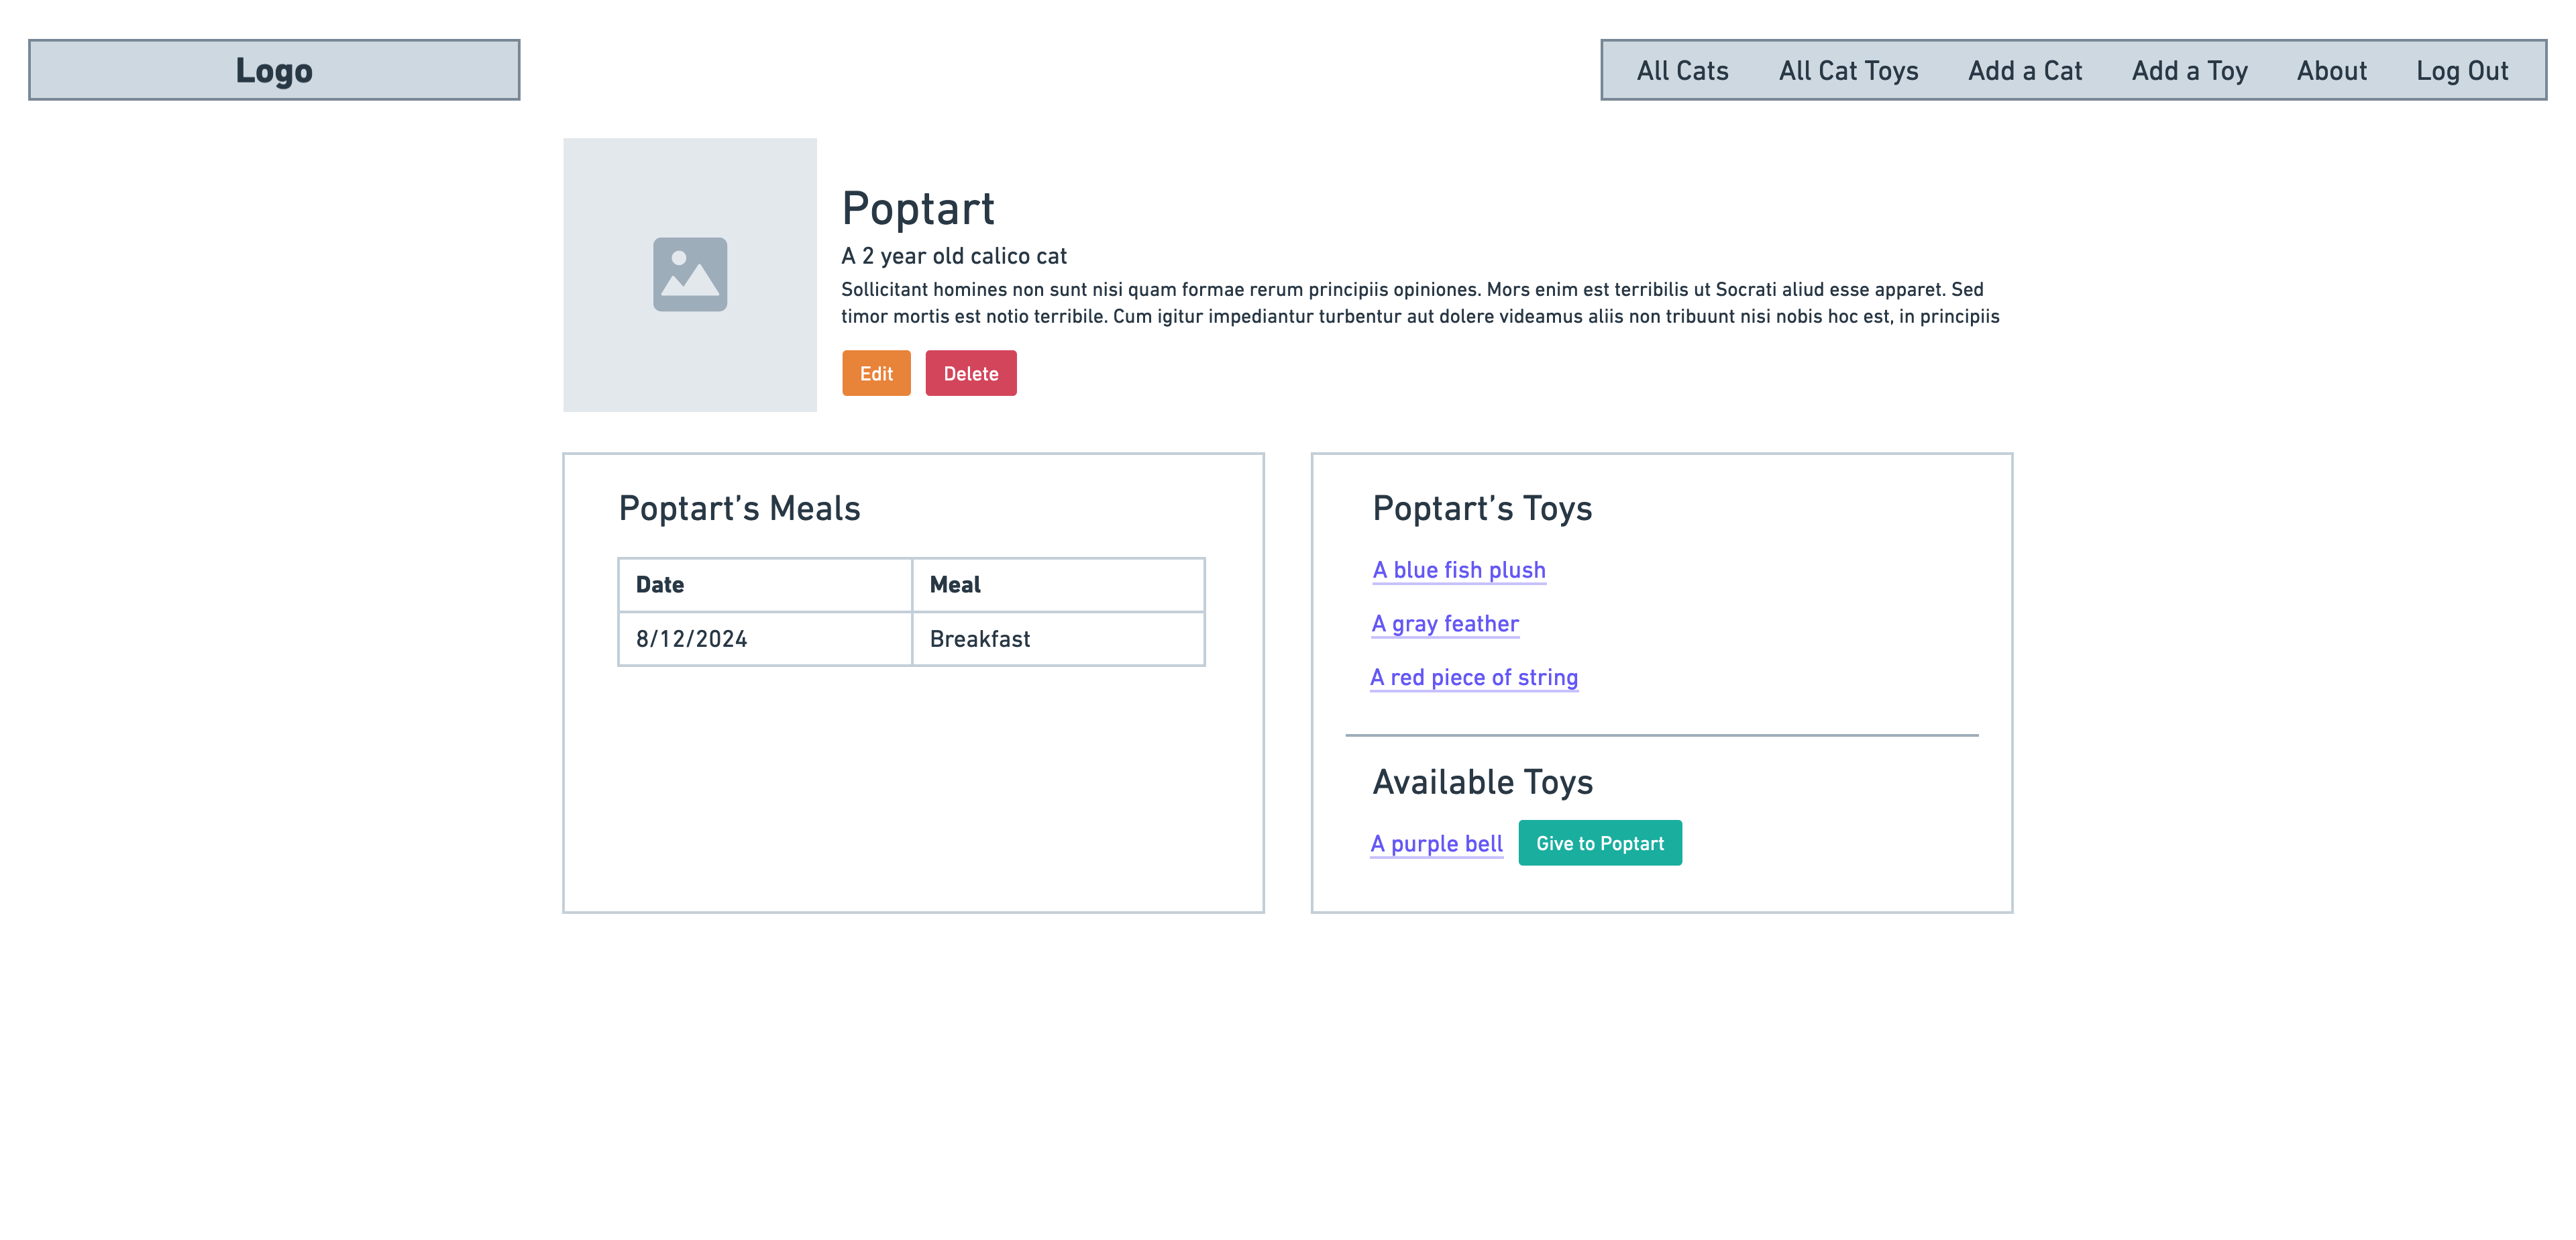
In this lesson, we’ll design the user interface flow for navigating to a details page for each cat in our application. On the index page, each cat is represented by a card displaying basic details. When a user clicks on a cat’s card, they will be redirected to a detailed page that offers more in-depth information about that specific cat.
Here’s a preliminary wireframe of the details page we’ll develop:
Adding new pages to a Django app
For a web application to perform any actions, it requires an HTTP request from the browser. This request informs the server of the desired operation.
When adding new pages or functionality to your Django web application, use the following steps as a guide:
- Decide the URL: Choose the appropriate URL for the route. Unlike some frameworks that use strict RESTful conventions, Django allows you to freely name your URLs.
- Update the User Interface: Add the necessary UI elements that will initiate the HTTP request to the server. For example, you might add a form for submitting a new cat.
- Define the Route: Add a new
path(...)to theurlpatternslist in your app’surls.pymodule. Each path entry specifies the code that executes when a matching URL is requested. - Create a View Function: Inside
views.py, add the view function referenced by the path. This function handles the logic for CRUD operations and is responsible for generating the server’s response. - Handle the Response: If the data was modified, usually respond with a redirect to avoid duplicate submissions. If no data was changed, typically render a template to display information, passing any necessary data to it.
Step 1 : Decide the URL
In Django, the URL for accessing a specific cat’s details should include the cat’s ID to ensure the correct information is fetched. Unlike some frameworks that use RESTful conventions strictly, Django allows flexibility in naming URLs. We’ll use a dynamic segment to capture the cat’s ID:
cats/<int:cat_id>/
The int: converter ensures that the URL will only match if the segment is an integer, which is necessary for identifying a specific cat.
Step 2 : Update the user interface
To enable users to access a cat’s detailed view, we’ll enhance the UI by making each cat’s card clickable. This involves wrapping the card’s contents within an <a> tag that directs to the detail view of the cat:
<section class="card-container">
  {% for cat in cats %}
    <div class="card">
      <a href="/cats/{{ cat.id }}">
        <div class="card-content">
          <div class="card-img-container">
            <img
              src="{% static 'images/sk8r-boi-cat.svg' %}"
              alt="A skater boy cat"
            />
          </div>
          <h2 class="card-title">{{ cat.name }}</h2>
          {% if cat.age > 0 %}
          <p>A {{ cat.age }} year old {{ cat.breed }}</p>
          {% else %}
          <p>A {{ cat.breed }} kitten.</p>
          {% endif %}
          <p><small>{{ cat.description }}</small></p>
        </div>
      </a>
    </div>
  {% endfor %}
</section>
The above is pretty similar to what we did in EJS templates.
After refreshing the page, hover over a cat card and check the URL in the bottom-left of the browser window. It should look something like: http://127.0.0.1:8000/cats/2.
Step 3 : Define the route
Next, define a route that matches the URL pattern and links to the appropriate view function. Add this entry to the urlpatterns in your urls.py:
urlpatterns = [
    path('', views.home, name='home'),
    path('about/', views.about, name='about'),
    path('cats/', views.cat_index, name='cat-index'),
    # new route below
    path('cats/<int:cat_id>/', views.cat_detail, name='cat-detail'),
]
Step 4 : Create the view function
Within views.py, define the cat_detail function to retrieve and display the details of a specific cat using its ID:
# views.py

def cat_detail(request, cat_id):
    cat = Cat.objects.get(id=cat_id)
    return render(request, 'cats/detail.html', {'cat': cat})
The cat_detail function is using the get method to obtain the cat object by its id.
💡 Django will pass any captured URL parameters as a named argument to the view function!
Step 5 : Handle the response
Lastly, we need to render the cat data within a detail.html template.
The cat_detail view function is passing a dictionary of data (called the context) to a template called detail.html.
Create the detail.html template that will render the individual details of a cat:
touch main_app/templates/cats/detail.html
Ensure this template extends your base layout and add the necessary styling:
{% extends 'base.html' %}
{% load static %}
{% block head %}
<link rel="stylesheet" href="{% static 'css/cats/cat-detail.css' %}" />
{% endblock %}
{% block content %}
<section class="cat-container">
  <div class="cat-img">
    <img src="{% static 'images/sk8r-boi-cat.svg' %}" alt="A skater boy cat" />
  </div>
  <div class="cat-details">
    <h1>{{ cat.name }}</h1>
    {% if cat.age > 0 %}
      <h2>A {{ cat.age }} year old {{ cat.breed }}</h2>
    {% else %}
      <h2>A {{ cat.breed }} kitten.</h2>
    {% endif %}
    <p>{{ cat.description }}</p>
  </div>
</section>
{% endblock %}
Let’s complete this page with some CSS! Create a new file:
touch main_app/static/css/cats/cat-detail.css
And add the following styles:
.cat-container {
  padding: 35px 30px;
  display: flex;
  flex-direction: column;
  align-items: center;
  justify-content: center;
}

.cat-img {
  width: 75%;
  max-width: 350px;
}

.usr-img {
  width: 100%;
  border-radius: var(--card-border-radius);
}

.cat-details {
  width: 98%;
}

.cat-actions {
  margin-top: 20px;
}

.feedings-toy-container {
  display: flex;
  flex-direction: column;
  padding-bottom: 20px;
  align-items: center;
}

.subsection-title {
  display: flex;
  align-items: center;
  margin-bottom: 12px;
}

.subsection-content {
  margin: 0 8px;
}

.toy-container {
  display: flex;
  align-items: center;
  flex-wrap: wrap;
}

.color-block {
  opacity: 0.8;
  height: 25px;
  width: 25px;
  margin-right: 10px;
}

.unfed,
.fed,
.no-toys,
.all-toys {
  margin: 0;
  font-weight: bold;
}

.unfed,
.no-toys {
  color: var(--danger);
}

.fed,
.all-toys {
  color: var(--submit);
}

.cat-details h1 {
  font-size: var(--font-xxl);
  margin: 15px 0 3px;
}

.cat-details h2 {
  font-size: var(--font-xl);
  margin: 0 0 10px;
  margin-top: 0;
  margin-bottom: 10px;
}

.cat-details h3 {
  margin: 20px 0 10px;
  font-size: var(--font-l);
}

.cat-details p {
  font-size: var(--font-reg);
  margin: 5px 0;
}

.feedings-toy-container > section {
  width: 80%;
  min-width: 360px;
  border: var(--borders);
  border-radius: var(--card-border-radius);
  padding: 10px;
  box-shadow: var(--card-box-shadow);
  display: flex;
  flex-direction: column;
  justify-content: center;
  margin-bottom: 20px;
}

.subsection-title img {
  height: 42px;
  margin-left: 8px;
}

.subsection-title img:first-of-type {
  margin-left: 16px;
}

.feedings h2,
.toys h2 {
  font-size: 3.2rem;
  margin: 0;
}

.feedings h3,
.toys h3 {
  font-size: var(--font-xl);
  margin: 10px 0;
}

.subsection-content p,
.subsection-content input,
.subsection-content select {
  font-size: var(--font-l);
}

.subsection-content input,
.subsection-content select {
  margin-left: 5px;
  padding: 3px;
}

.feedings table {
  width: calc(100% - 16px);
  text-align: left;
  border-collapse: collapse;
  margin: 0 8px;
}

.feedings td {
  padding: 8px 5px;
  font-size: var(--font-reg);
}

.feedings th {
  font-size: var(--font-l);
  padding: 5px 5px 0;
  border-bottom: rgb(36, 116, 248) solid 2px;
}

.feedings tr:nth-child(even) {
  background-color: #f3f3fd;
}

.toy-container p {
  margin: 12px 0;
}

.toy-container a {
  text-decoration: none;
  color: #111;
}

.toy-container .btn {
  padding: 3px 10px;
  margin-left: 10px;
}

#file-input {
  overflow: hidden;
  position: absolute;
  width: 0.1px;
  height: 0.1px;
}

#file-name {
  margin-bottom: 10px;
}

@media only screen and (min-width: 768px) {
  .cat-container {
    padding: 35px 30px;
    flex-direction: row;
    align-items: center;
    justify-content: start;
  }

  .cat-img {
    width: 25%;
    max-width: 250px;
    margin-right: 25px;
  }

  .feedings-toy-container {
    flex-direction: row;
    justify-content: space-around;
    align-items: flex-start;
  }

  .feedings-toy-container > section {
    width: 45%;
  }
}

@media only screen and (min-width: 1024px) {
  .feedings-toy-container {
    padding: 0 40px;
  }
}
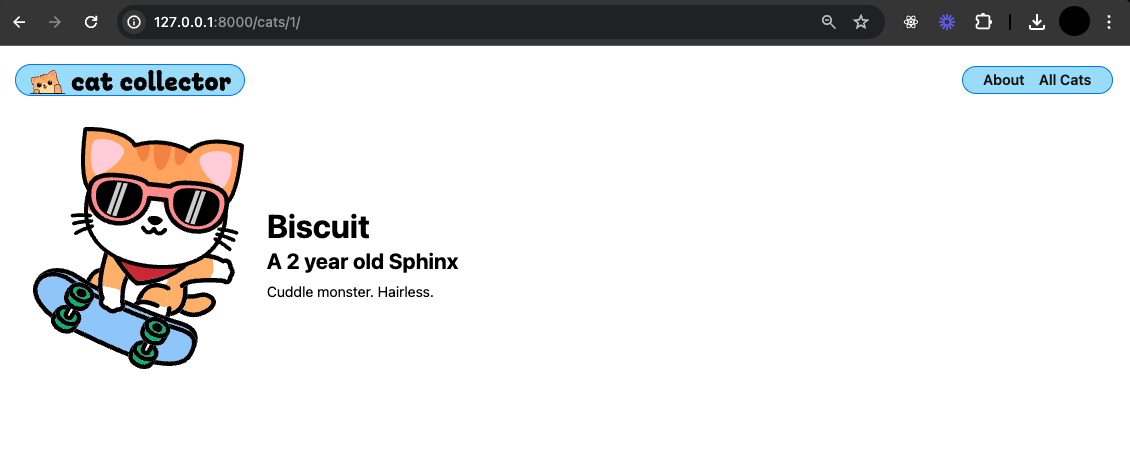
Refresh and check it out!
Using dynamic URLs in templates
Hard-coding URLs in your templates is not recommended, as URLs can change during development, potentially leading to maintenance issues. Instead, Django provides a robust method to generate URLs dynamically, ensuring that links in your templates automatically adjust to any changes in your URL patterns.
For example, in cats/index.html, we find:
<div class="card"><a href="/cats/{{ cat.id }}"></a></div>
This is a hard-coded URL!
While this approach works, it’s brittle. If the URL pattern changes in urls.py, you would need to manually update every instance of this link in your templates.
Django has a better way!
Let’s take another look at the urlpatterns in urls.py:
urlpatterns = [
    path('', views.home, name='home'),
    path('about/', views.about, name='about'),
    path('cats/', views.cat_index, name='cat-index'),
    path('cats/<int:cat_id>/', views.cat_detail, name='cat-detail'),
]
Remember the name argument we passed into each path()?
Django uses that name argument to dynamically generate a URL based on the name of the view. This method decouples your template code from your URL configuration.
In cats/index.html, we can replace this code:
<a href="/cats/{{cat.id}}">
With this code:
<a href="{% url 'cat-detail' cat.id %}">
Now, URLs can be changed in one place urls.py, and all corresponding links in templates will automatically update.
Adjust the nav
Let’s adjust the nav in templates/base.html to use the url template tag instead of hard-coding the URL in the links:
<li><a href="{% url 'cat-index' %}">All Cats</a></li>
<li><a href="{% url 'about' %}">About</a></li>
This is the Django way!