Hoot Back-End Create Hoot
Learning objective: By the end of this lesson, students will be able to implement and test a POST route, allowing them to securely add new blog posts to the database and return the created posts as JSON responses.
Overview
In this section, we will make a route to create a new hoot. This route will be a POST request to /hoots, and will return a JSON response with the new hoot document. The purpose of this route is to handle data that is sent along with a form submission.
We will be following these specs when building the route:
- CRUD Action: CREATE
- Method:
POST - Path:
/hoots - Response: JSON
- Success Status Code:
201Created - Success Response Body: A new hoot object
- Error Status Code:
500Internal Server Error - Error Response Body: A JSON object with an error key and a message describing the error
Create a hootsRouter
Before we can start writing the route and controller function, we’ll need to create a hootsRouter and mount it to server.js.
Run the following commands in your terminal:
touch controllers/hoots.js
Add the following boilerplate to controllers/hoots.js.
// controllers/hoots.js

const express = require("express");
const verifyToken = require("../middleware/verify-token.js");
const Hoot = require("../models/hoot.js");
const router = express.Router();

// add routes here

module.exports = router;
In server.js, let’s import the hootsRouter and add it to our '/hoots' route.
Add the following to server.js:
// server.js

const hootsRouter = require("./controllers/hoots.js");
And mount the router:
// server.js

app.use("/hoots", hootsRouter);
Define the route
Next we’ll define a route that listens for POST requests on '/hoots':
POST /hoots
Add the following route to controllers/hoots.js:
// controllers/hoots.js

router.post("/", verifyToken, async (req, res) => {
  // new route
});
🏆 Adding
verifyTokendirectly to this route guarantees its protection, independent of the order in which middleware is applied elsewhere in the application. This approach is the recommended method for handling authentication when securing routes individually.
💡 In
server.js, we set the base path for ourhootsRouteras/hoots. This means that when defining therouterabove, we only need to specify the path as/. This path will automatically be appended to the base path/hootsdefined inserver.js.
Code the Controller Function
Let’s break down what we’ll do inside the controller function step by step:
-
Add the logged-in user as the author
Before creating a newhoot, we’ll add the logged-in user’s ID (req.user._id) to thereq.body.author. This ensures that the logged-in user is recorded as the author of thehoot. -
Create the hoot
We’ll use thecreate()method from theHootmodel, passing inreq.body. This method will create a newhootdocument.- At first, the
authorproperty in this document will only have the user’s ID (an ObjectId). - To include the full user information, we’ll add the complete
userobject (already available inreq) to the newhoot.
💡 This step is important so that the new
hootcan immediately display the author’s details on the client side. - At first, the
-
Send the response
After creating the newhoot, we’ll send it back as a JSON response. This way, the client can immediately show the new hoot with all its information.
Add the following to controllers/hoots.js:
// controllers/hoots.js

router.post("/", verifyToken, async (req, res) => {
  try {
    req.body.author = req.user._id;
    const hoot = await Hoot.create(req.body);
    hoot._doc.author = req.user;
    res.status(201).json(hoot);
  } catch (err) {
    res.status(500).json({ err: err.message });
  }
});
💡 When we use Mongoose’s
create()method, the newhootis not just a regular JavaScript object—it’s a Mongoose document. This document includes an extra_docproperty, which holds the actual data retrieved from MongoDB. Normally, we don’t need to worry about this, but since we’re updating theauthorproperty before sending the response, we’ll need to access thehoot._docproperty to work with the actual data.
Test the route in Postman
Now that we have finished the route let’s test it with Postman. We’ll do this by sending a POST request to
http://localhost:3000/hoots
Recall that our hootSchema has the following data fields:
// models/hoot.js

const hootSchema = new mongoose.Schema(
  {
    title: {
      type: String,
      required: true,
    },
    text: {
      type: String,
      required: true,
    },
    category: {
      type: String,
      required: true,
      enum: ["News", "Sports", "Games", "Movies", "Music", "Television"],
    },
    author: { type: mongoose.Schema.Types.ObjectId, ref: "User" },
    comments: [commentSchema],
  },
  { timestamps: true }
);
In Postman, make a new POST request called Create.
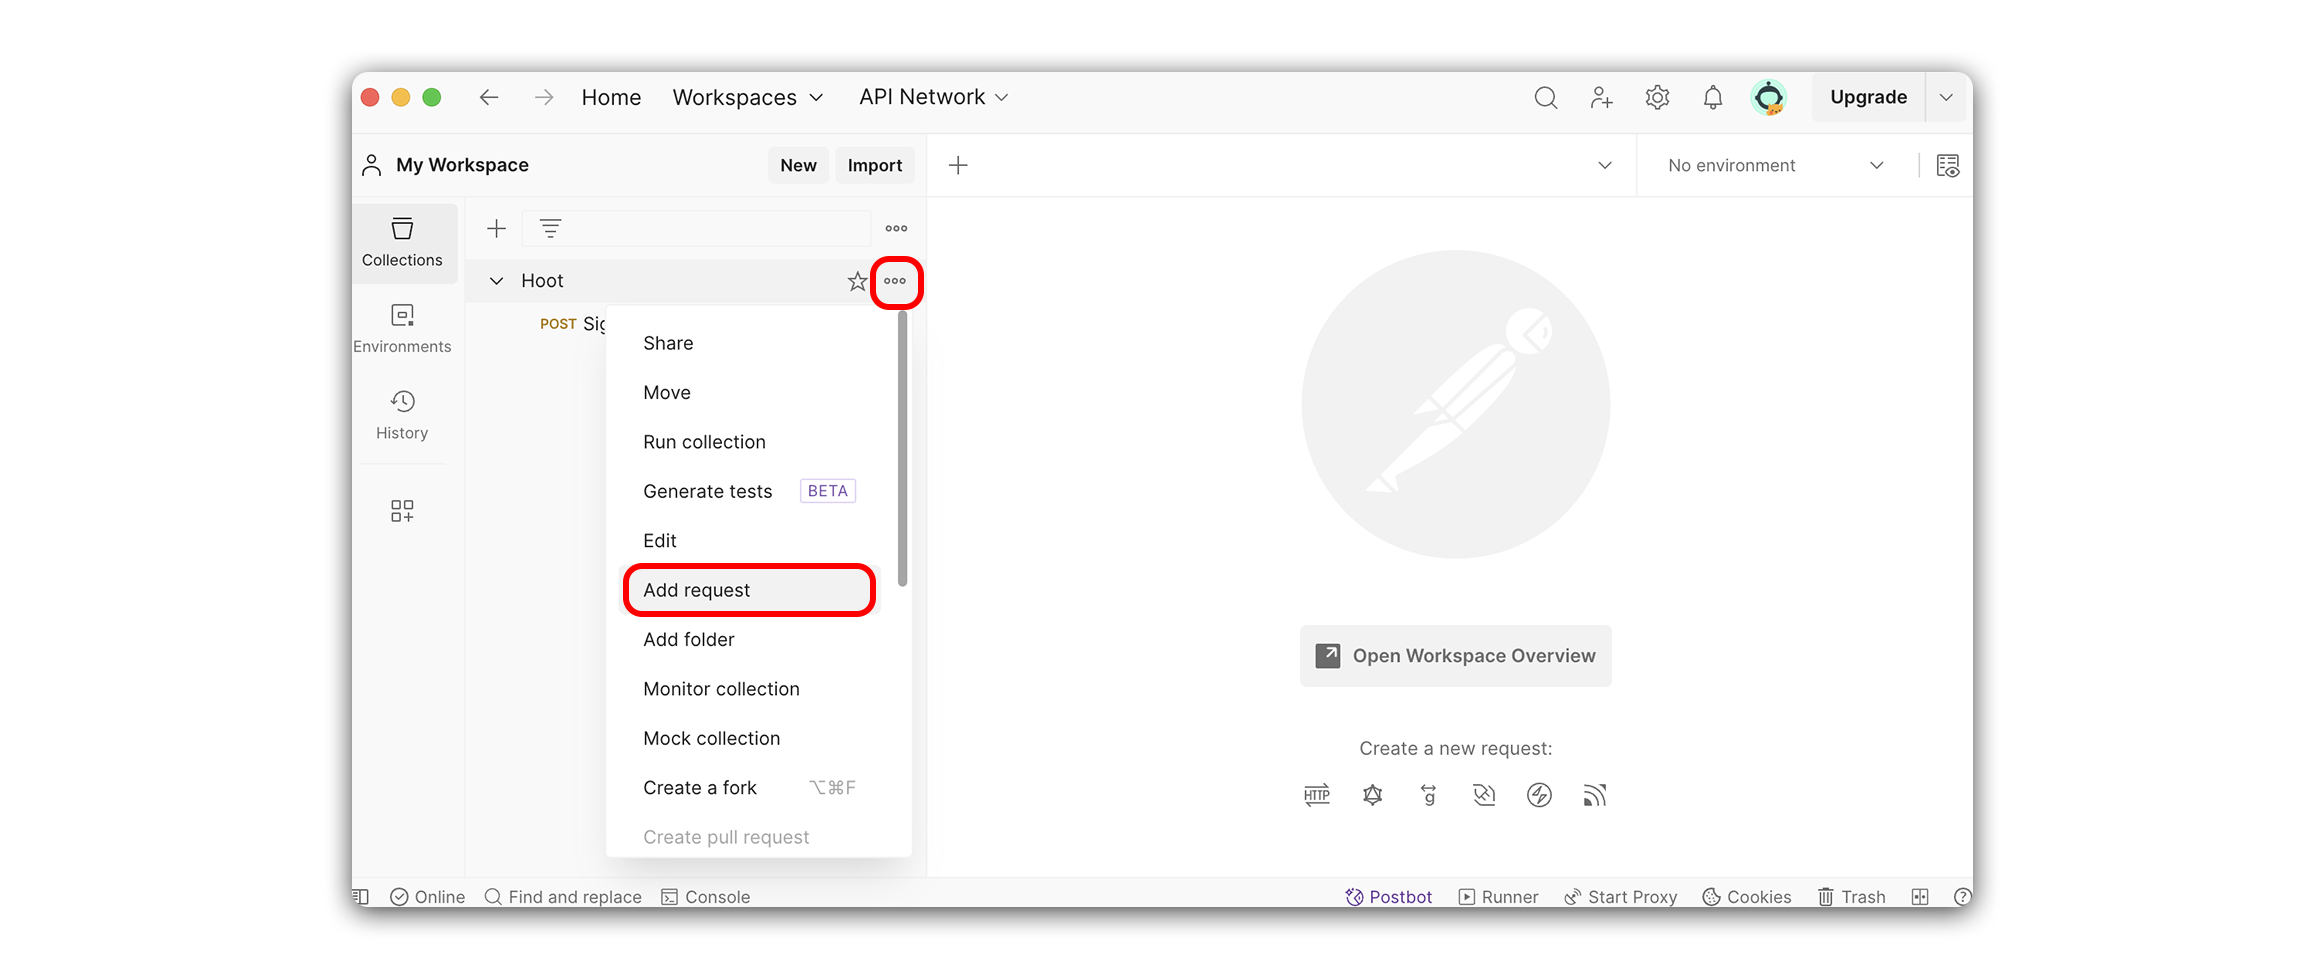
❗ Be sure to add this request to your Hoot collection.
Add the following URL:
http://localhost:3000/hoots
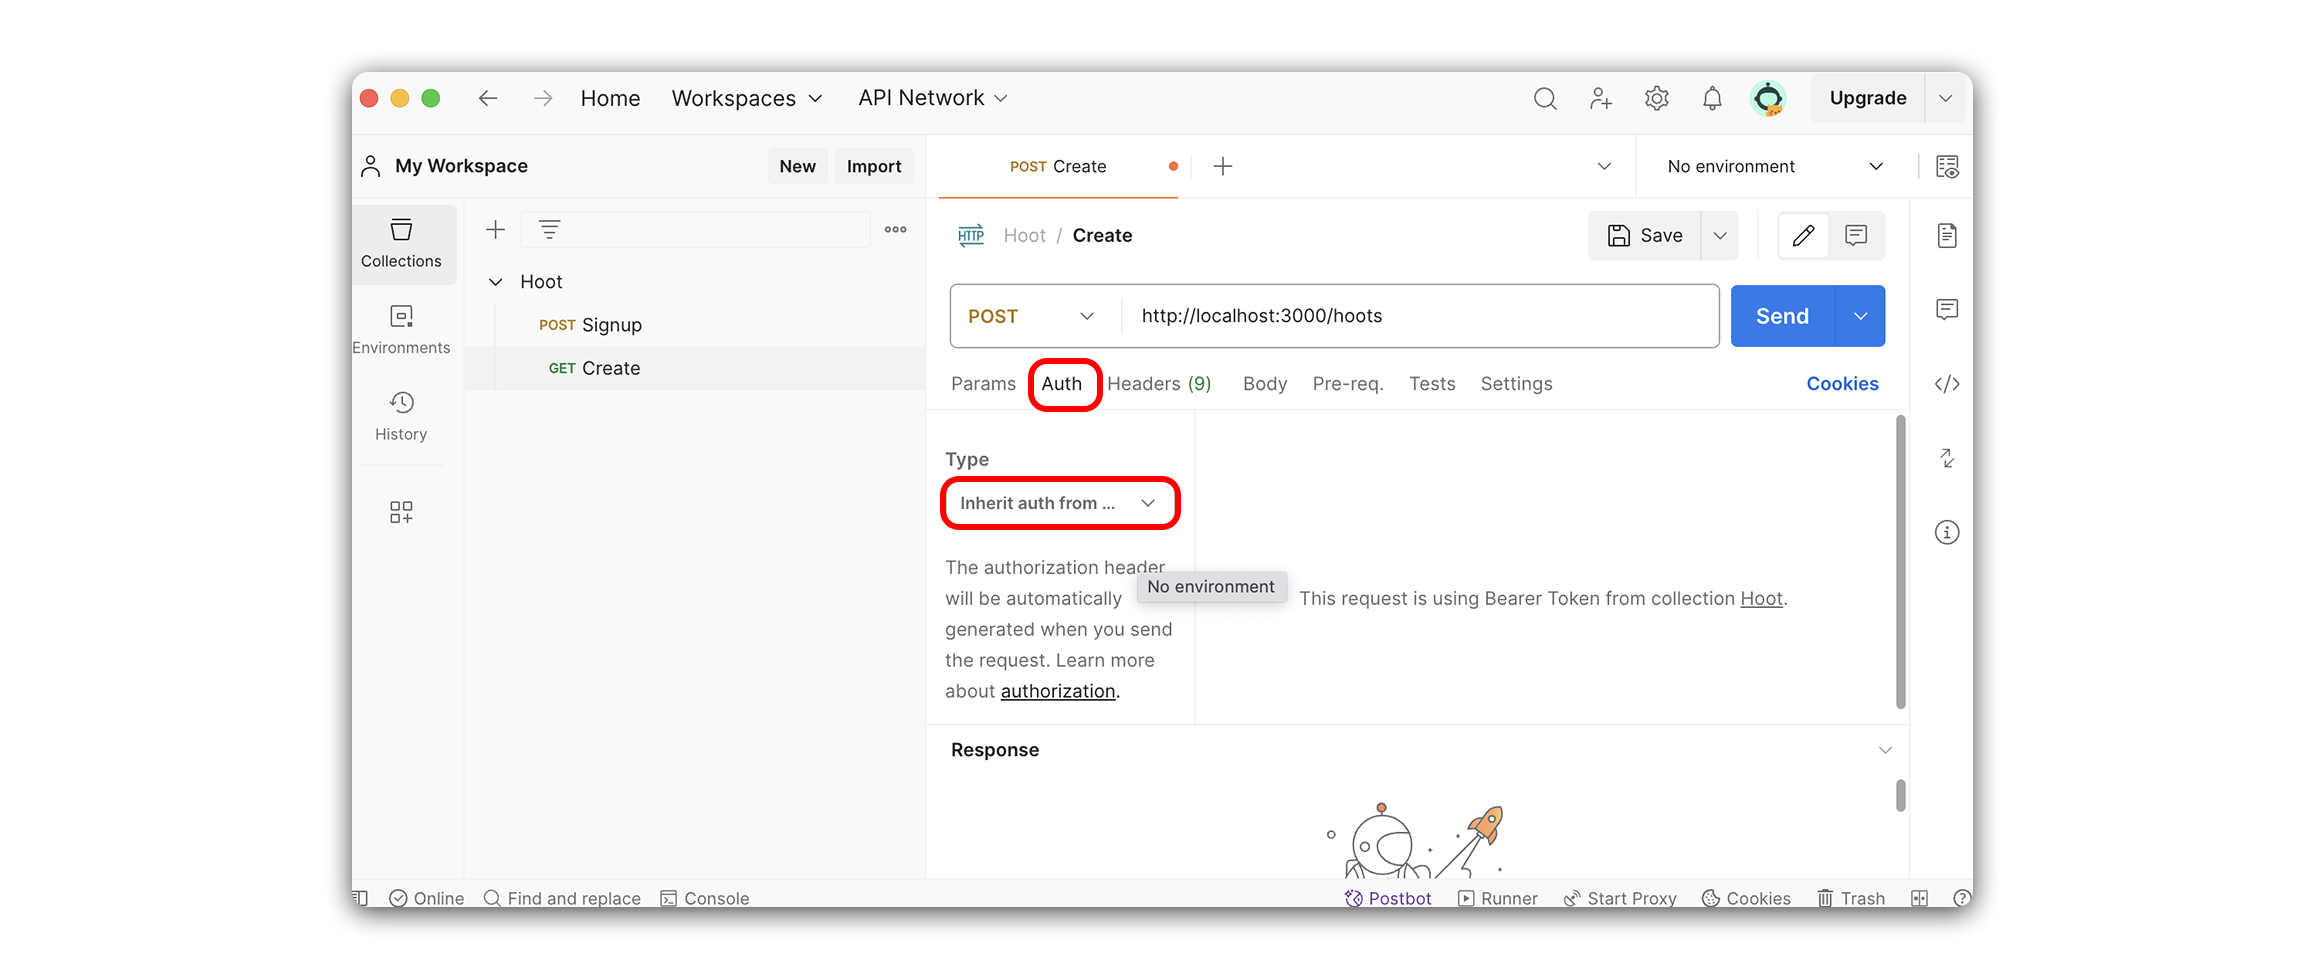
Since this request requires authentication, we’ll need to give Postman access to our token from the previous step.
Select the Authorization tab, and make sure the Type is set to Inherit auth from parent.
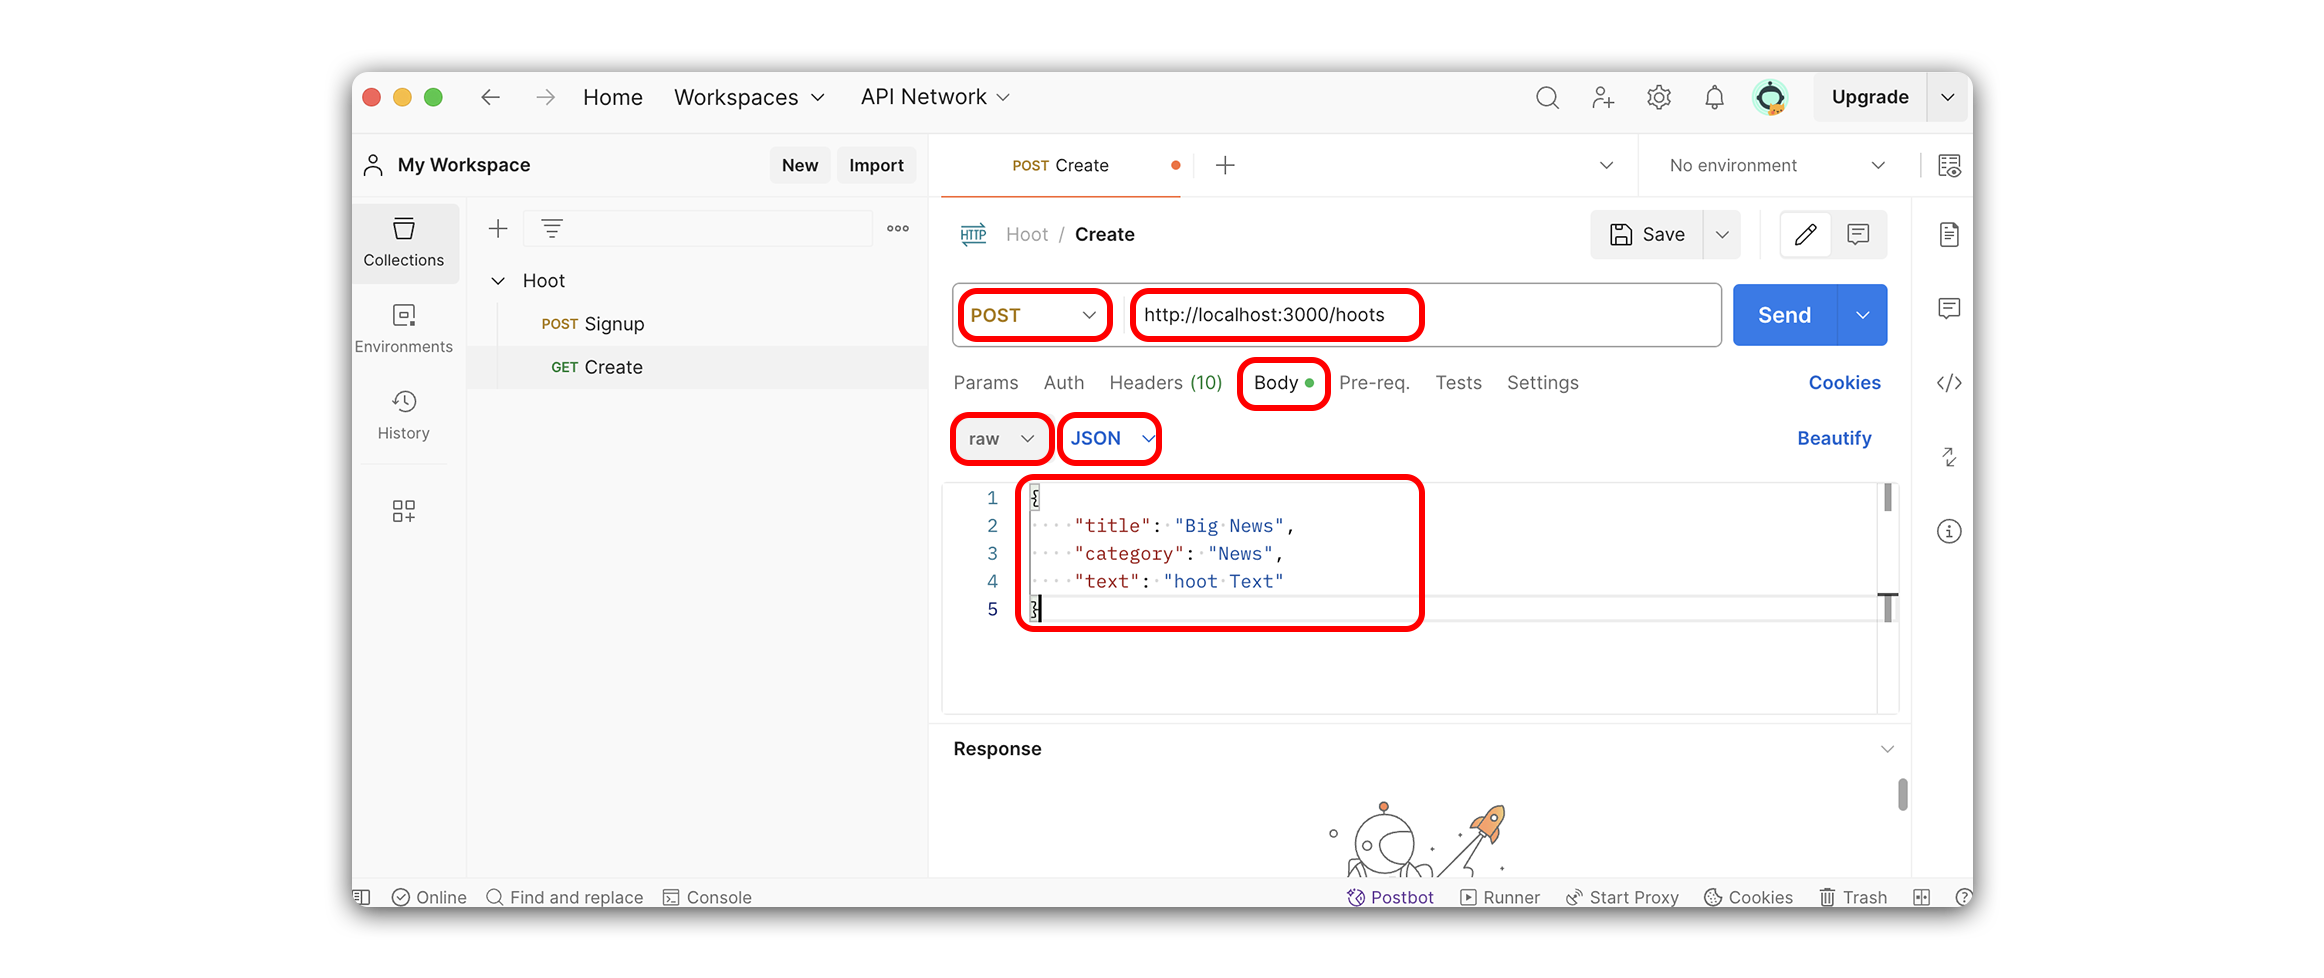
Within the Body tab, select raw, and change the Text dropdown to JSON. Next, add the following test data to the body:
{
  "title": "Big News",
  "category": "News",
  "text": "hoot Text"
}
Your request in Postman should look something like this. Note the changed values highlighted below, and don’t forget to save:
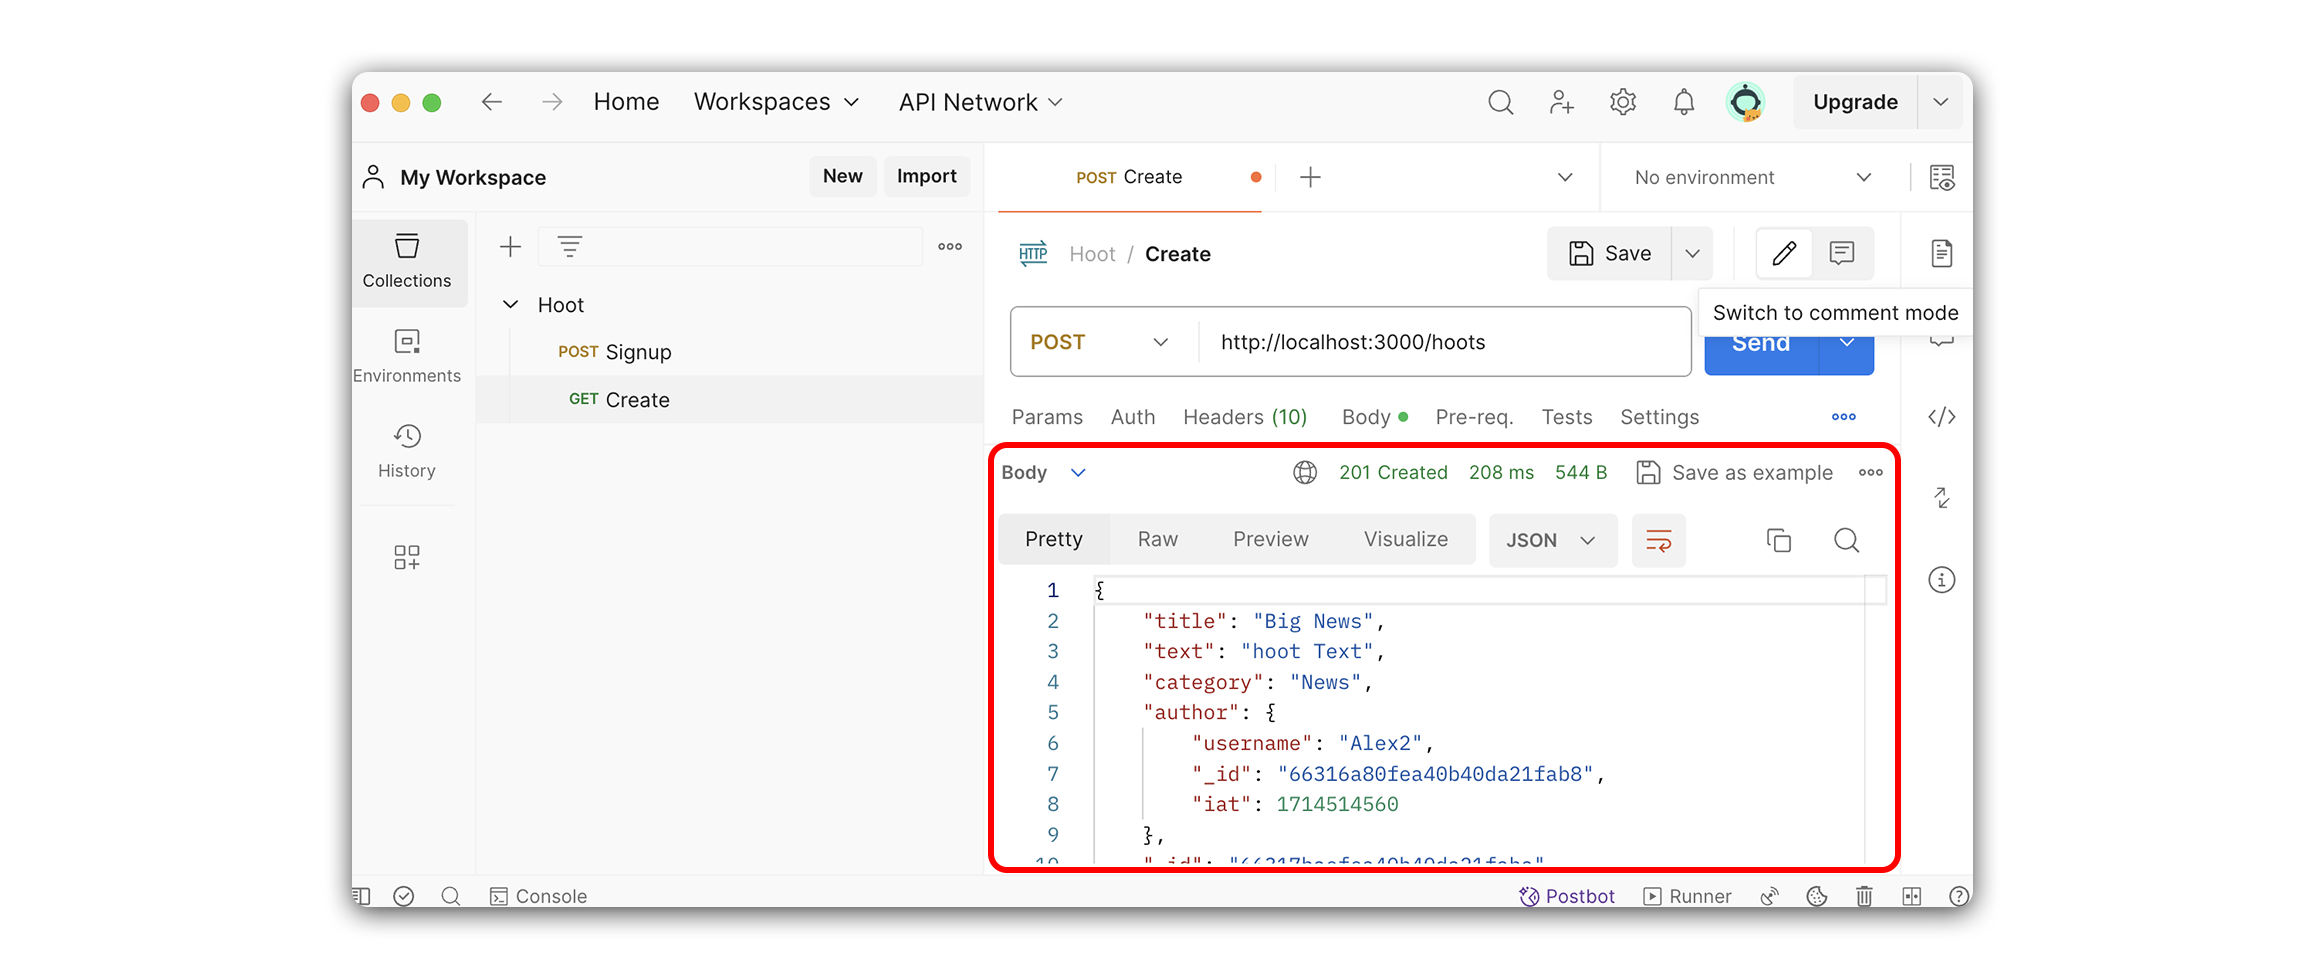
If your request was successful, you should see something like the response below: