Hoot Back-End Signup a User
Learning objective: By the end of this lesson, students will be able to sign up a new user using Postman.
Overview
To get started, we’ll use Postman and the existing Sign Up functionality provided by the auth template to add a new user to our database.
Before diving into Postman, let’s take a moment to review a few relevant pieces of code for signing up a user.
In server.js, you’ll notice that the authRouter is mounted with a base path of /auth. This means all routes within authRouter will begin with /auth. This includes our sign-up and sign-in routes.
// server.js

app.use('/auth', authRouter);
Take note of the /sign-up route defined in controllers/auth.js:
// controllers/auth.js

router.post('/sign-up', async (req, res) => {...});
As a result, with Postman we’ll make requests to the following:
POST /auth/sign-up
The last detail to take note of is the response (res) issued by the sign-up route:
// controllers/auth.js

res.status(201).json({ token });
Notice the route returns a token. We’ll add this token to a special tab in Postman, which will allow us to included it as a bearer token on future requests. This will be important, as beyond sign up and sign in, all other features in this application will be protected, requiring authenticated requests to access them.
Start your server and let’s begin testing our routes!
Test the route in Postman
In Postman, create a new collection called Hoot:
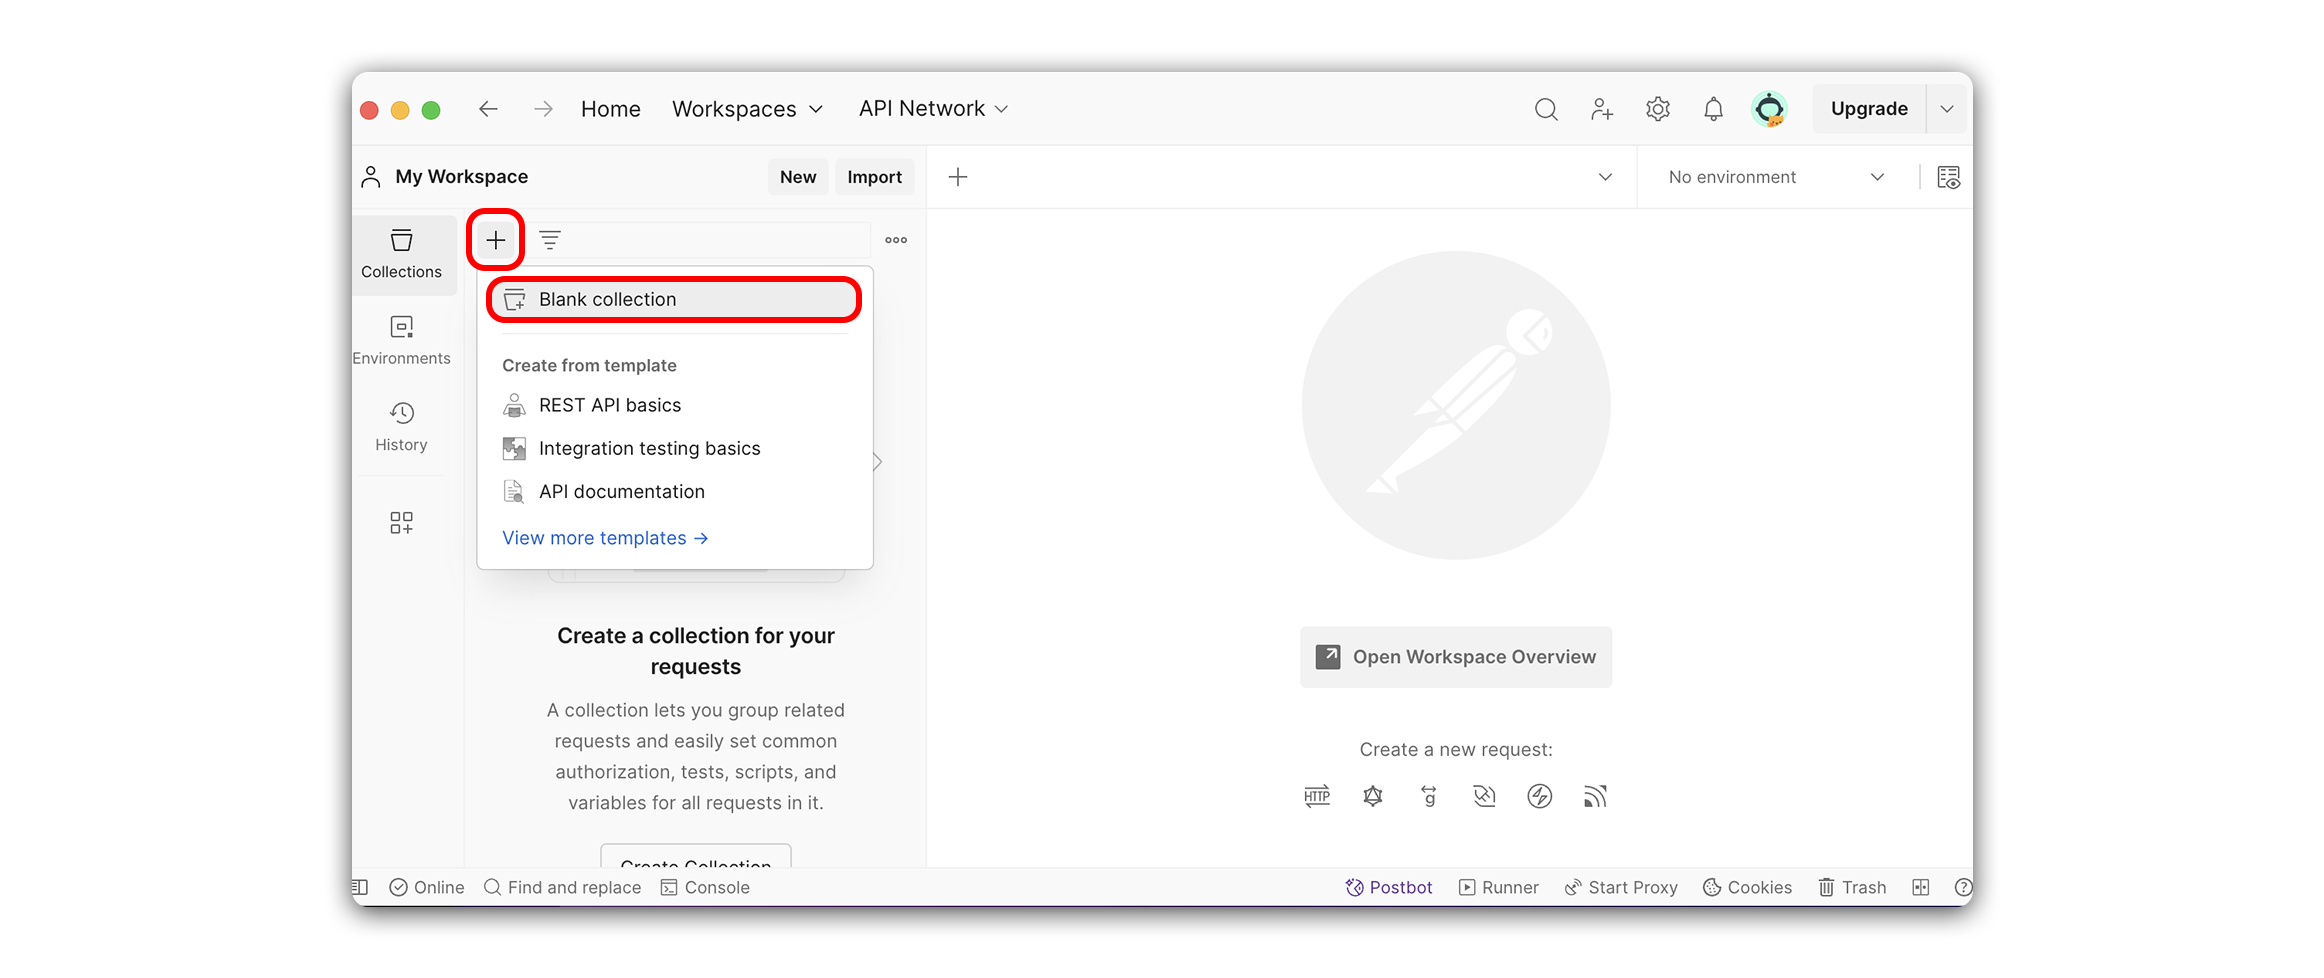
With this collection, we’ll be able to group a series of Postman requests, and reuse them as necessary. This makes it easier to return to previous requests later. The other advantage relates to Authorization. As discussed earlier, we’ll need to include a bearer token on all future requests for Hoot resources. By using a collection, all requests included in the collection will be able to share the same token.
After creating the collection, locate the Add a request button:
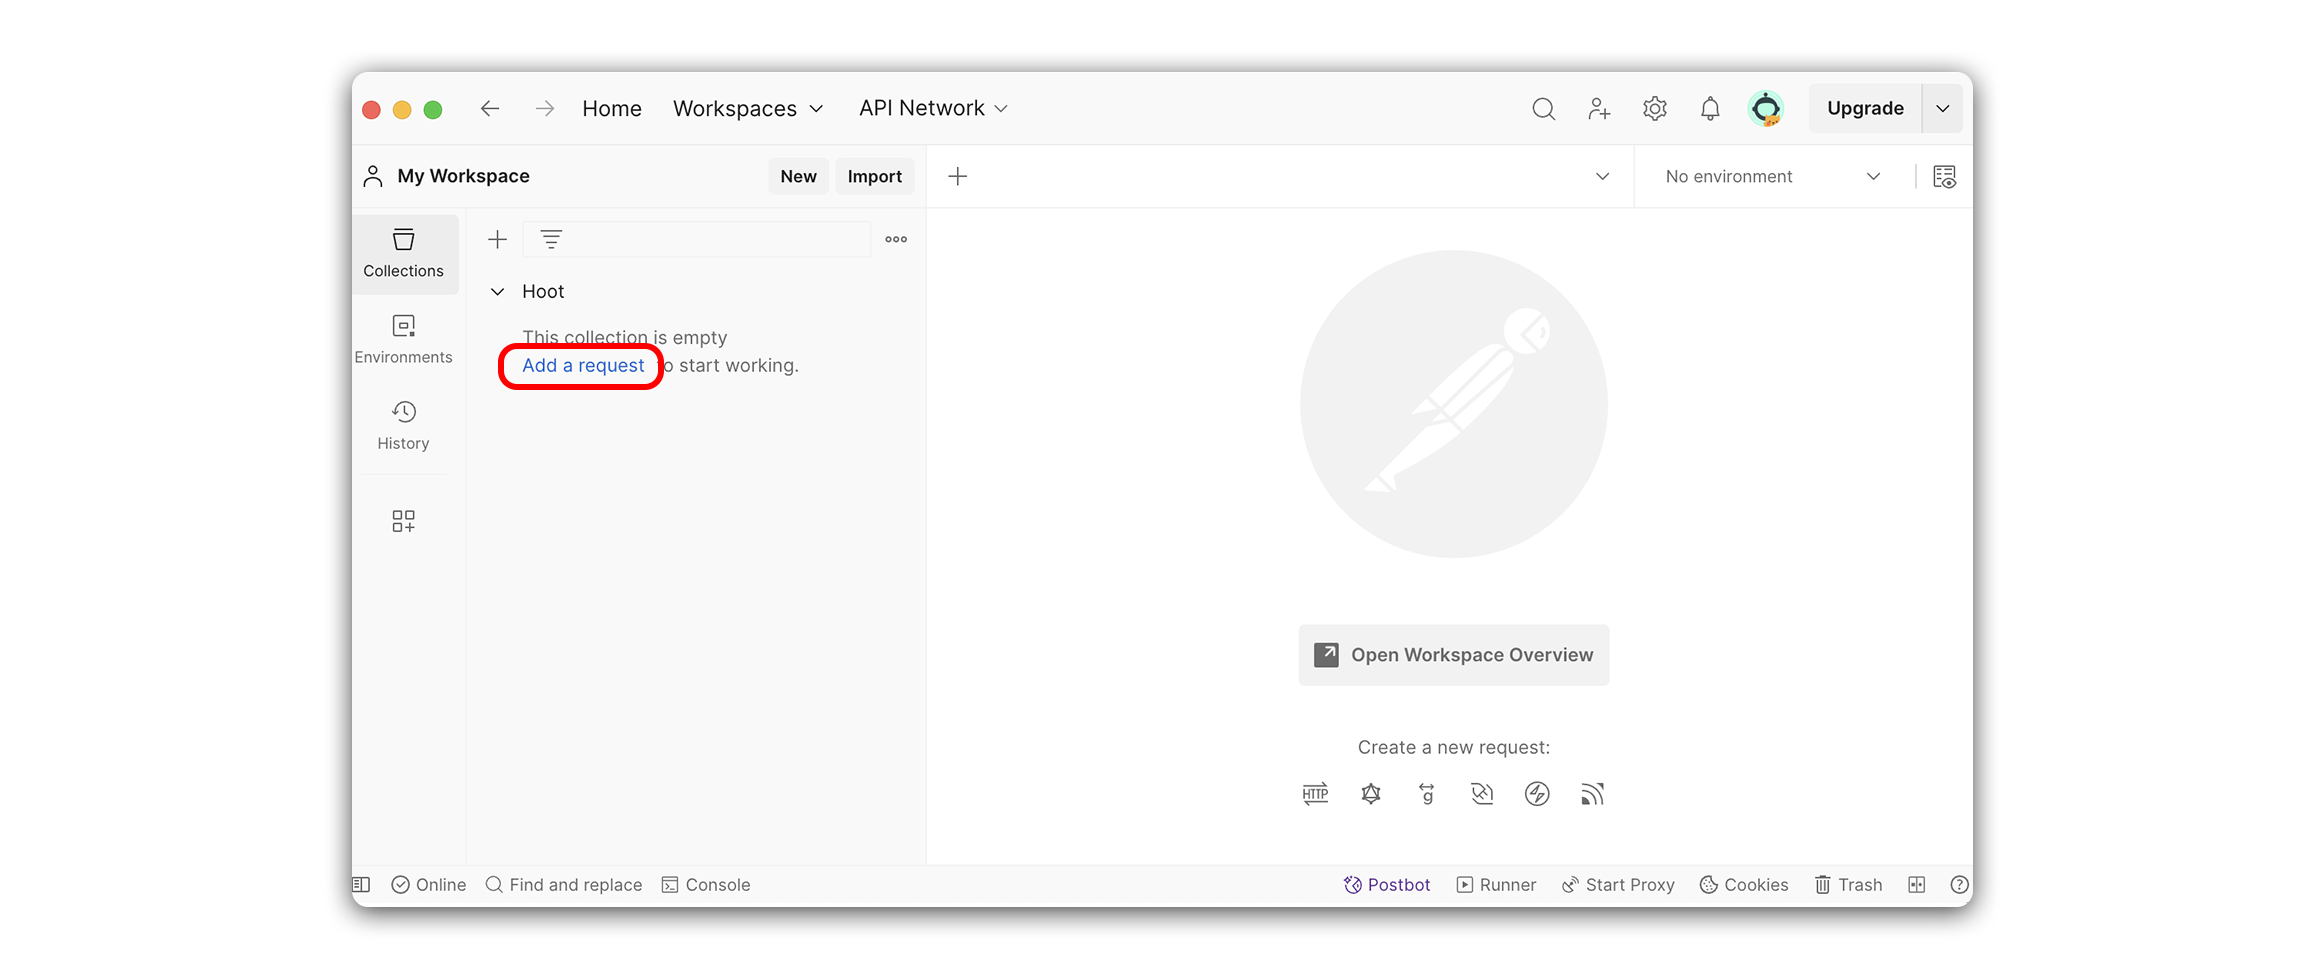
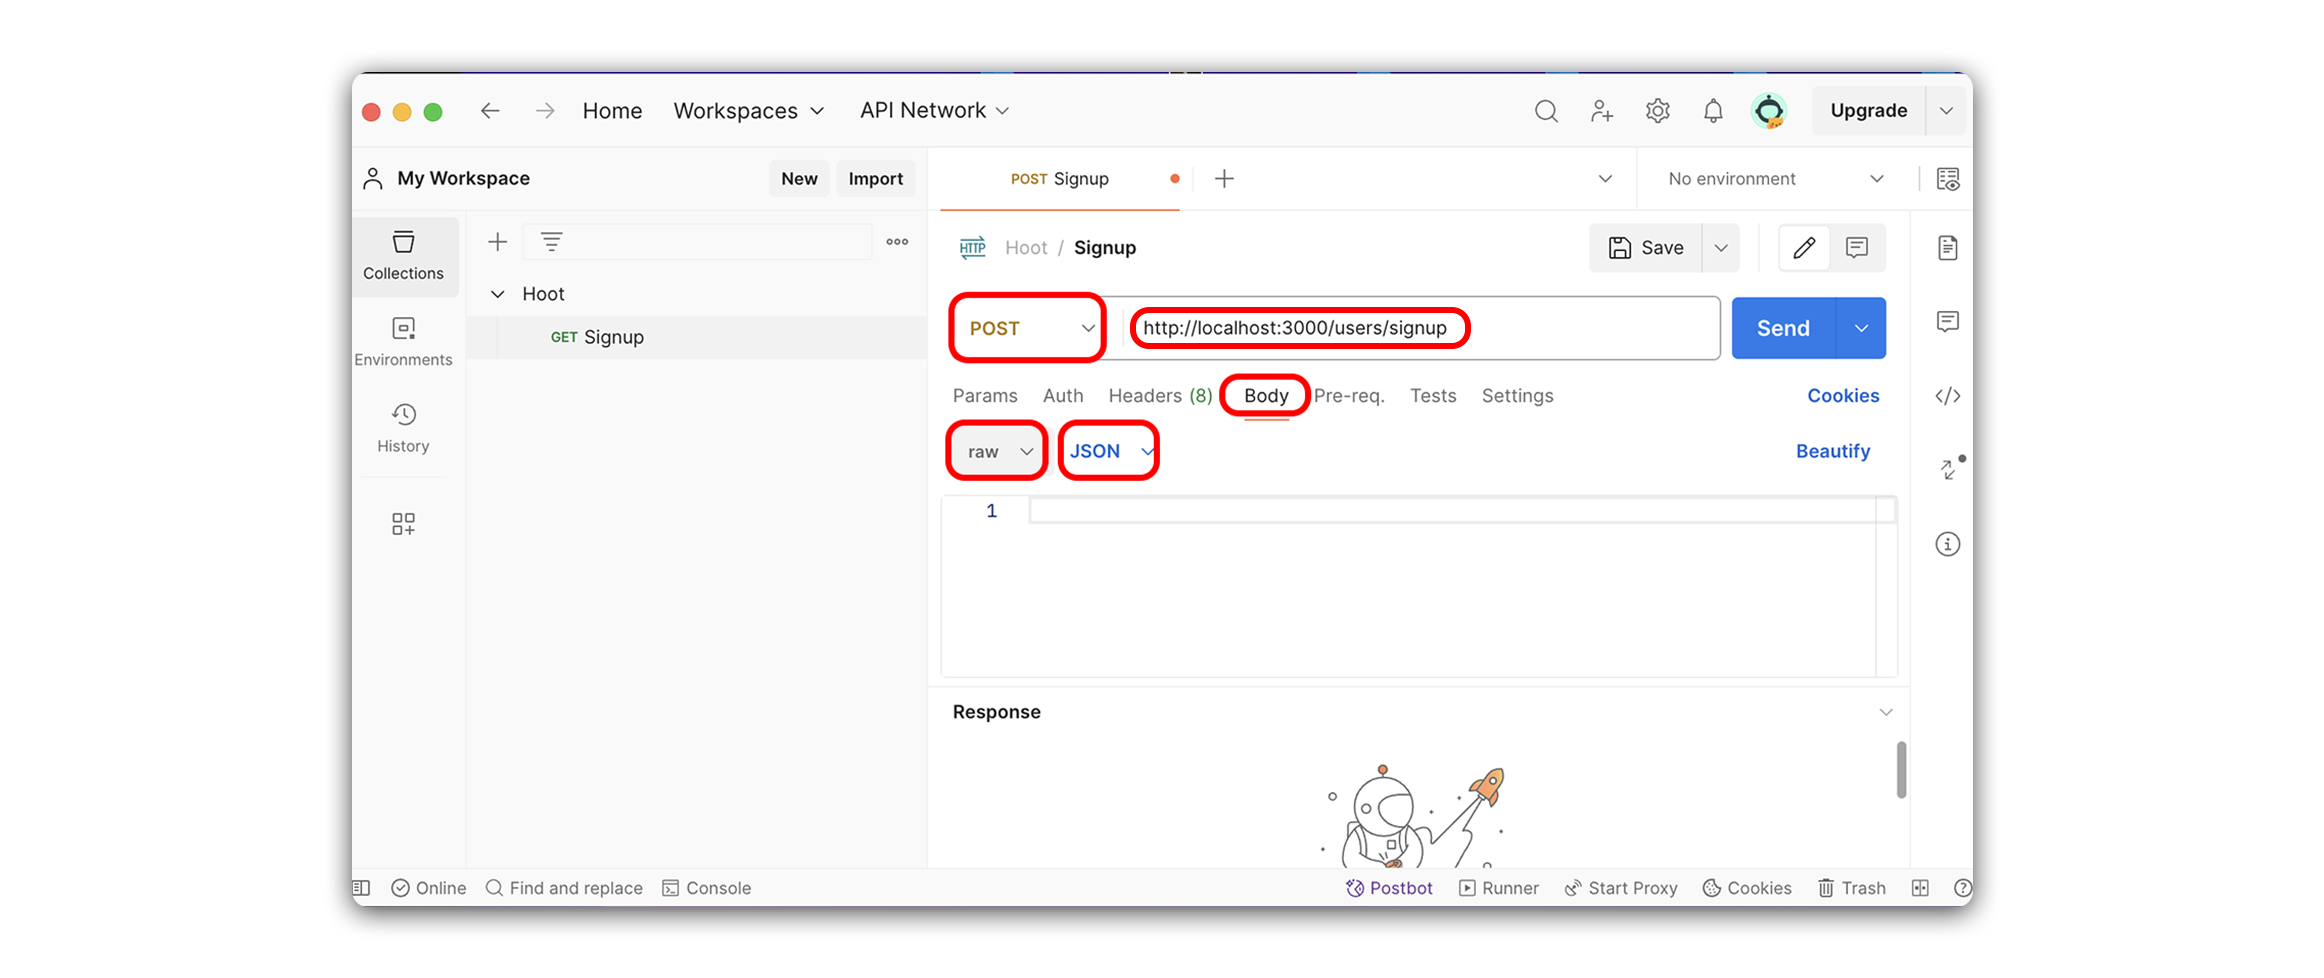
We need to make a new Postman request called Signup. Start by updating the fields highlighted below:
-
Within the Body tab, select raw, and change the Text dropdown to JSON.
-
Change the request type to a POST request, and provide the URL that matches the signup route:
http://localhost:3000/auth/sign-up
After doing this, your Postman interface should look like the following:
 tktk : new image url - http://localhost:3000/auth/sign-up
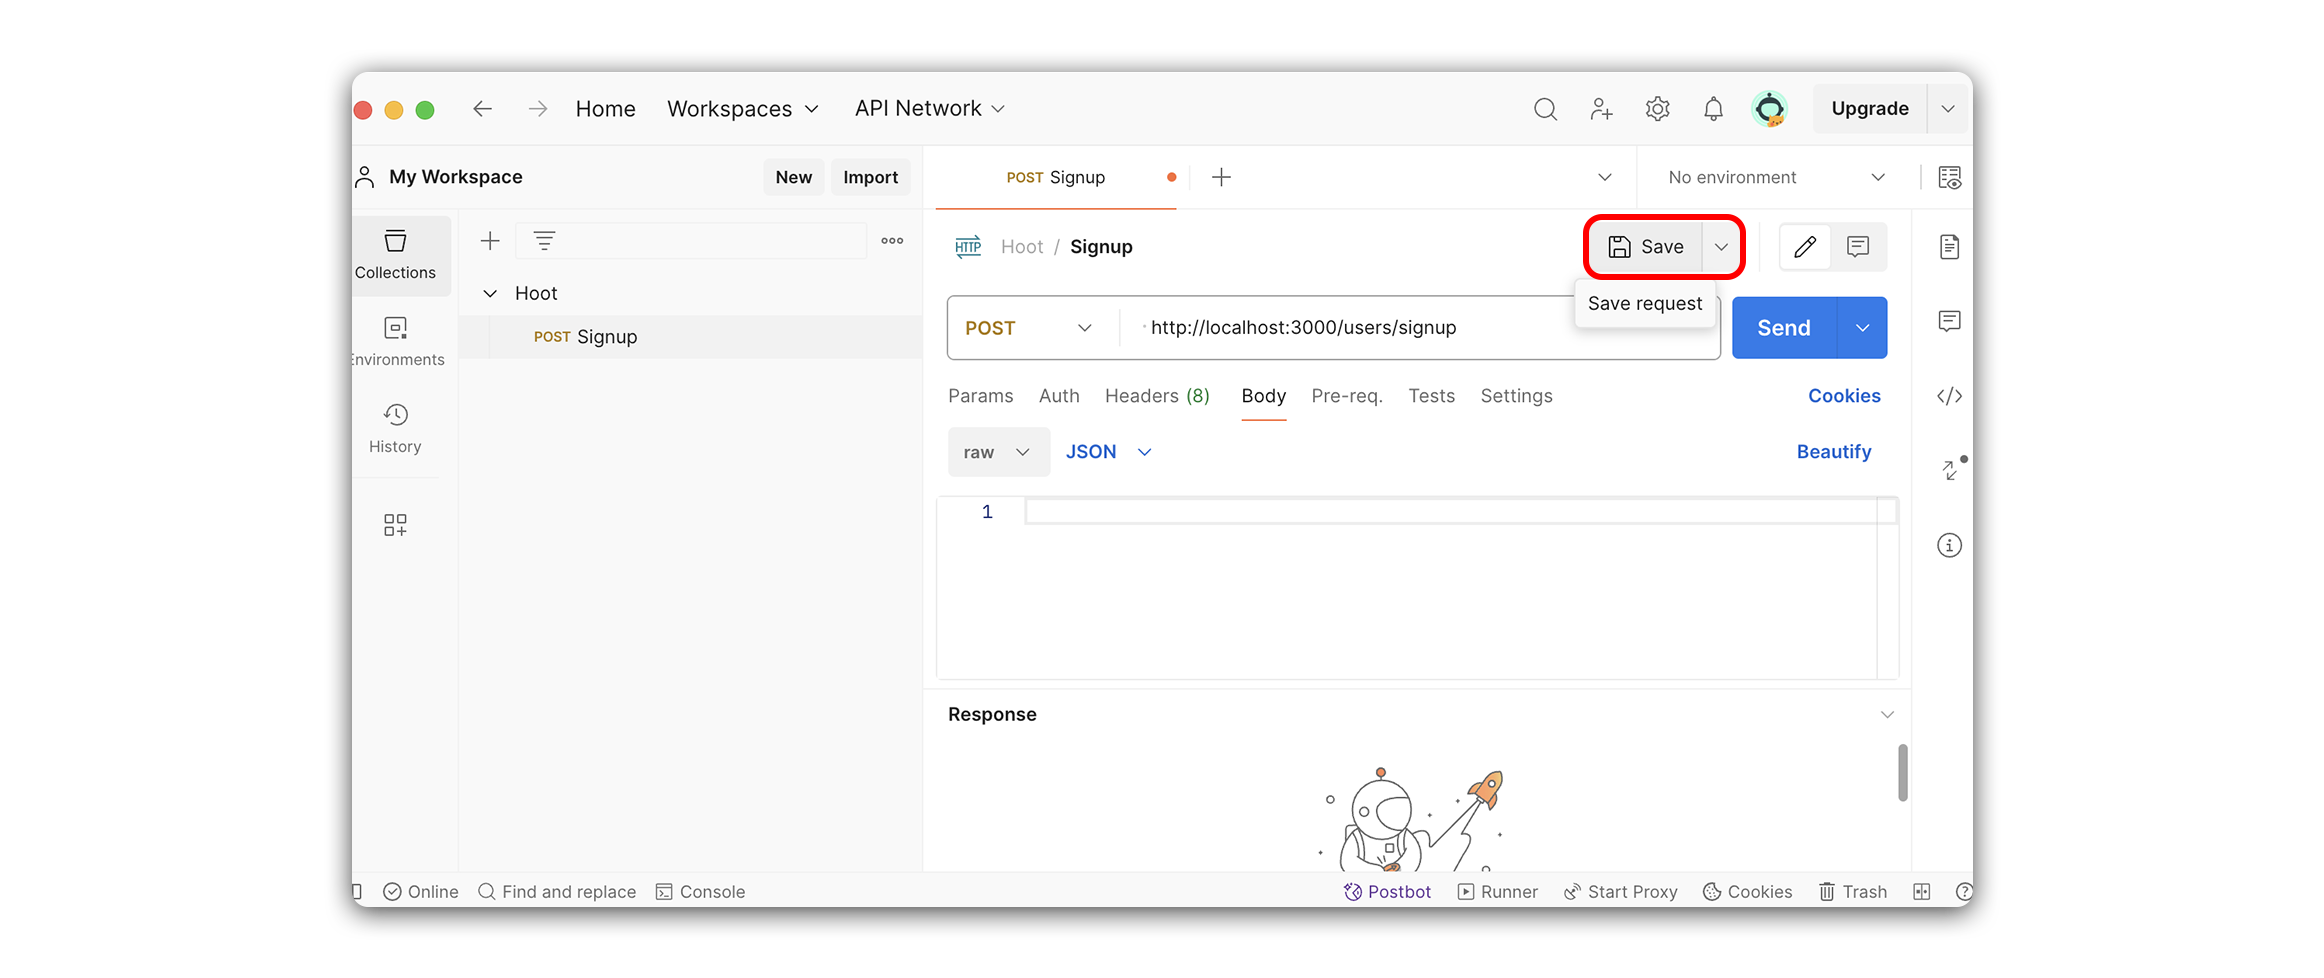
Finally, be sure to click the Save button:
 tktk : new image url - http://localhost:3000/auth/sign-up
Add some test account information to the Body in Postman, as shown below:
{
    "username": "test",
    "password": "test"
}
If the request was successful, you should see something like the following response:
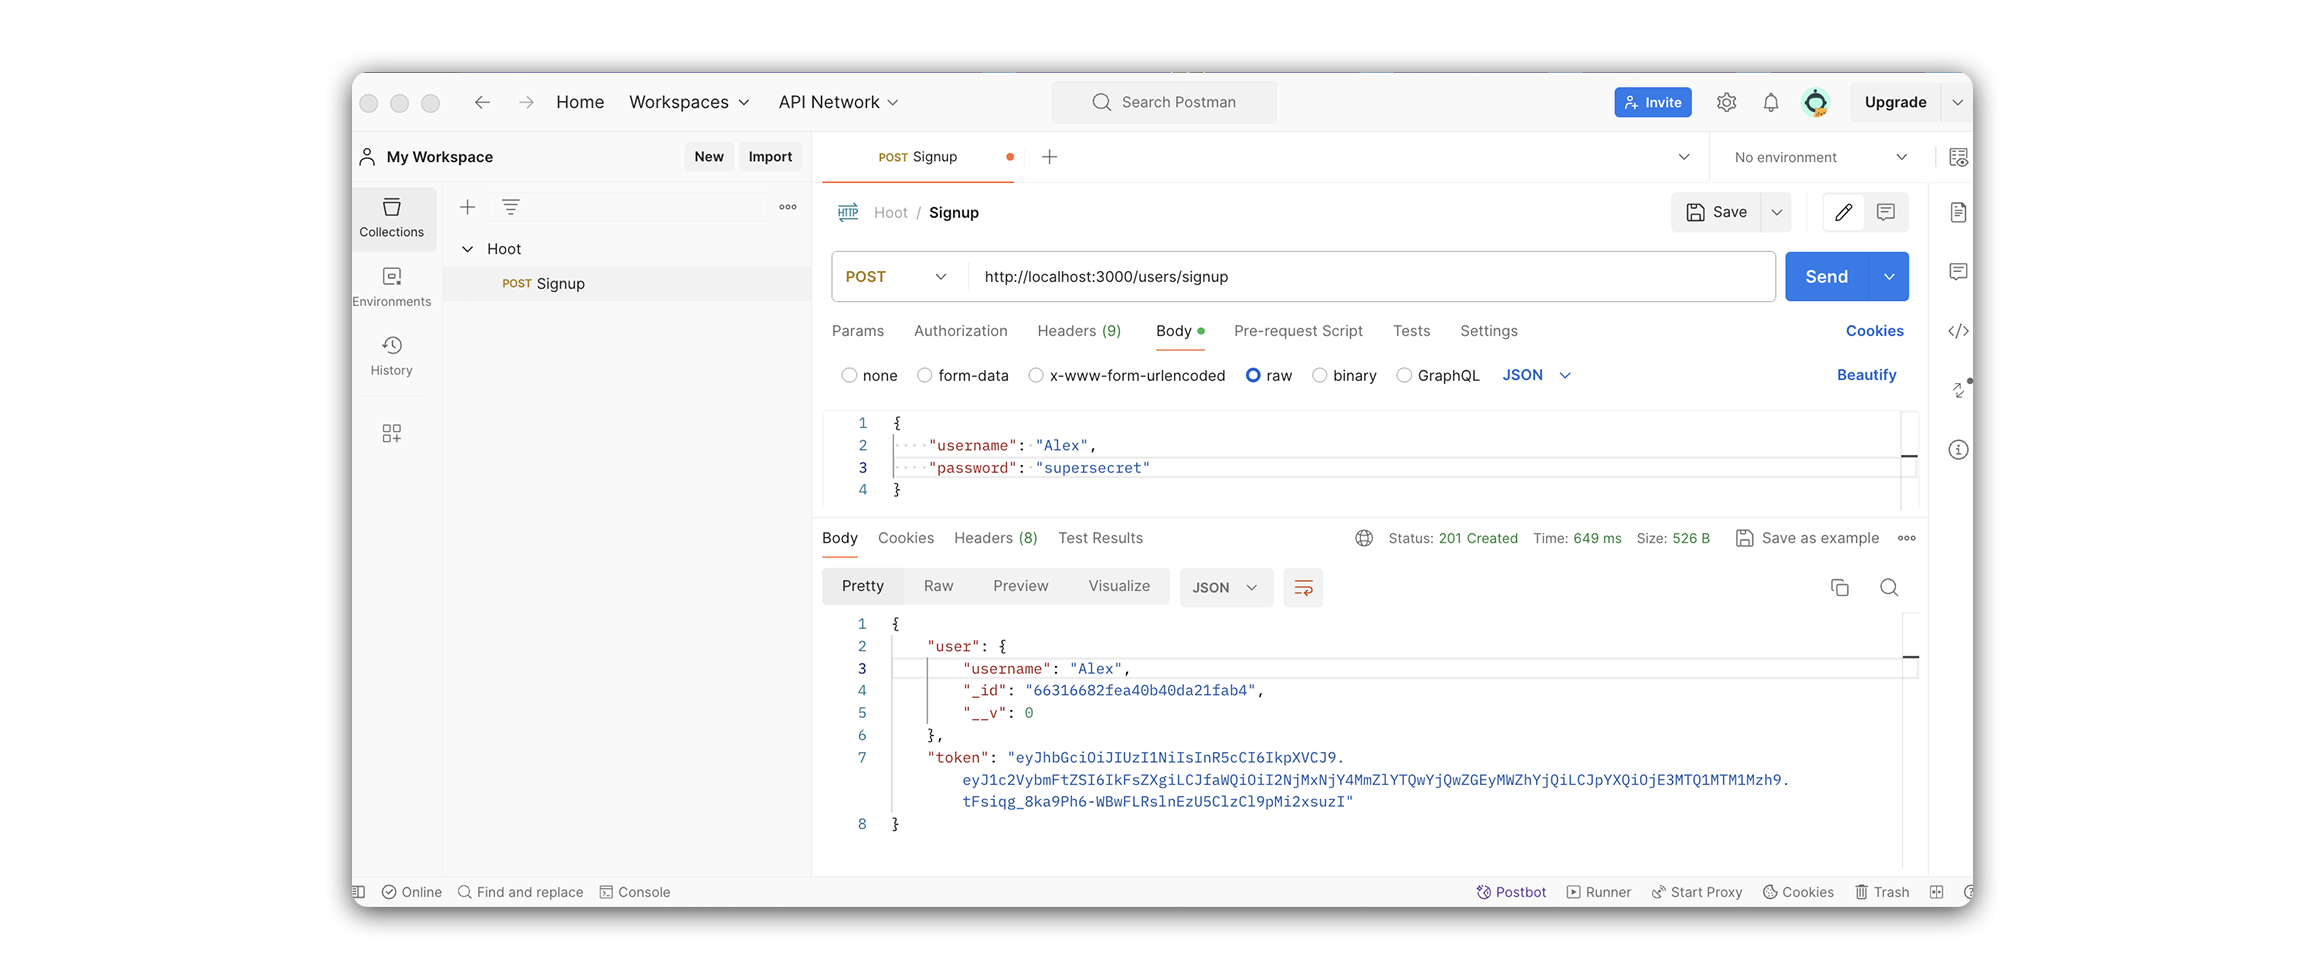 tktk : new image url - http://localhost:3000/auth/sign-up
We’ll be using the token issued here in the next few steps, so be sure to save it somewhere easily accessible. When you copy the value of the token, do not include the quotes.
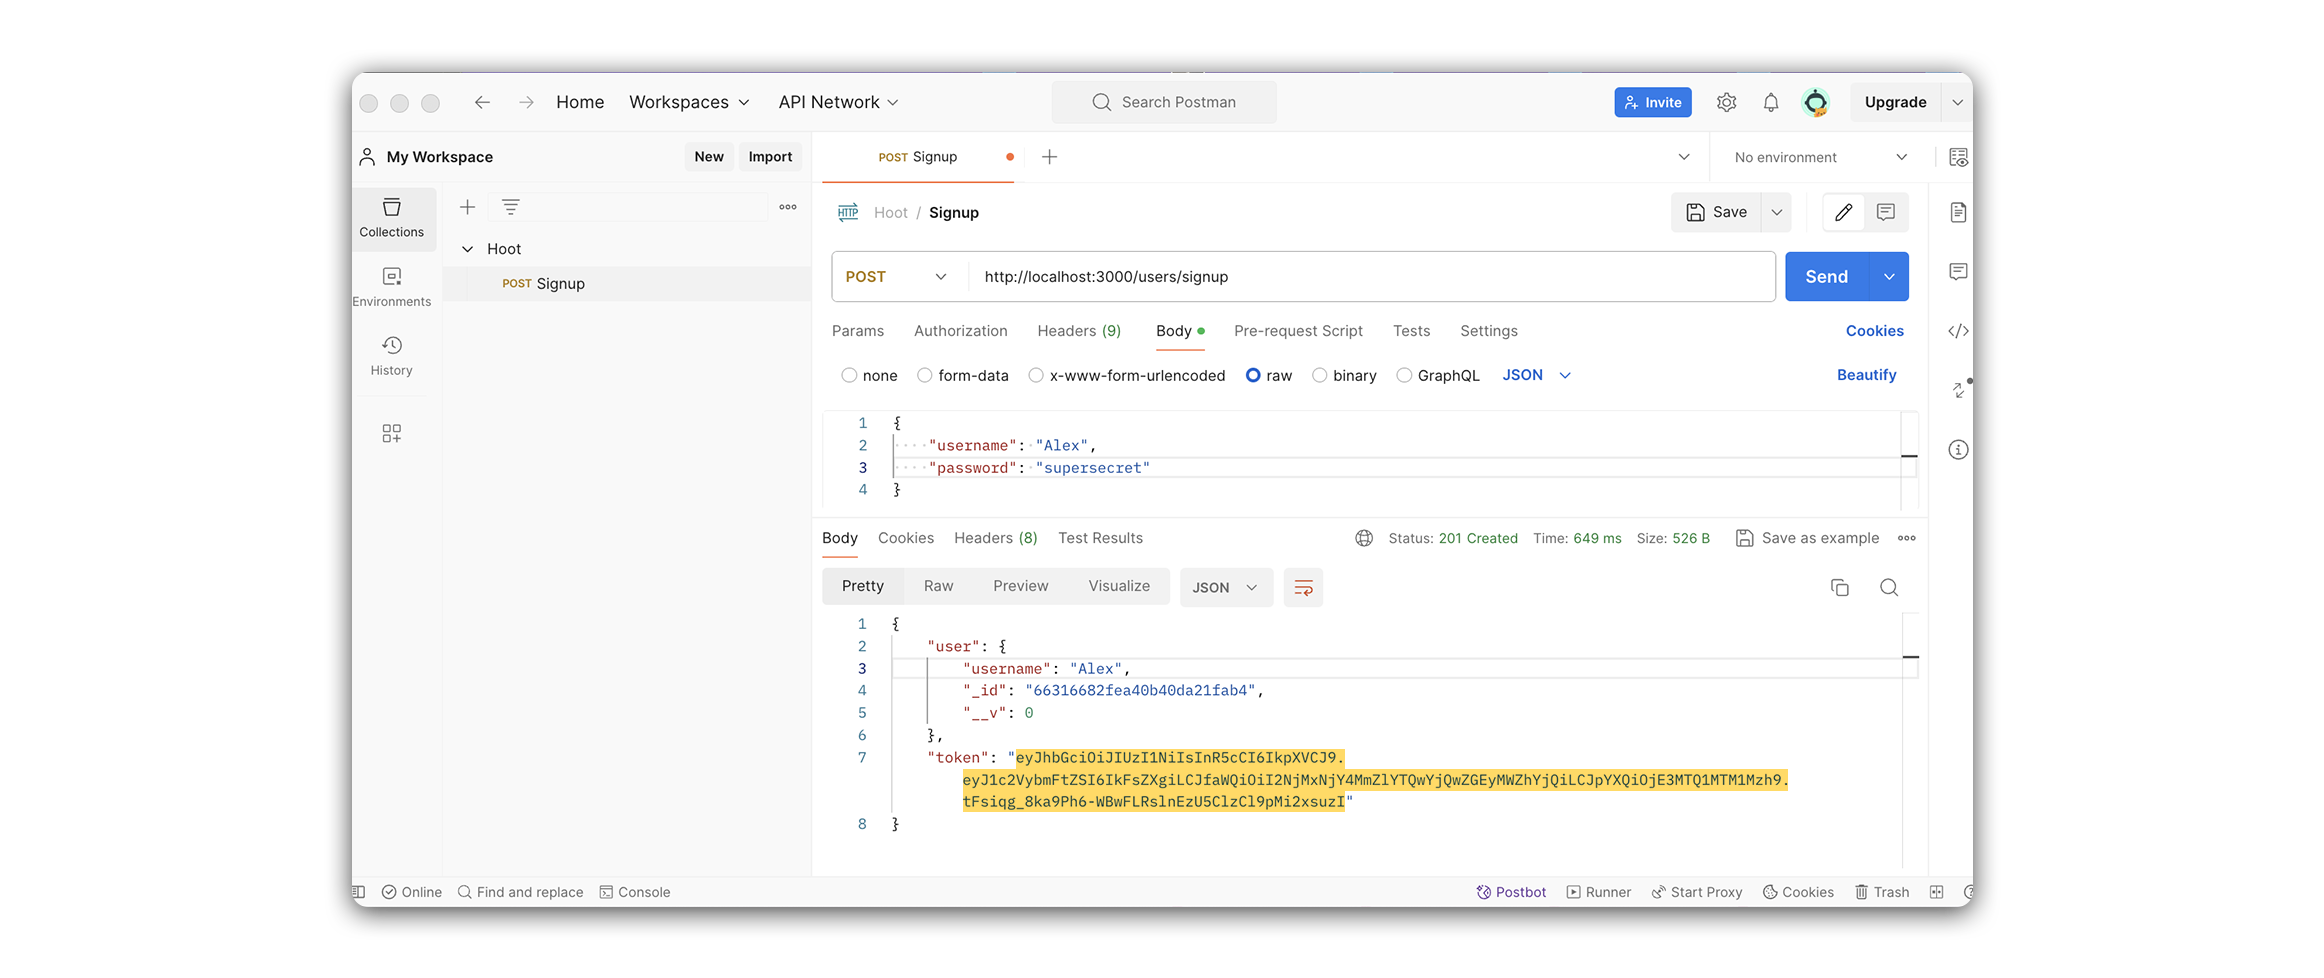 tktk : new image url - http://localhost:3000/auth/sign-up
Select your Hoot collection in Postman. Click on the Authorization tab.
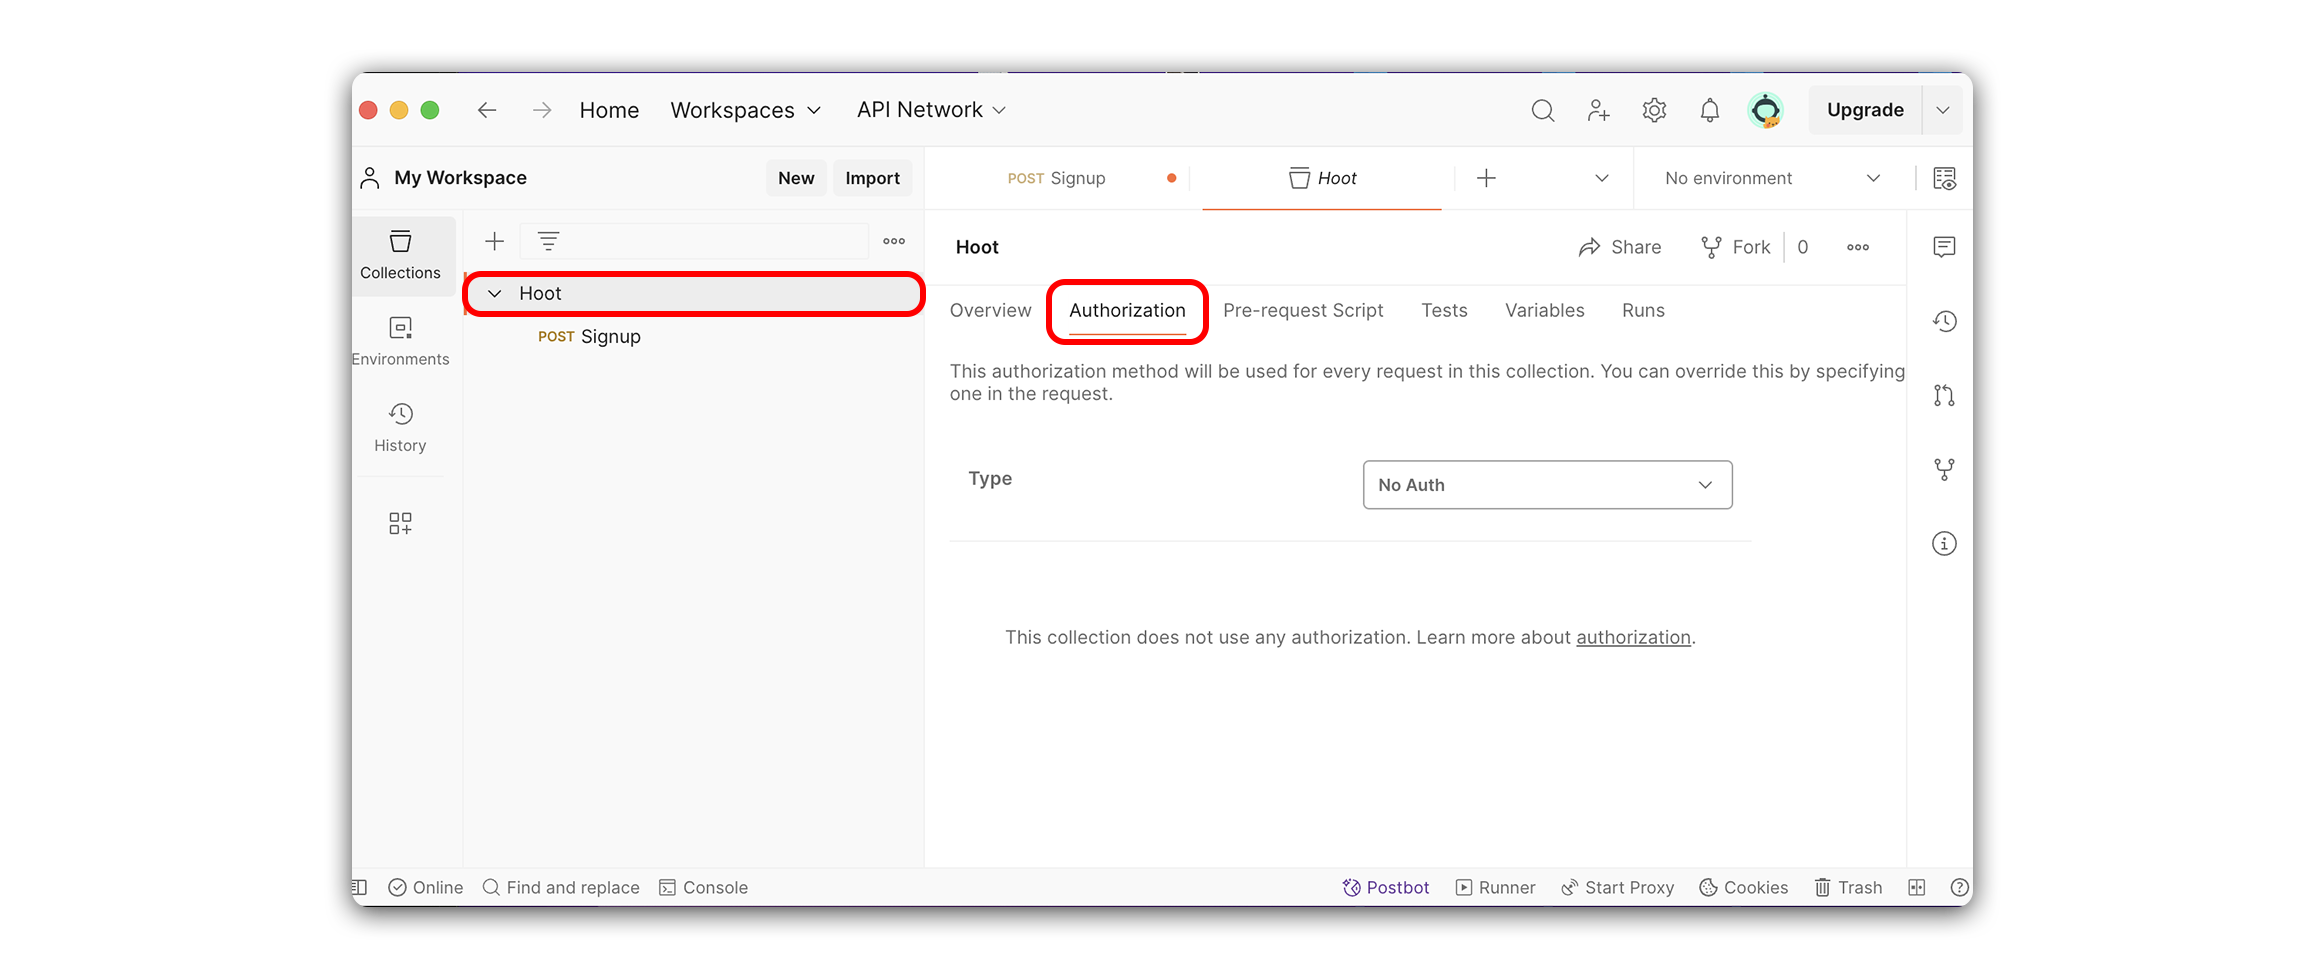
Set the Type to Bearer Token and add your token to the Token input field.
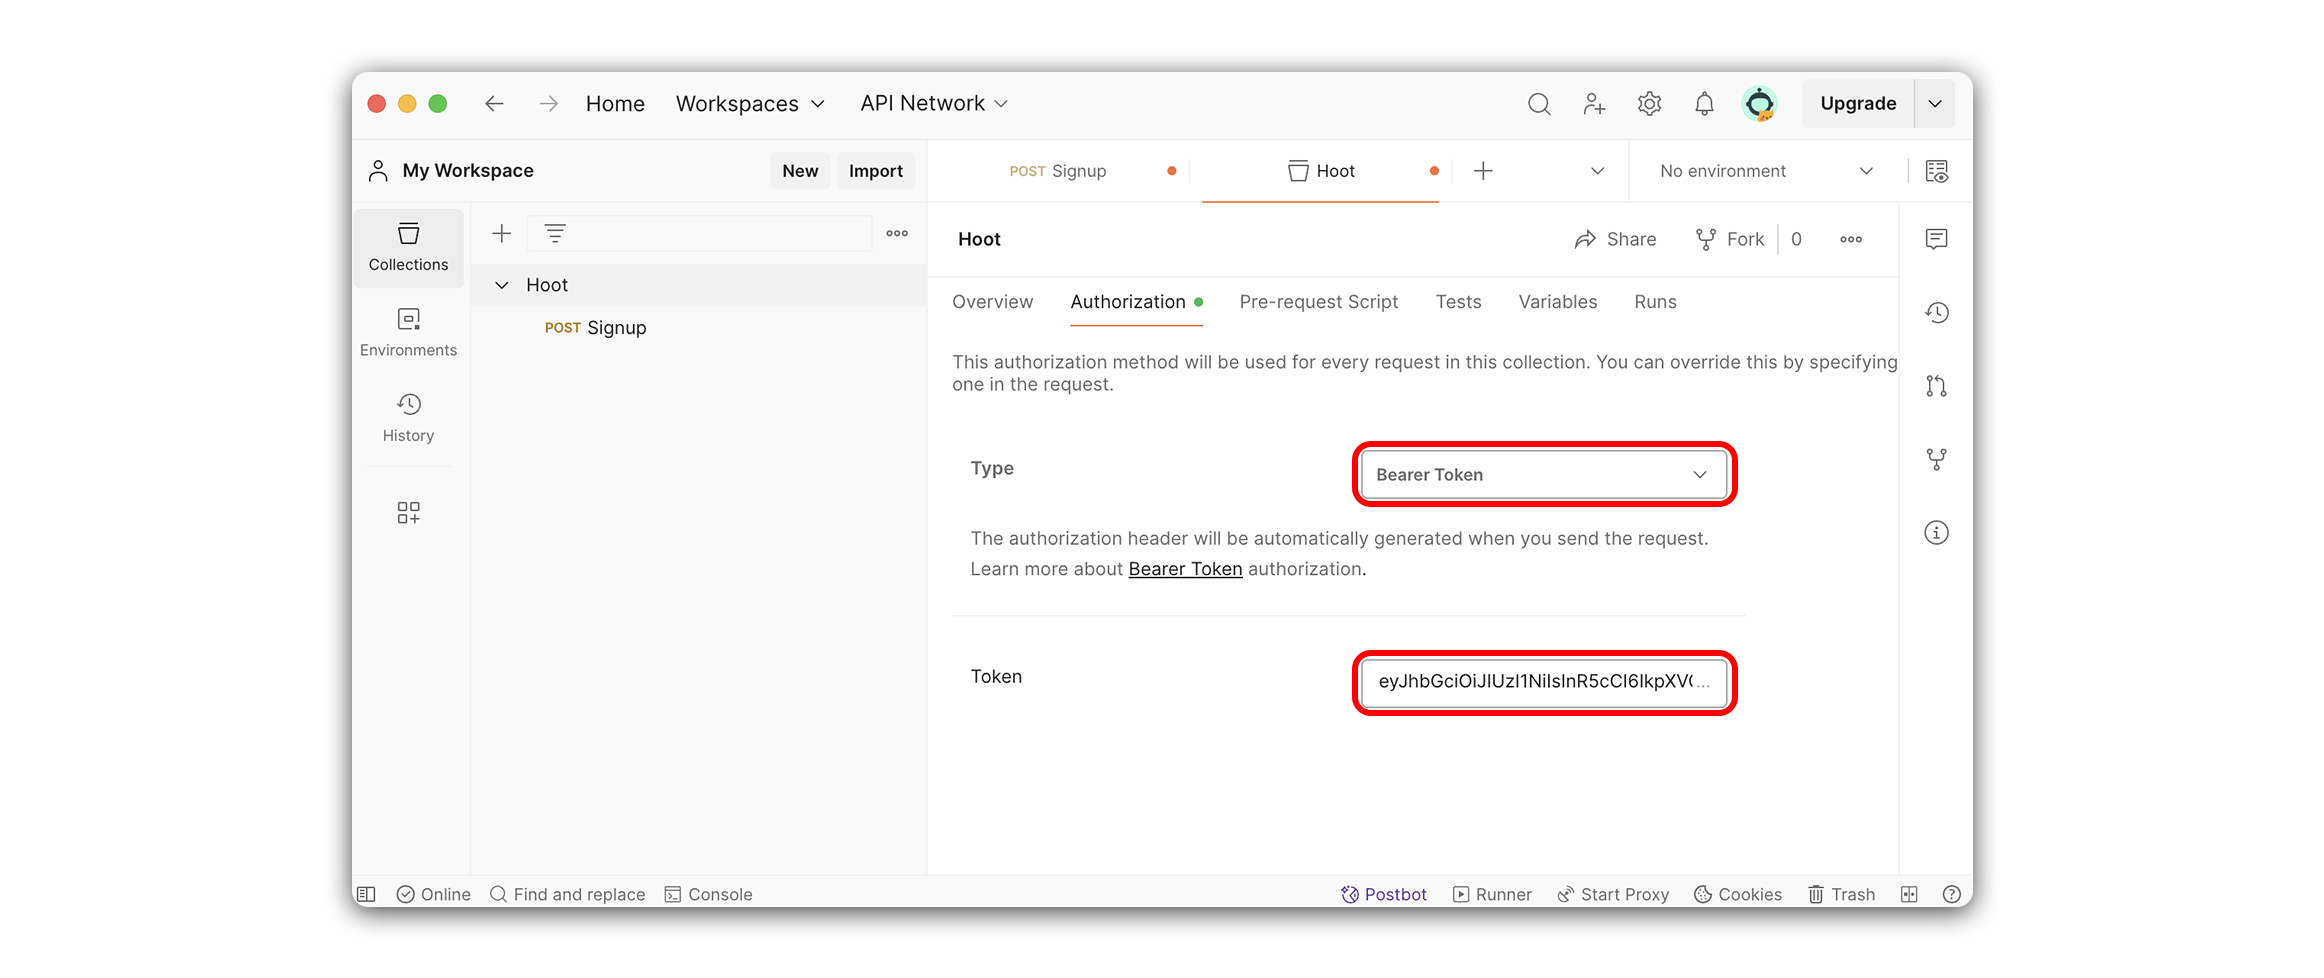
Afterwards, don’t forget to click the Save button.
💡 Depending on the width of your Postman window, you might need to click the dropdown menu in the screenshot below to access the Save option. Alternatively, the Save button will be represented by a floppy disk icon.
Congratulations - Now that we have a user, we can start to building out CRUD on our hoots.