Hoot Back-End Create Hoot
Learning objective: By the end of this lesson, students will be able to implement and test a POST route, allowing them to securely add new blog posts to the database and return the created posts as JSON responses.
Overview
In this section, we will make a route to create a new hoot. This route will be a POST request to /hoots, and will return a JSON response with the new hoot document. The purpose of this route is to handle data that is sent along with a form submission.
We will be following these specs when building the route:
- CRUD Action: CREATE
- Method:
POST - Path:
/hoots - Response: JSON
- Success Status Code:
201Created - Success Response Body: A new hoot object
- Error Status Code:
500Internal Server Error - Error Response Body: A JSON object with an
errorkey and a message describing the error
Define the route
Next we’ll define a route that listens for POST requests on '/hoots':
POST /hoots
We’ll make use of our @token_required decorator, as only a logged in user should be able to create a hoot.
Add the following route to hoots_blueprint.py:
@hoots_blueprint.route('/hoots', methods=['POST'])
@token_required
🏆 Any route that requires auth should include the
@token_requireddecorator. These are our protected routes.
Code the controller function
Let’s breakdown what we’ll accomplish inside our controller function.
Our function will use the connection cursor to execute the following SQL query:
INSERT INTO hoots (author, title, text, category)
VALUES (%s, %s, %s, %s)
RETURNING *
This query inserts a new row into the hoots table with the specified author, title, text, and category values. After inserting the row, it returns all columns of the newly created row, which can be used to verify the insertion.
The cursor.execute() method will also accept a tuple of values (new_hoot['author'], new_hoot['title'], new_hoot['text'], new_hoot['category']) that correspond to the %s placeholders in the SQL query. This ensures the safe insertion of the data.
After inserting the new row in the hoots table, our function will respond to the request with the new_hoot as JSON data.
Add the following to hoots_blueprint.py:
@hoots_blueprint.route('/hoots', methods=['POST'])
@token_required
def create_hoot():
    try:
        new_hoot = request.json
        new_hoot["author"] = g.user["id"]
        connection = get_db_connection()
        cursor = connection.cursor(cursor_factory=psycopg2.extras.RealDictCursor)
        cursor.execute("""
                        INSERT INTO hoots (author, title, text, category)
                        VALUES (%s, %s, %s, %s)
                        RETURNING *
                        """,
                        (new_hoot['author'], new_hoot['title'], new_hoot['text'], new_hoot['category'])
        )
        created_hoot = cursor.fetchone()
        connection.commit()
        connection.close()
        return jsonify({"hoot": created_hoot}), 201
    except Exception as error:
        return jsonify({"error": str(error)}), 500
Test the route in Postman
Now that we have finished the route let’s test it with Postman.
Since this request requires authentication, we’ll need to give Postman access to our token. If you deleted your users in a previous step, go ahead and sign up a new user in Postman now.
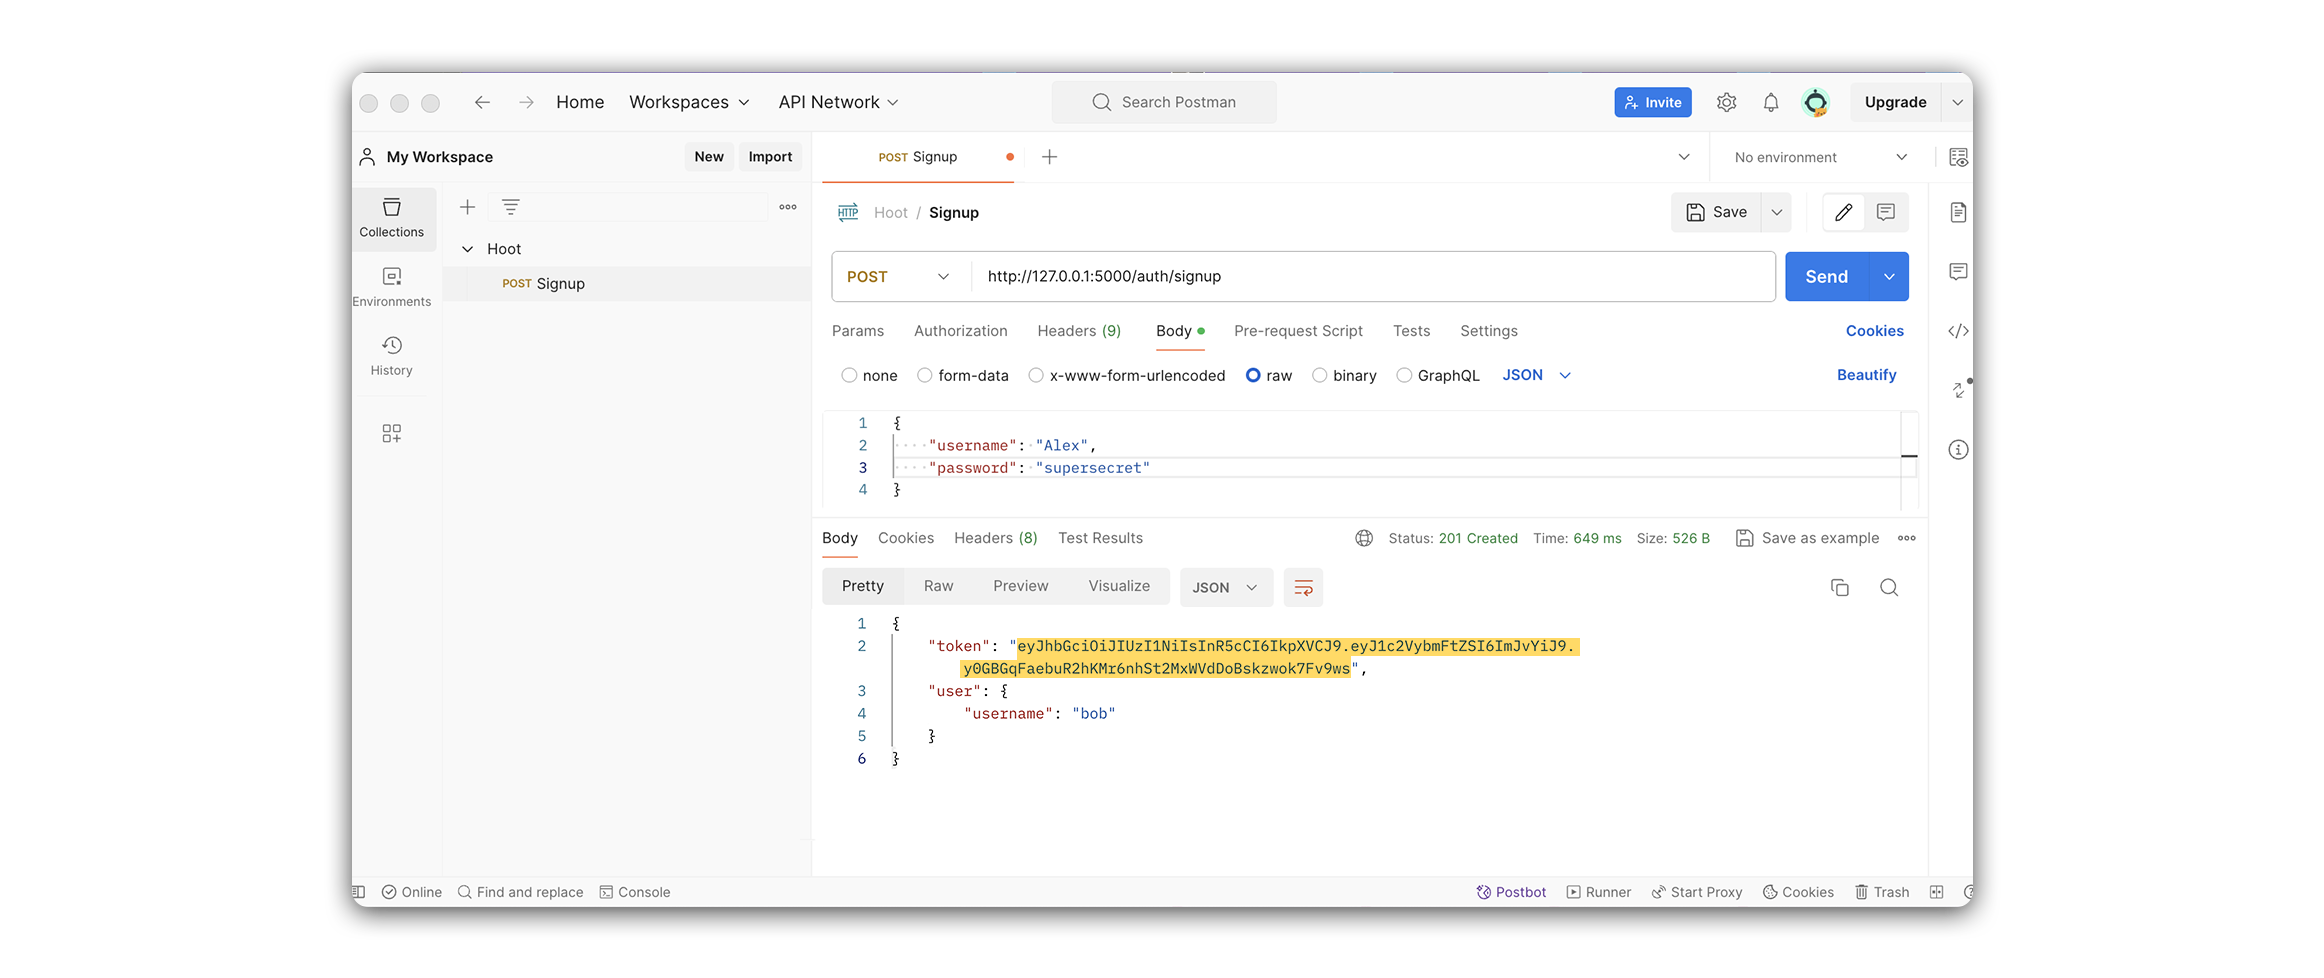
If the sign up request was successful, you should see something like the following response:
{
  "token": "eyJhbGciOiJIUzI1NiIsInR5cCI6IkpXVCJ9.eyJpZCI6NCwidXNlcm5hbWUiOiJBbGV4MiJ9.VLAksJtvVvicoQNrrftqhtRbGJFMy6fPk9s8yq3YbkE",
  "user": {
    "id": 2,
    "username": "your-username"
  }
}
We’ll be using the token issued here in the next few steps, so be sure to save it somewhere easily accessible. When you copy the value of the token, do not include the quotes.
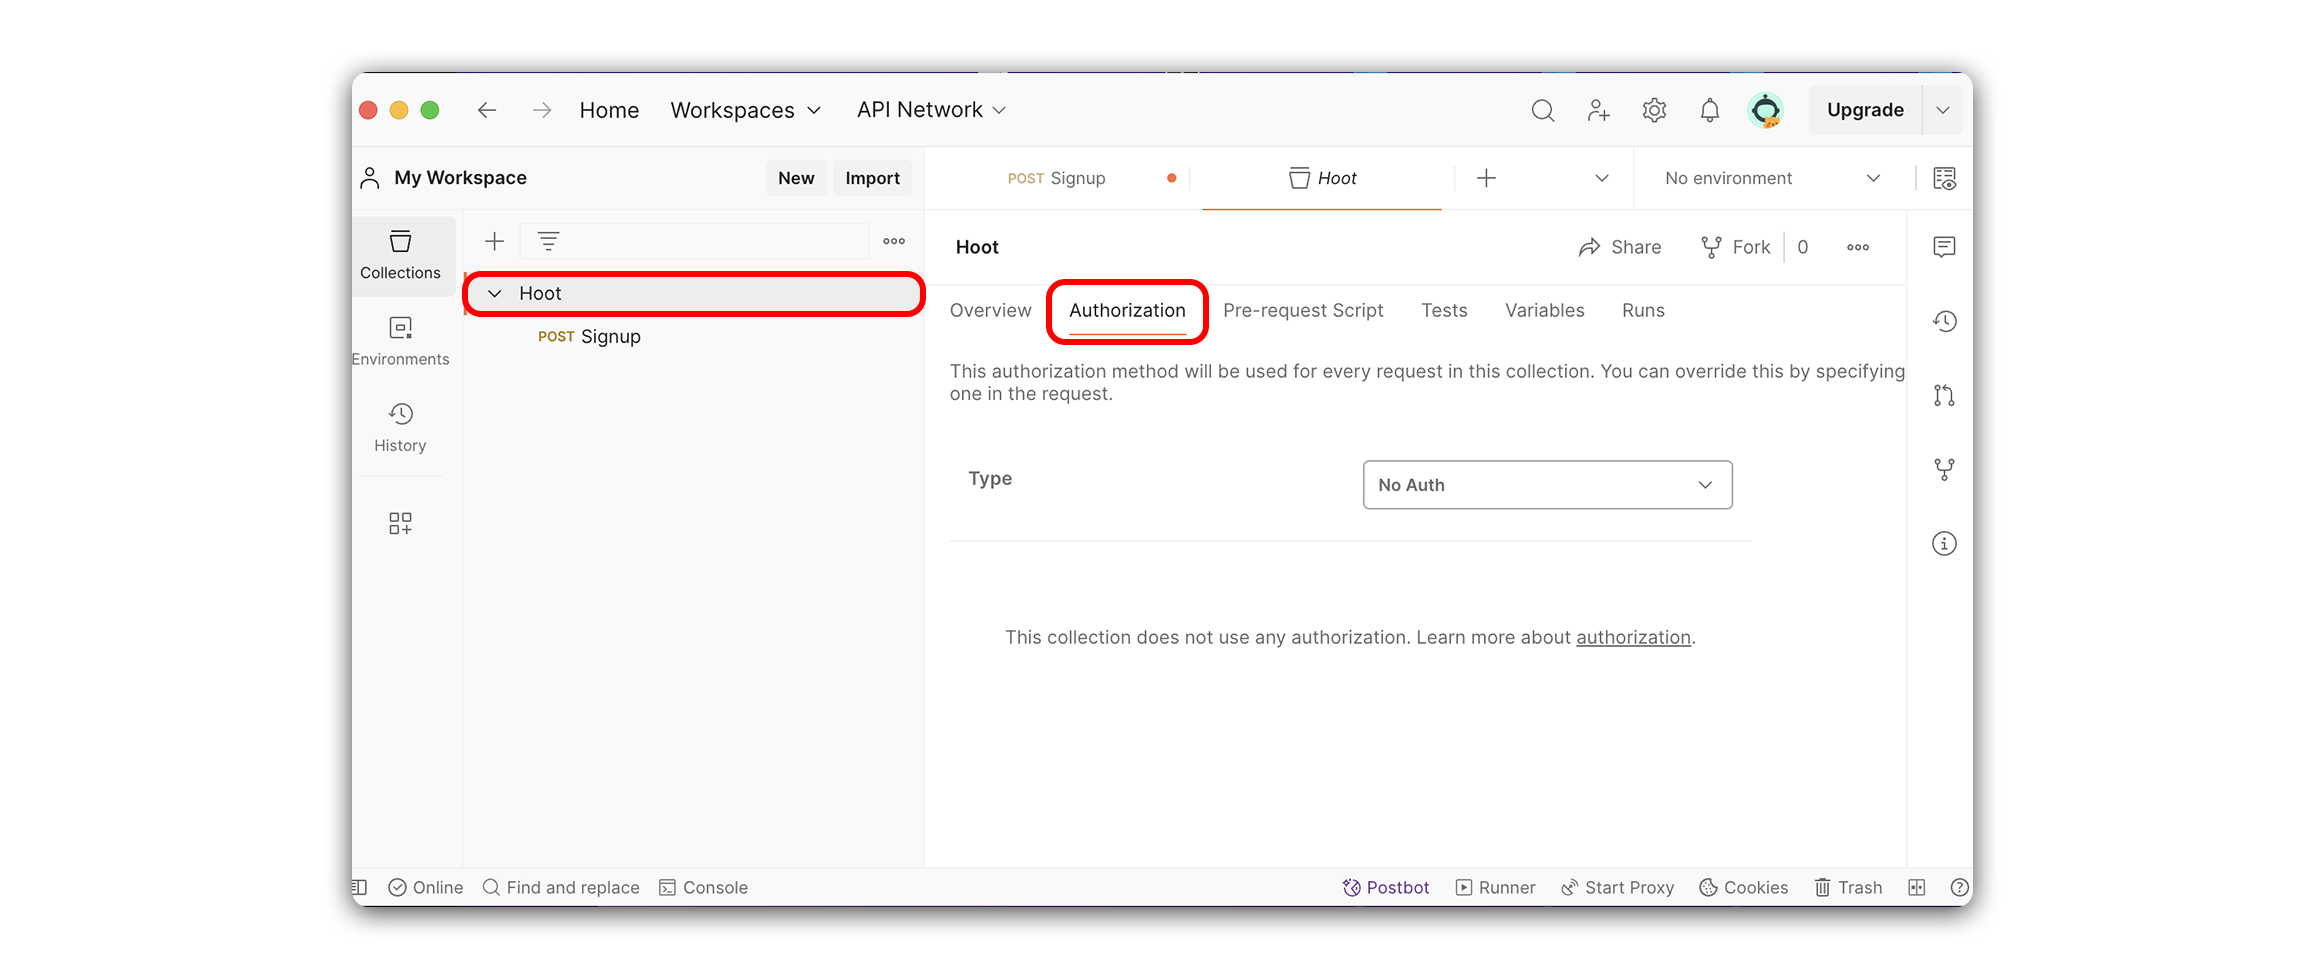
Create a Hoot collection in Postman and click on the collection’s Authorization tab.
Set the Type to Bearer Token and add your token to the Token input field.
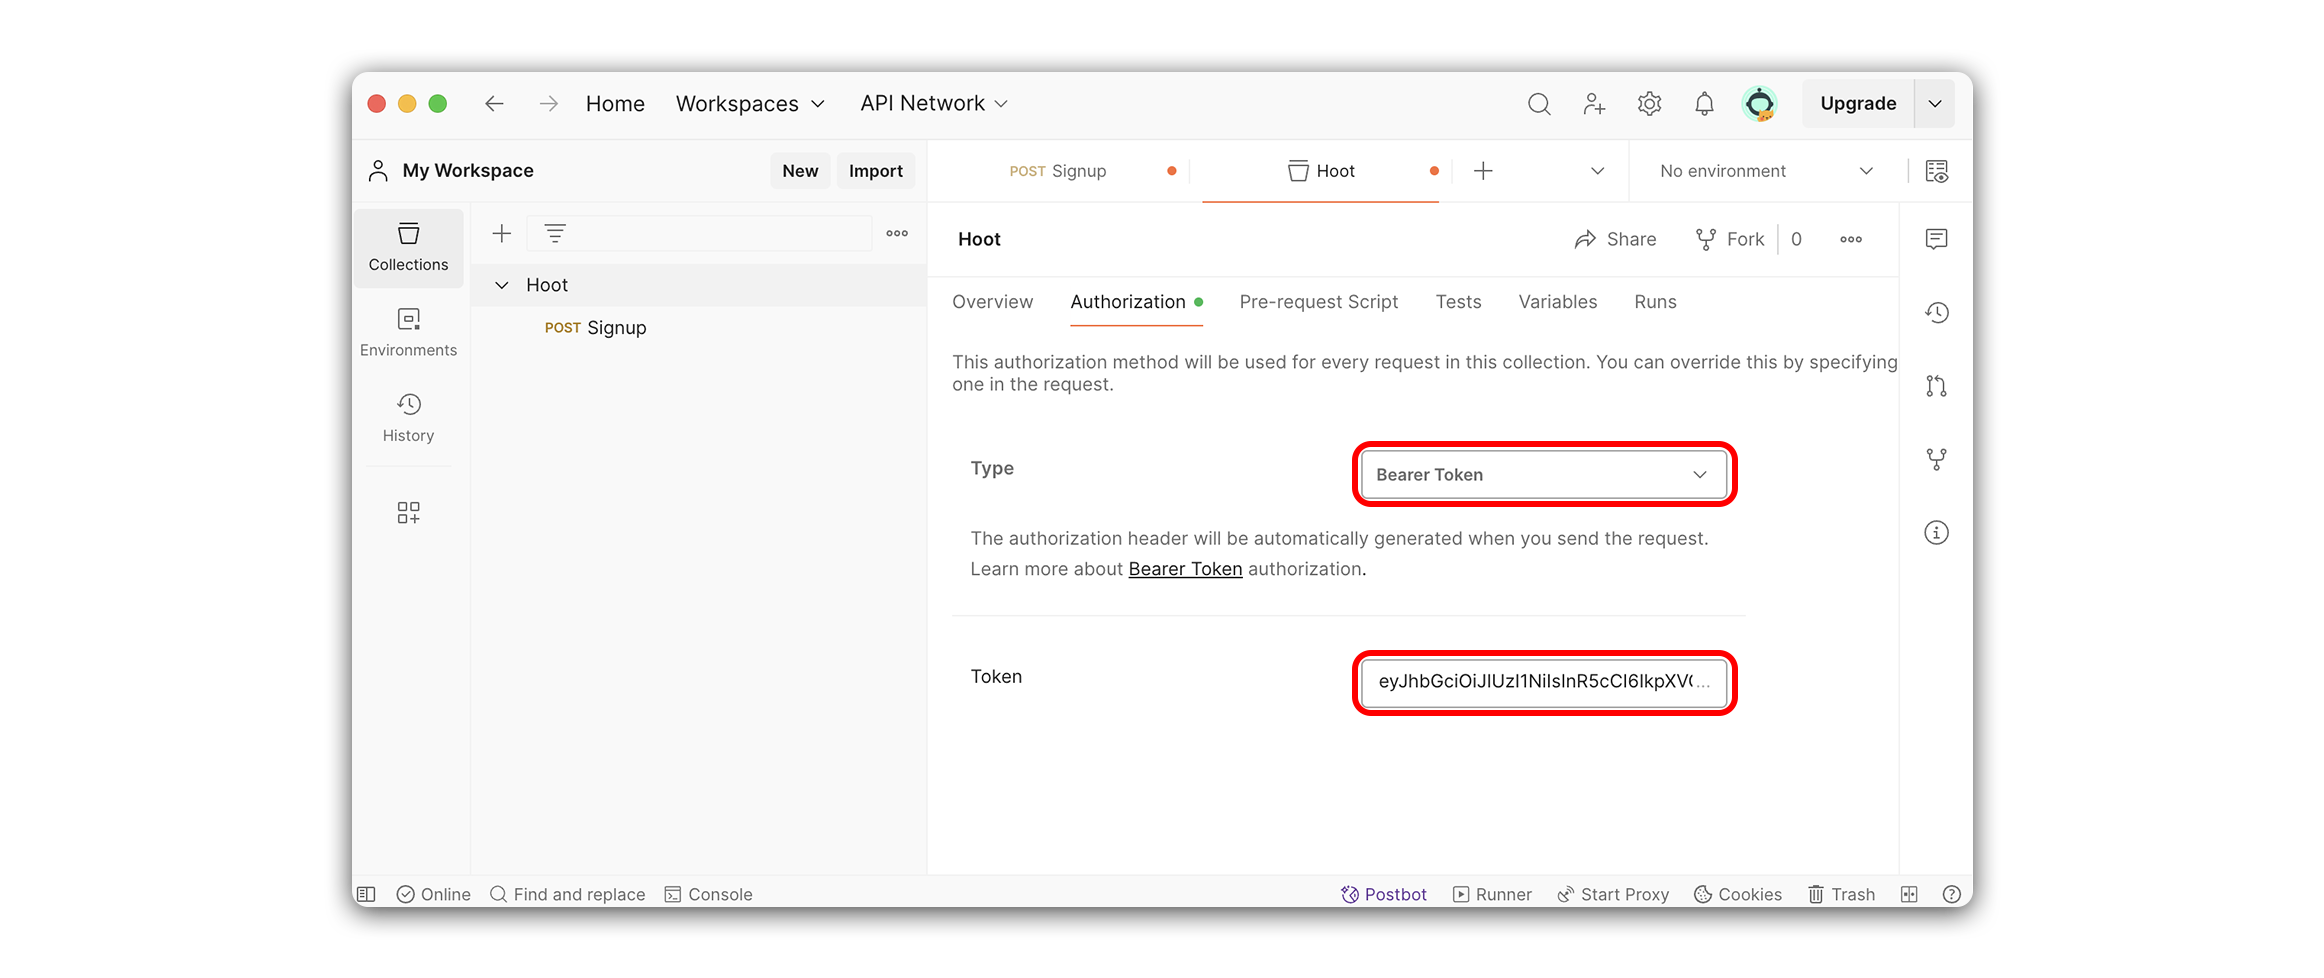
Afterwards, don’t forget to click the Save button.
💡 Depending on the width of your Postman window, you might need to click the dropdown menu in the screenshot below to access the Save option. Alternatively, the Save button will be represented by a floppy disk icon.
Next, in Postman, make a new POST request called Create.
❗ Be sure to add this request to your Hoot collection.
Add the following URL:
http://127.0.0.1:5000/hoots
🚨 In the Authorization tab, make sure the Type is set to Inherit auth from parent, or to the appropriate bearer token if you are not using a parent collection.
Within the Body tab, select raw, and change the Text dropdown to JSON. Next, add the following test data to the body:
{
  "title": "Big News",
  "text": "Lorem ipsum",
  "category": "news"
}
If your request was successful, you should see something like the response below:
{
  "hoot": {
    "author": 2,
    "category": "news",
    "id": 2,
    "text": "Lorem ipsum",
    "title": "Big News"
  }
}