Pets Back End Create Route
Learning objective: By the end of this lesson, students will be able to create a new pet by interacting with the database and sending a JSON response to the client.
CREATE - Create route
In this section, we will make a new route for creating pet. This route will handle POST requests made to /pets, and will return a JSON response with the created pet.
We will be following these specs when building the route:
- CRUD Action: CREATE
- Method:
POST - Path:
/pets - Response: JSON
- Success Status Code: 201
- Success Response Body: A new Pet object
- Error Status Code: 500
- Error Response Body: A JSON object with a message describing the error
Defining the route
Our POST route will be responsible for handling data sent along with a form submission and adding it to our database.
To access this form submission data, we’ll need to make use of a Flask request object. Flask’s request object represents the incoming request and allows access to information like headers and form data.
Let’s update the existing import at the top of app.py to include request:
# app.py
from flask import Flask, request
Next, we’ll make use the request object in our route to verify the data submitted by our users. Using request.json, we’ll print the JSON data from the request to our console. Then we’ll return this JSON data as the response to the client.
# app.py
@app.route('/pets', methods=['POST'])
def create_pet():
  new_pet = request.json
  print(new_pet)
  return new_pet
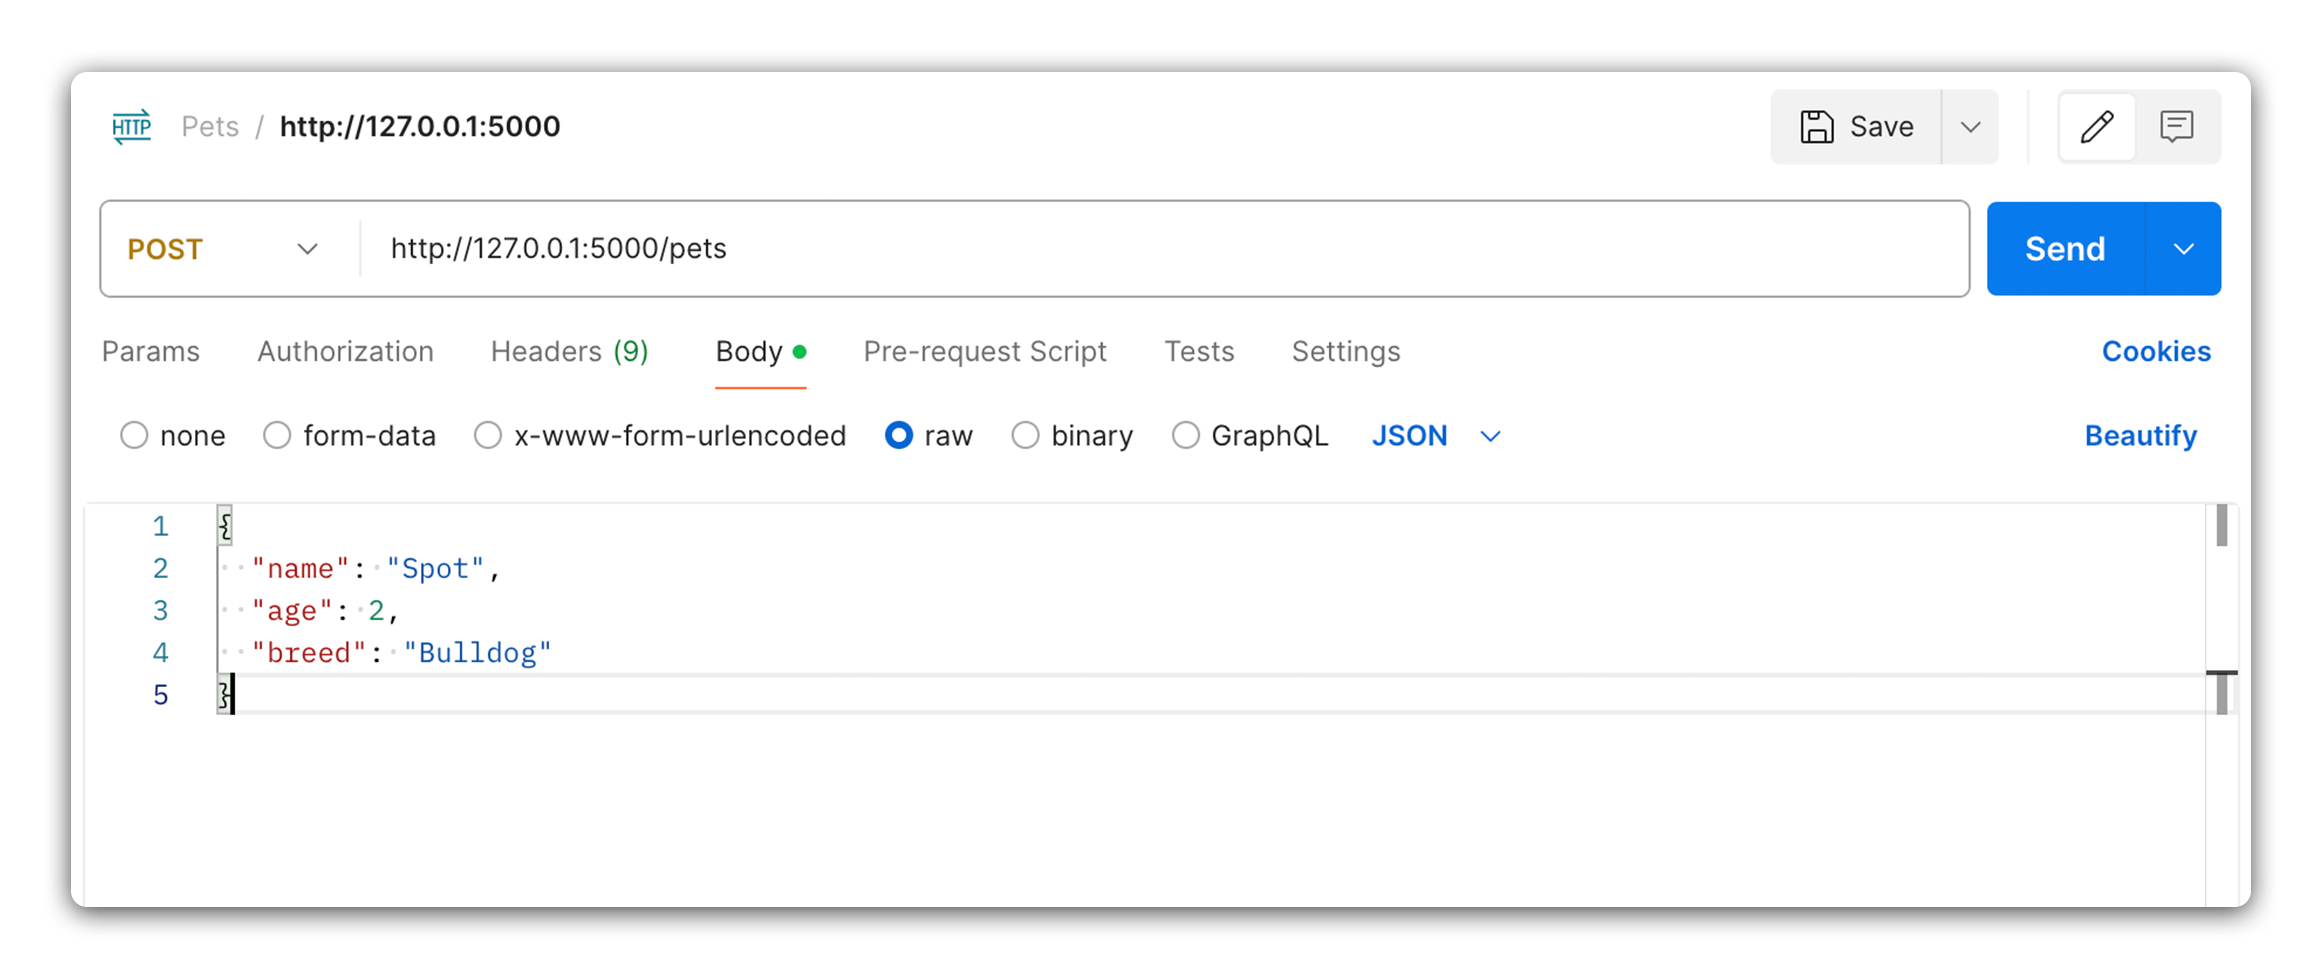
In Postman, try submitting a POST request to http://127.0.0.1:5000/pets. Your Postman request should look something like the example below:
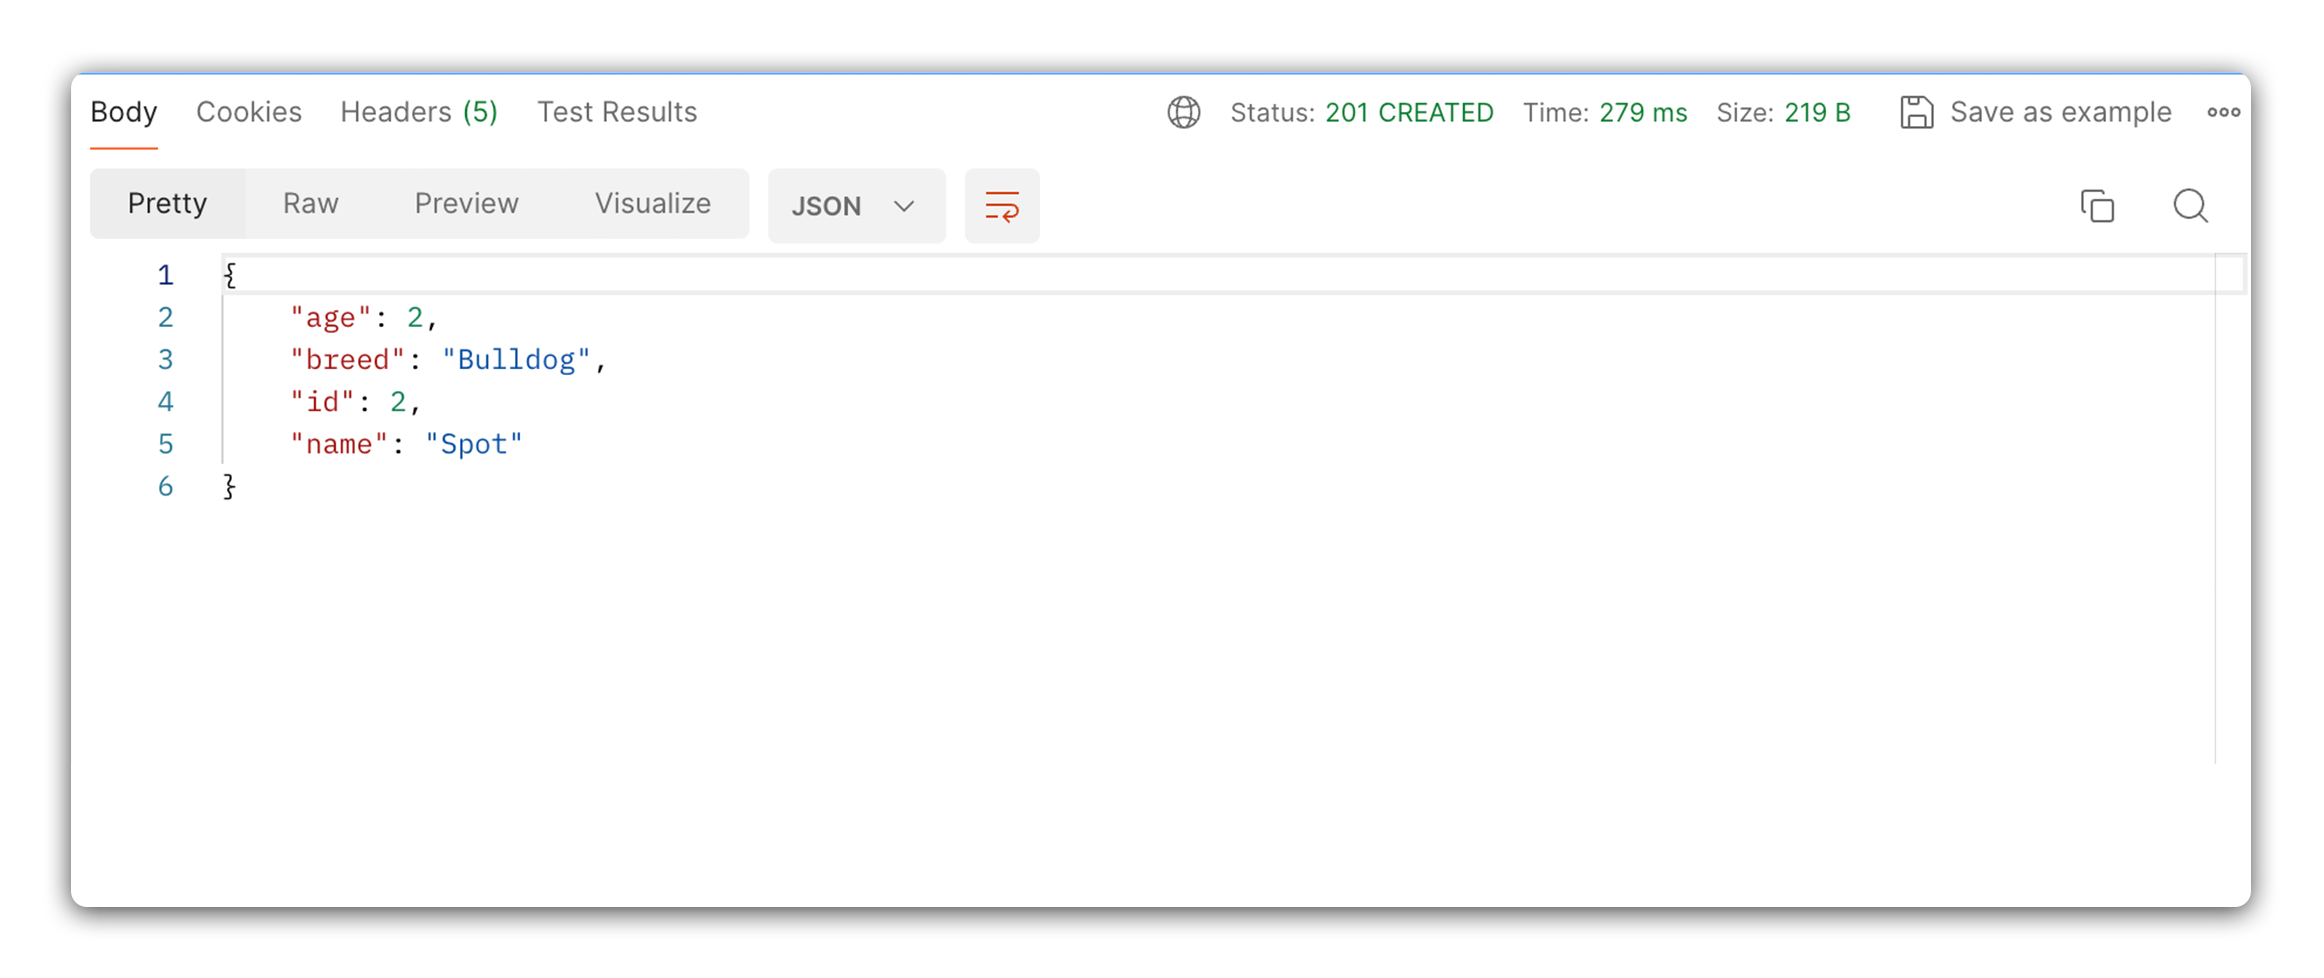
If the request was successful, you should see the form data you submitted issued back as a response.
Creating a new pet in SQL
Now that we can access the submitted form data, we’ll construct our SQL query.
This SQL query will need use the request.json object as input. When using any user input in a SQL statement, we need to protect against SQL Injection by preparing a parameterized query.
We can find just such an example in the psycopg documentation:
# Pass data to fill a query placeholders and let Psycopg perform
# the correct conversion (no more SQL injections!)

>>> cur.execute("INSERT INTO test (num, data) VALUES (%s, %s)",
...      (100, "abc'def"))
Let’s include this query in our POST route, including the same connection boilerplate from our index route to get started:
@app.route('/pets', methods=['POST'])
def create_pet():
  try:
    new_pet = request.json
    connection = get_db_connection()
    cursor = connection.cursor(cursor_factory=psycopg2.extras.RealDictCursor)
    cursor.execute("INSERT INTO pets (name, age, breed) VALUES (%s, %s, %s) RETURNING *",
                   (new_pet['name'], new_pet['age'], new_pet['breed']))
    created_pet = cursor.fetchone()
    connection.commit() # Commit changes to the database
    connection.close()
    return created_pet, 201
  except Exception as e:
     return str(e), 500
Notice the use of con.commit() in the code above. The .commit() method is used to ensure that modifications are permanently saved to the database. Be sure to include this when executing create, update, or delete operations.
💡 Note the need for an explicit
RETURNING *clause to ensure our SQL statement returns a value we can then send back to the user.
Once again, test the route using Postman. This time, ensure that the response includes an id property. This id property lets us know that the data has been added as a new row in the table.