GitHub Collaboration Fork Method Merging
Learning objective: By the end of this lesson, students will be able to merge branches and handle merge conflicts.
Merging
Merging is the process of combining changes from one branch into another. When you merge branches, Git will automatically determine the best way to combine the changes. However, sometimes, Git cannot automatically merge the changes, resulting in a merge conflict. In this section, we will look at merging locally and remotely.
Merging remotely (GitHub managers)
⚠️ Only GitHub managers should complete this task. Technically, any collaborator added to the repository can complete this task, but many teams find it best to have one person in charge of this work to ensure a consistent experience.
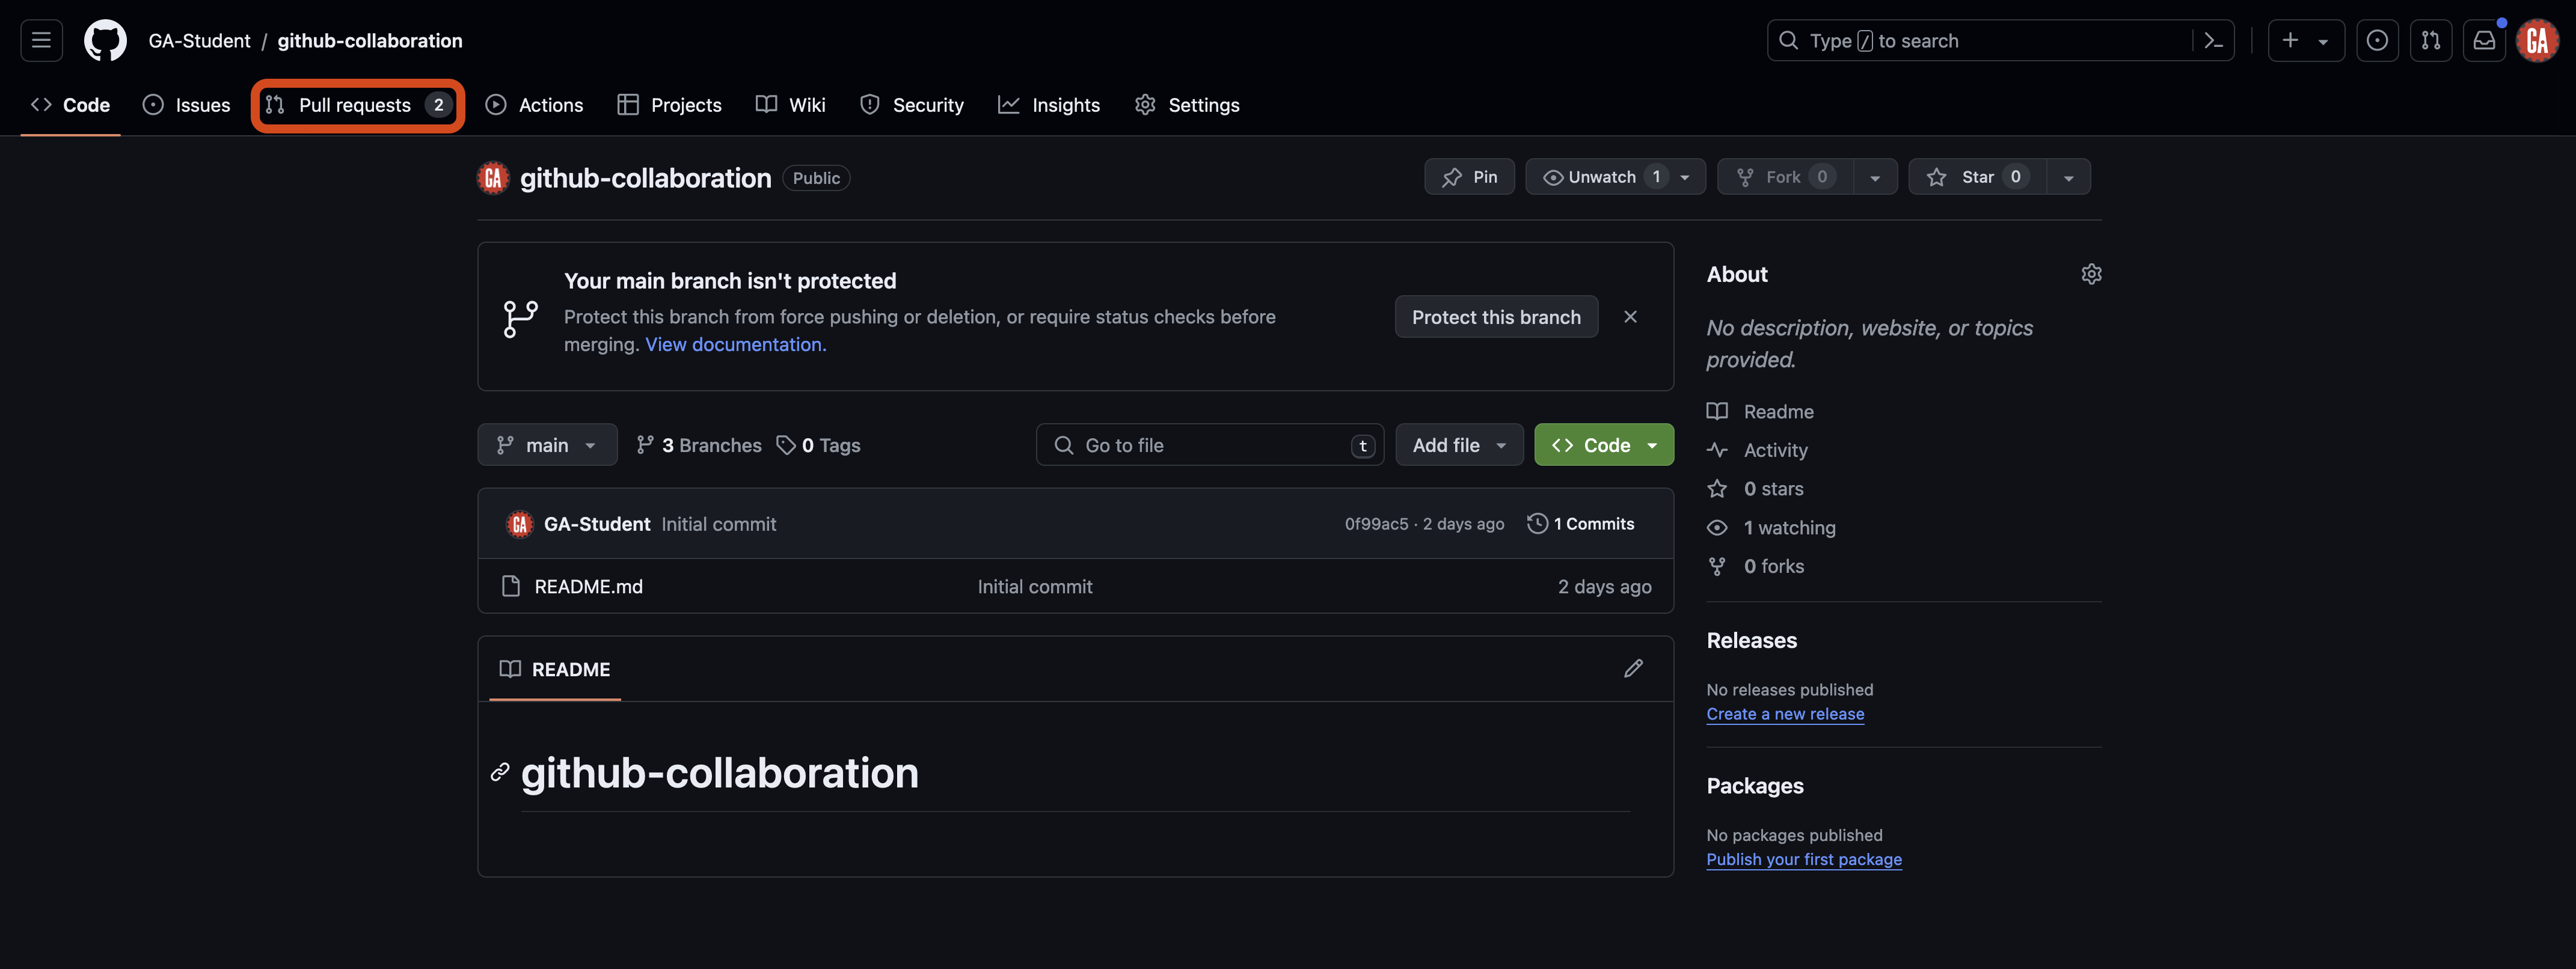
Merging branches remotely is done through a pull request, which is advantageous because we have a pull request waiting for us! When merging remotely, you’ll do your work on GitHub’s website. Navigate to one of the pull requests created in the previous lesson by going to your github-collaboration repo and selecting the Pull requests tab outlined in red below.
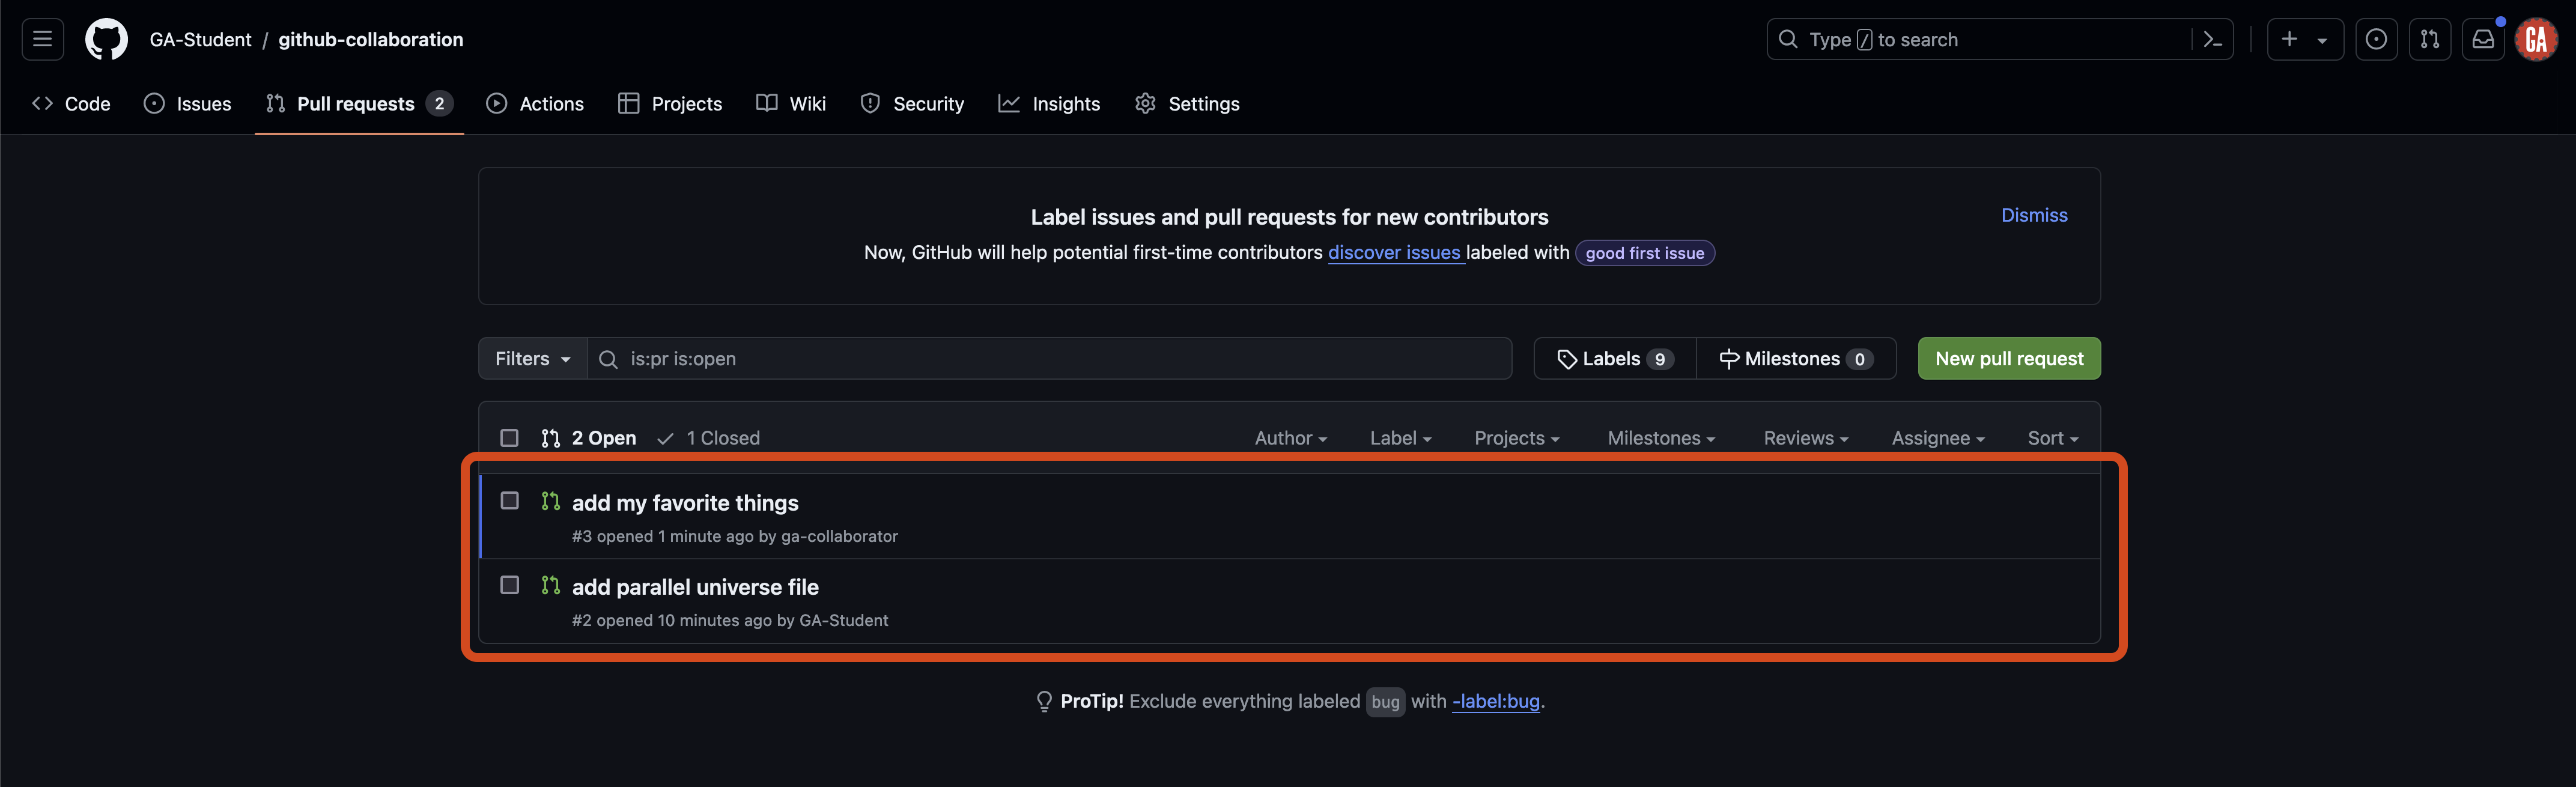
Once on the Pull requests tab, select an open pull request you would like to review as shown outlined in red below:
You’ll be taken to a page to view the pull request on:

A lot is happening on this page. Let’s break it down into two parts: information on this page and actions you can take.
Information
This page has a lot of information on it that is important to understand:
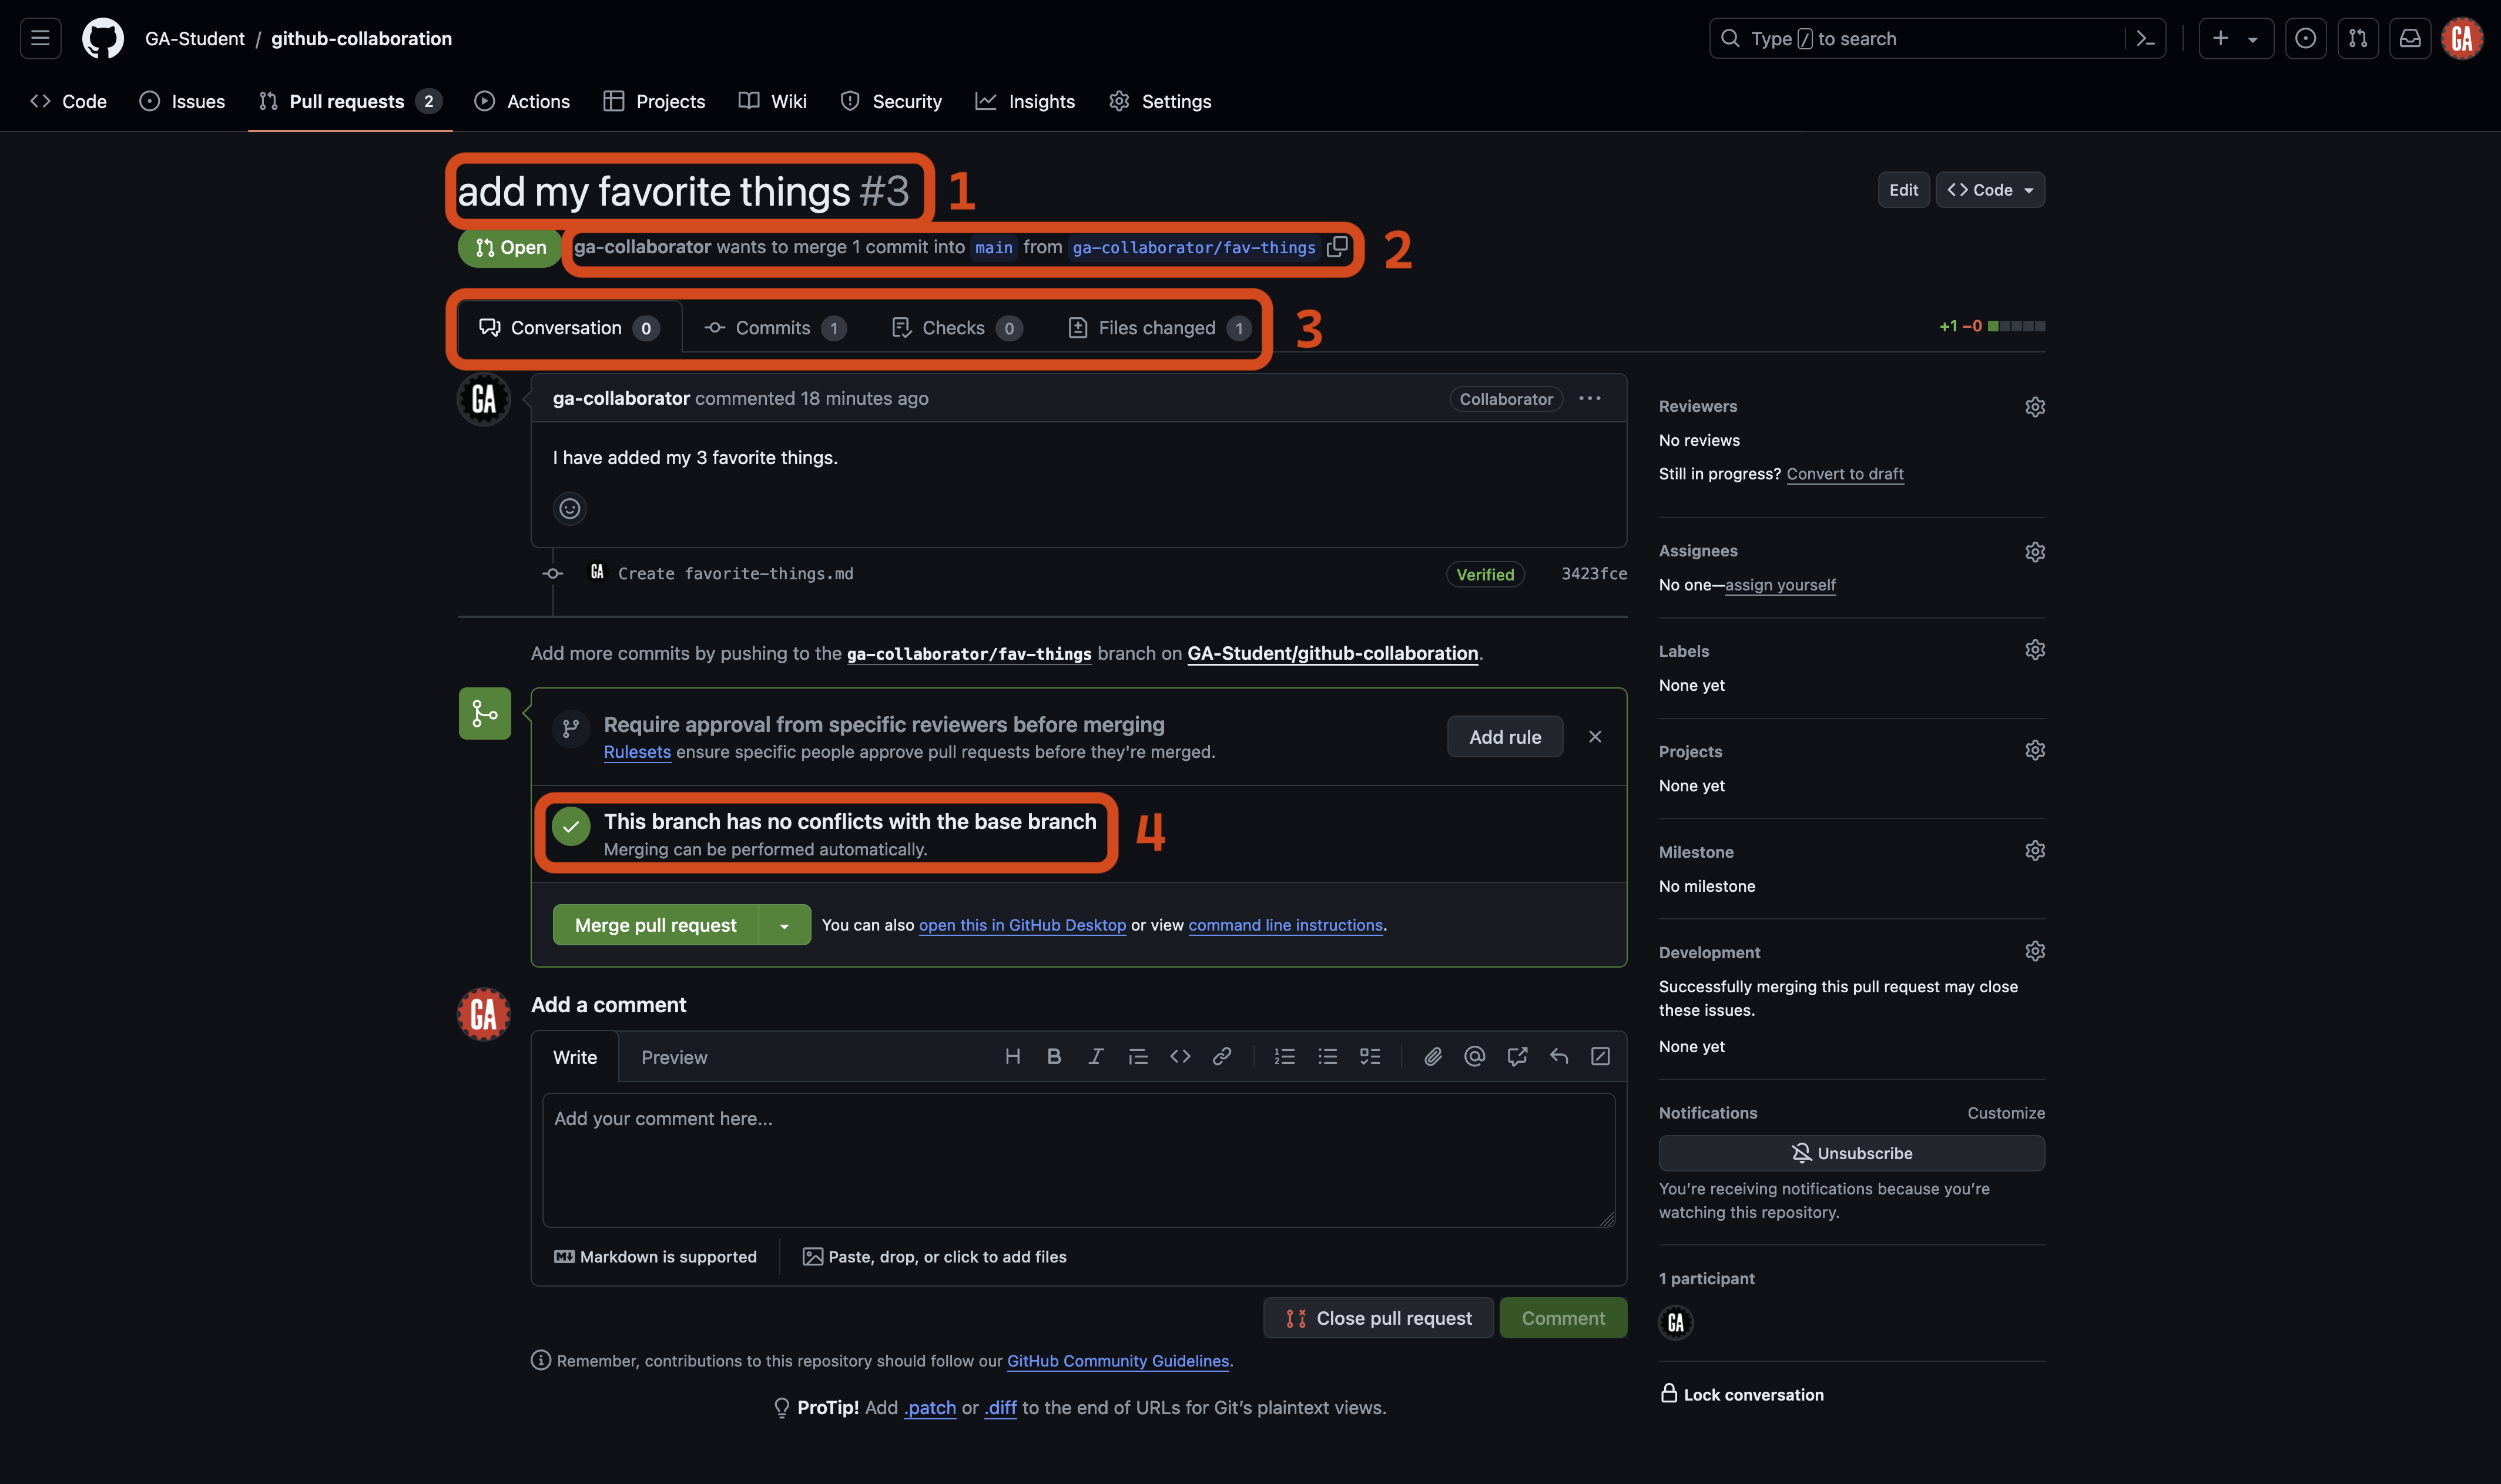
- Pull request title and ID: The ID is the number of the pull request and increments by one for every pull request made. This ID makes it easy to reference a pull request on and off of GitHub.
- Pull request details: These details include who made the pull request and what branches they want to merge.
- Pull request tabs: Switch between these tabs to see the discussion about the pull request, the commits made as part of the pull request, and the files changed in those commits. This information is vital for understanding the impact of merging this pull request.
- Conflicts between the compare branch and the base branch: If the compare branch conflicts with the base branch, you won’t be able to merge it without making changes.
🧠 Use this information to help you review a pull request and identify the changes it will make to the base branch.
If something needs to be fixed, you should communicate that with the person who made the pull request so that they can resolve the issue before you merge the changes into the base branch. They’ll work in the same feature branch to make the necessary updates, then push to the remote repo when the fixes are in place - the pull request will automatically update.
Actions
Let’s talk about the actions you can take:
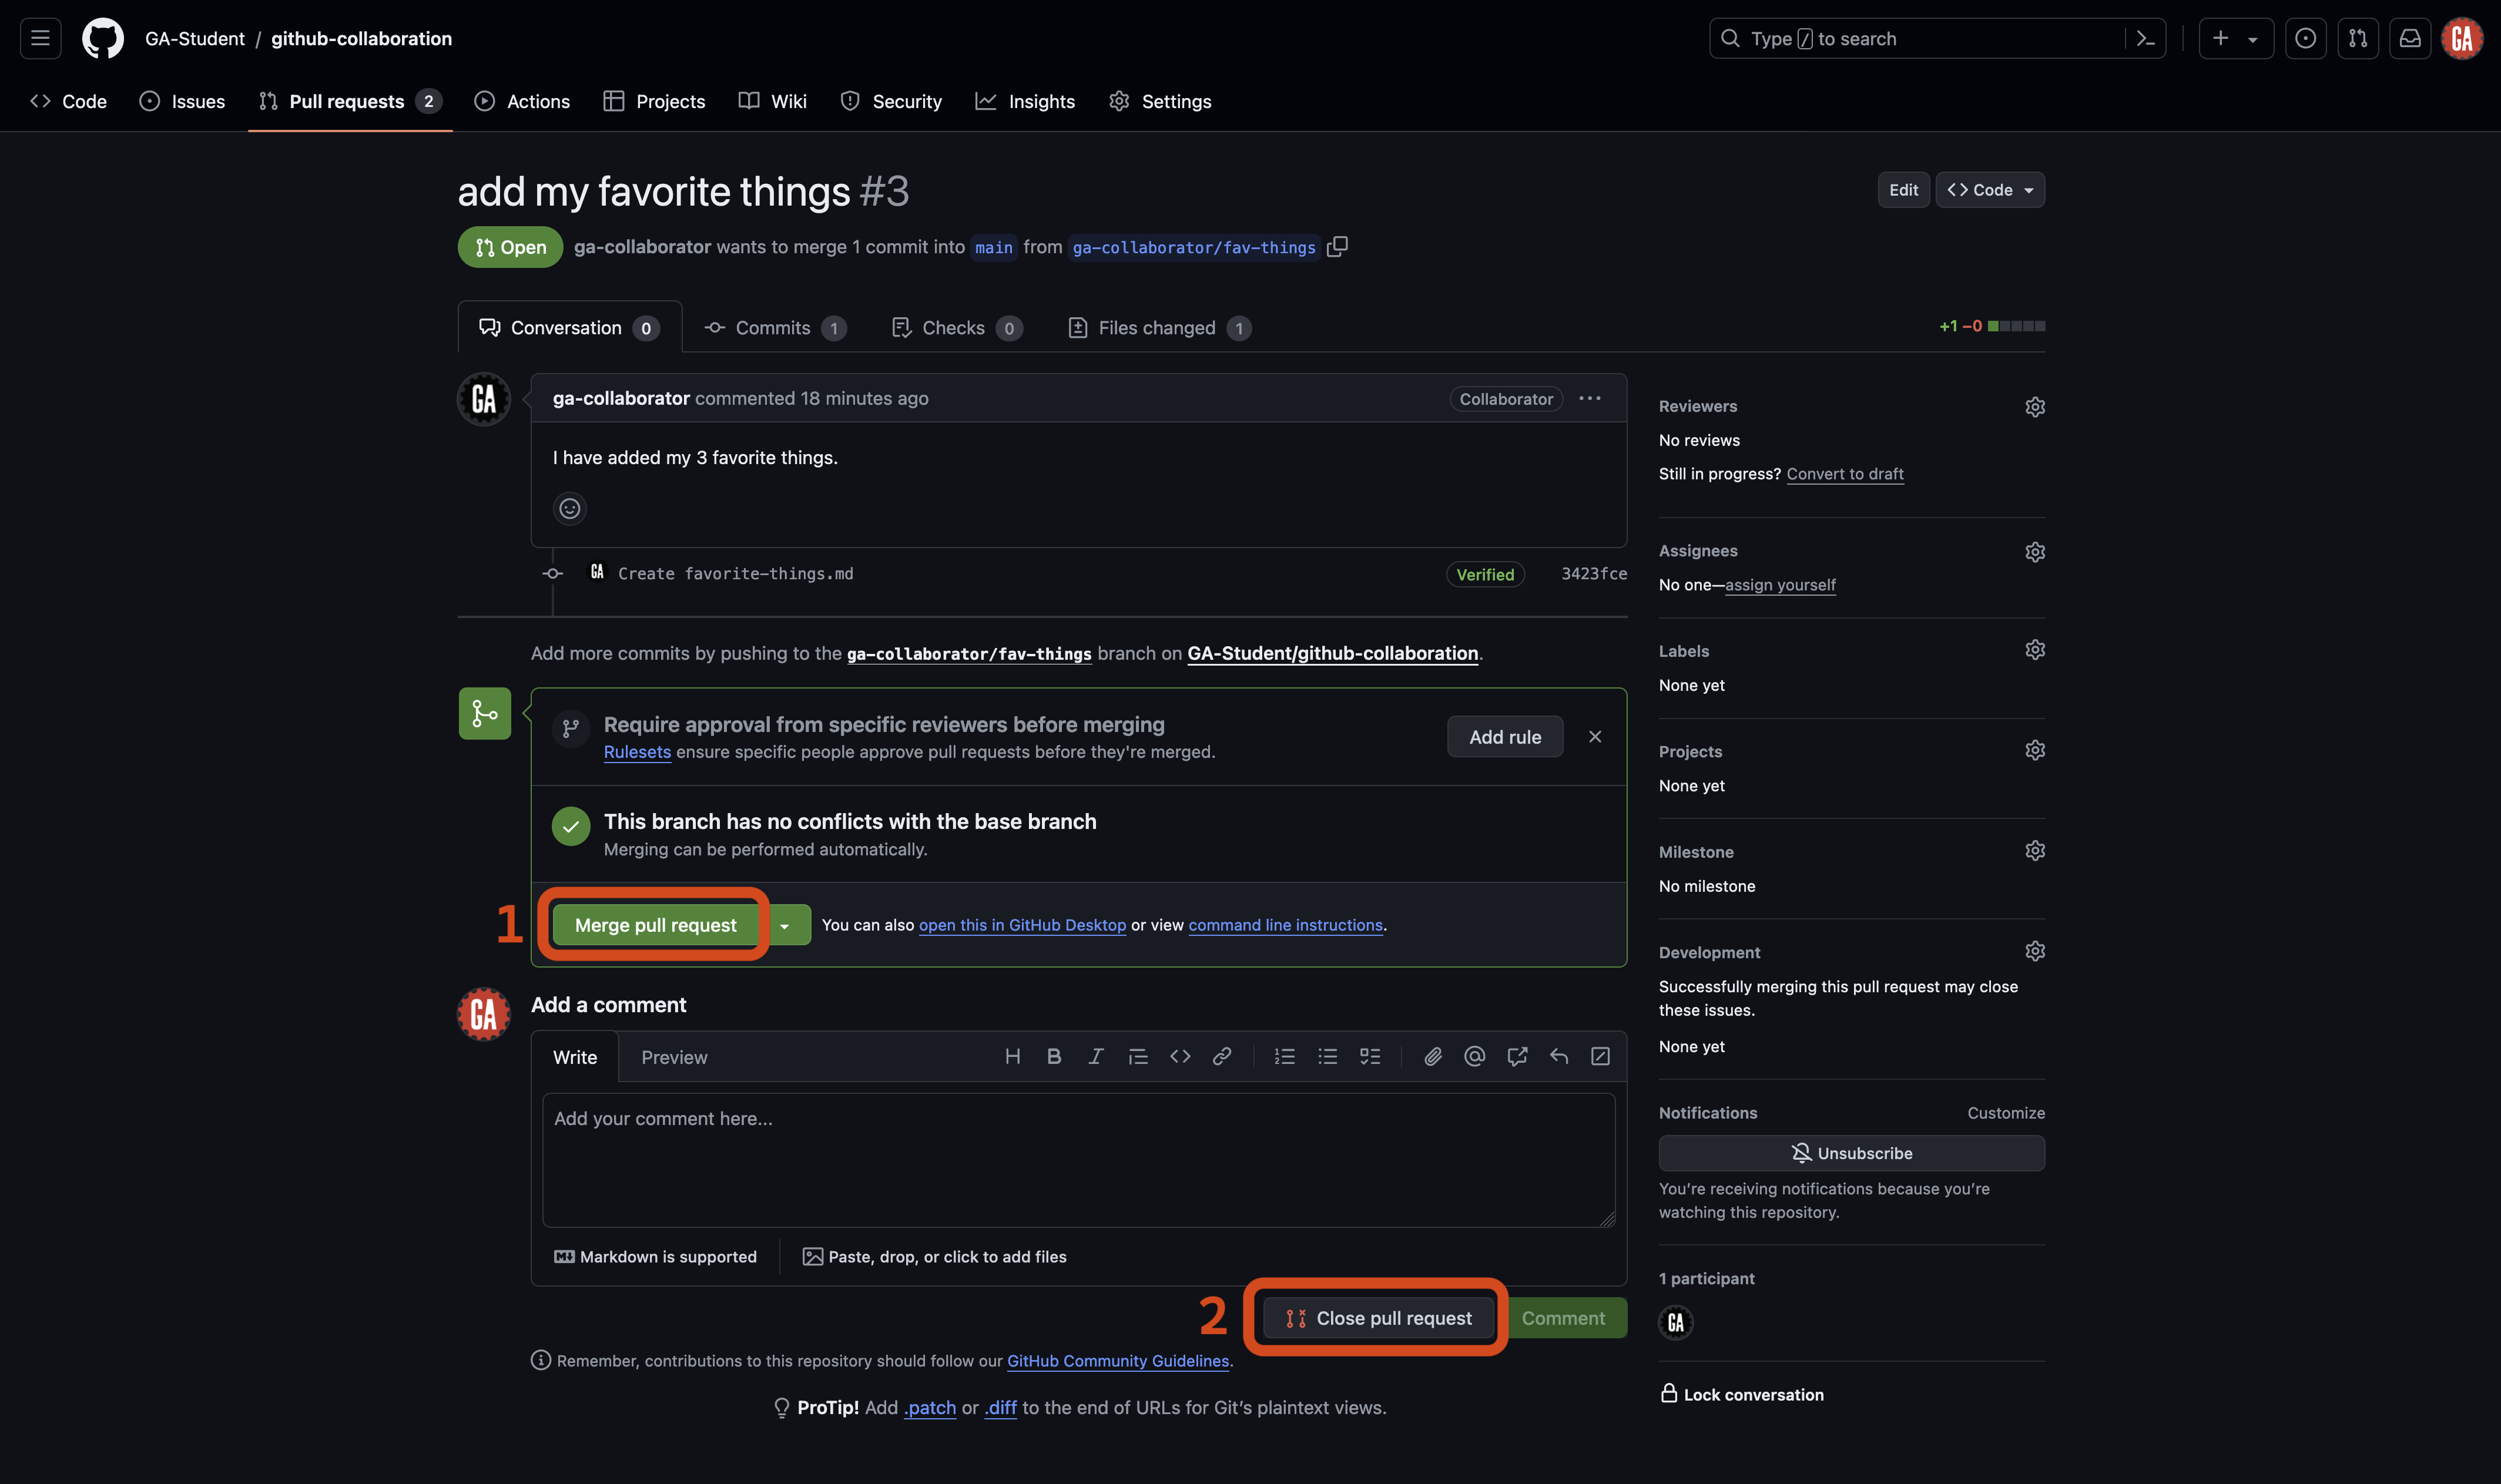
- Merge pull request: Use this to merge a pull request, bringing the work done in the compare branch into the base branch.
- Close pull request: Use this to close a pull request without merging the branches. If you close a pull request, you can make a new one with the same branch later if necessary.
You should be able to select the Merge pull request button. When you select this button, GitHub will merge the changes from the compare branch into the base branch. That’s it! You have merged the changes into the GitHub manager’s remote repo. 🎉
Continue to merge pull requests until there are none left to merge. If you’ve followed along with the lecture so far, you shouldn’t encounter any merge conflicts.
Merging locally (GitHub managers and programmers)
⚠️ Both GitHub managers and programmers should complete this task.
There is one more action we need to take after we merge the pull request. Everyone on the team needs to pull the changes made in the main branch of the GitHub manager’s remote repo to their local repo’s main branch. From here, you can merge the changes into any work currently being done.
🧠 Everyone on the team should do this after each merge to the
mainbranch on the GitHub repo. This will take some adjustment, but it’s the best way to ensure you’re working with the newest possible code and will also help reduce the chances of submitting a pull request that contains merge conflicts.
The steps to accomplish this will be slightly different if you are the GitHub manager or a programmer. If you are a GitHub manager, continue to the Merging (GitHub managers) section below. If you are a programmer, skip to the Merging (programmers) section below.
Merging (GitHub managers)
⚠️ Only GitHub managers should complete this task.
First, return to your terminal in VS Code. If you have uncommitted work in a feature branch, commit your work first:
git add -A
git commit -m "meaningful commit message"
Checkout the main branch:
git checkout main
Then, pull the code from the main branch of the GitHub manager’s remote repo:
git pull origin main
Skip to the Next steps section below.
Merging (programmers)
⚠️ Only programmers should complete this task.
Like many Git actions, there are many ways to get the code from the GitHub manager’s remote repo to your programmer’s local repo. The following method ensures that both your remote and local repo main branches stay current. It also prevents us from interacting with more than one remote repository from the command line.
Navigate to your fork of the repo on GitHub (the programmer’s remote repo). It should be at this URL: https://github.com/<your-username>/github-collaboration.
🚨 Replace
<your-username>(including the<and>) with your GitHub username.
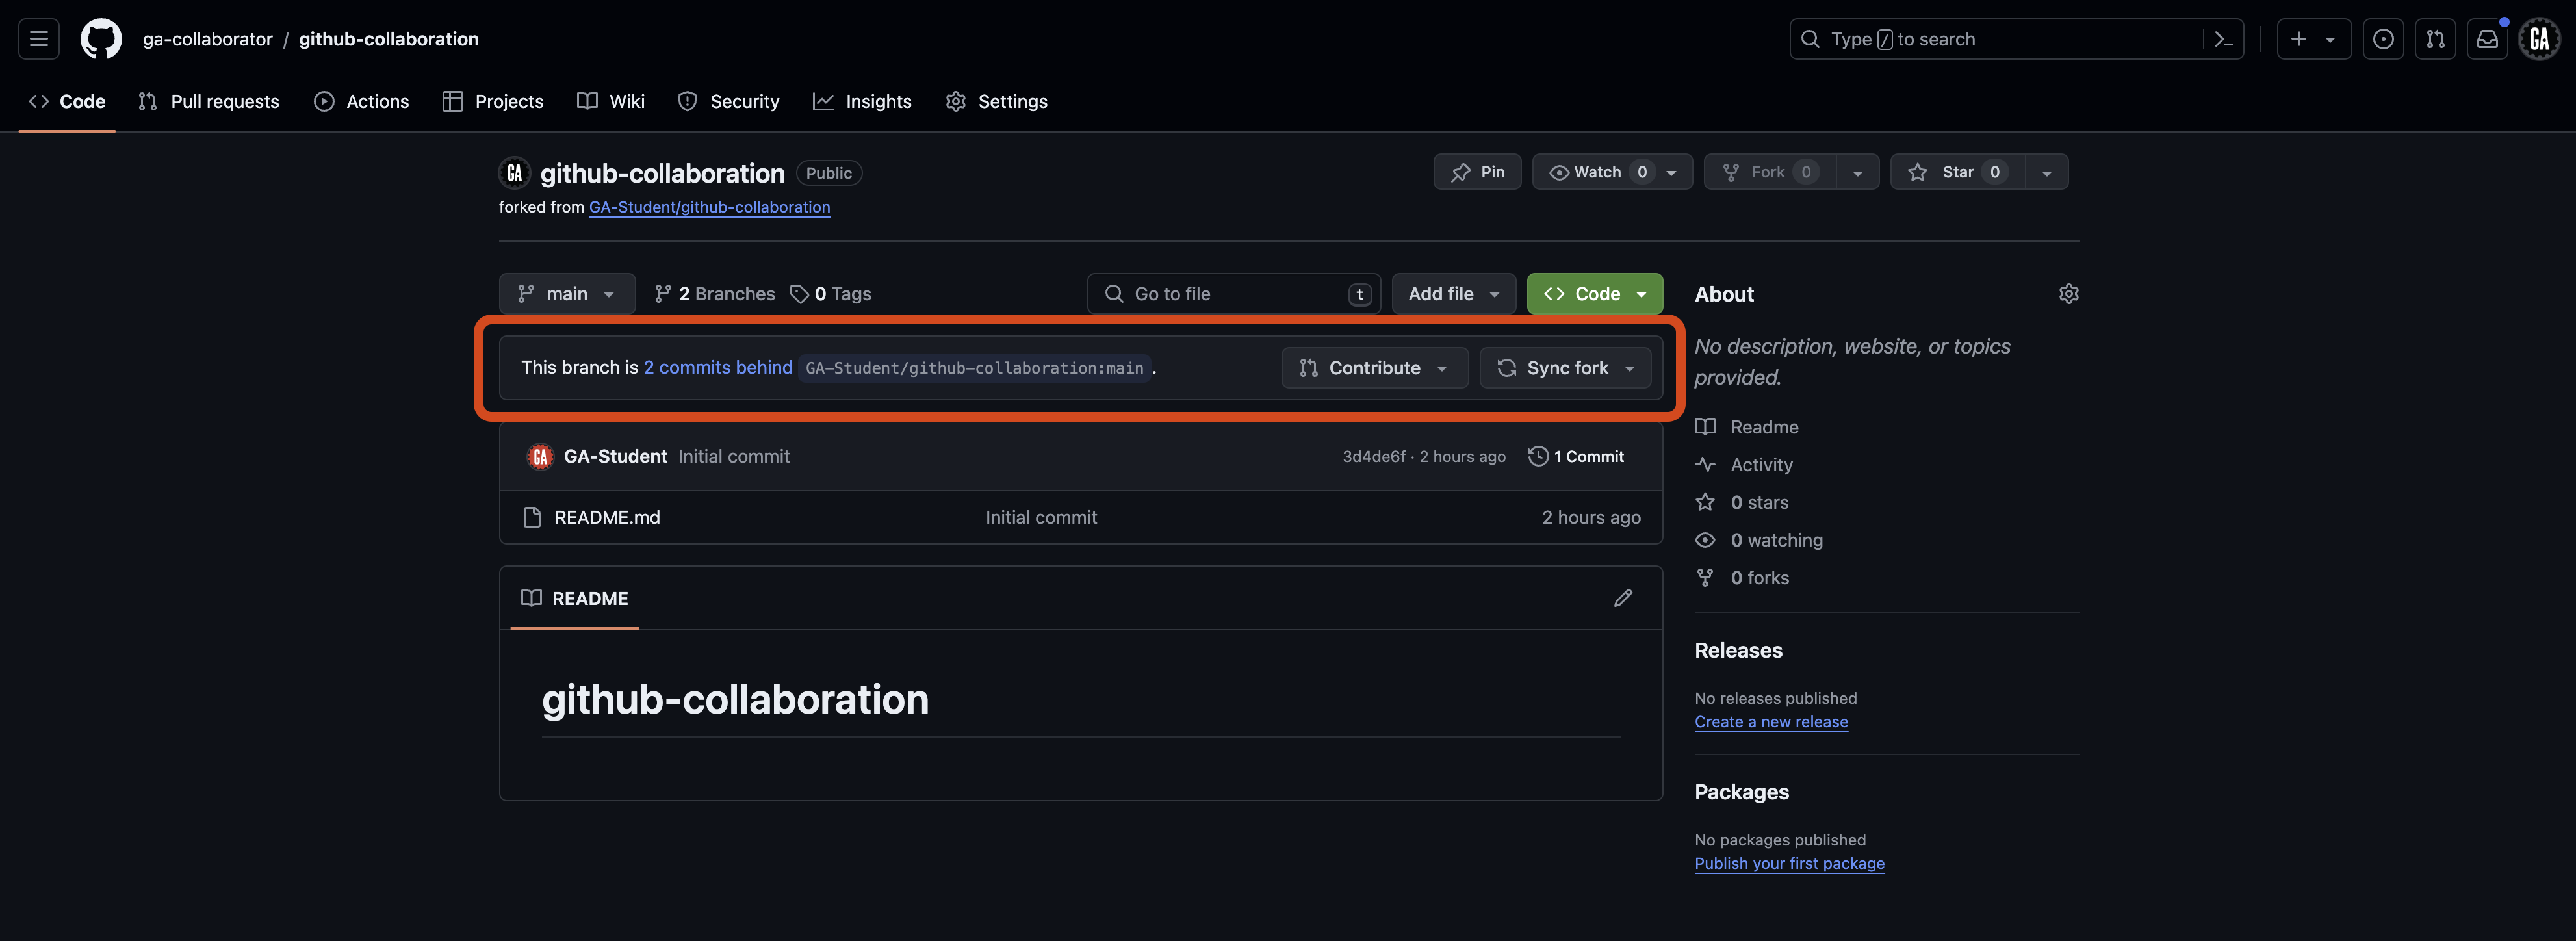
If the main branch of your remote repo isn’t up to date, you should see a section like the one outlined in red below. This indicates the main branch of your programmer’s remote repo is out of date compared to the main branch of the GitHub manager’s remote repo:
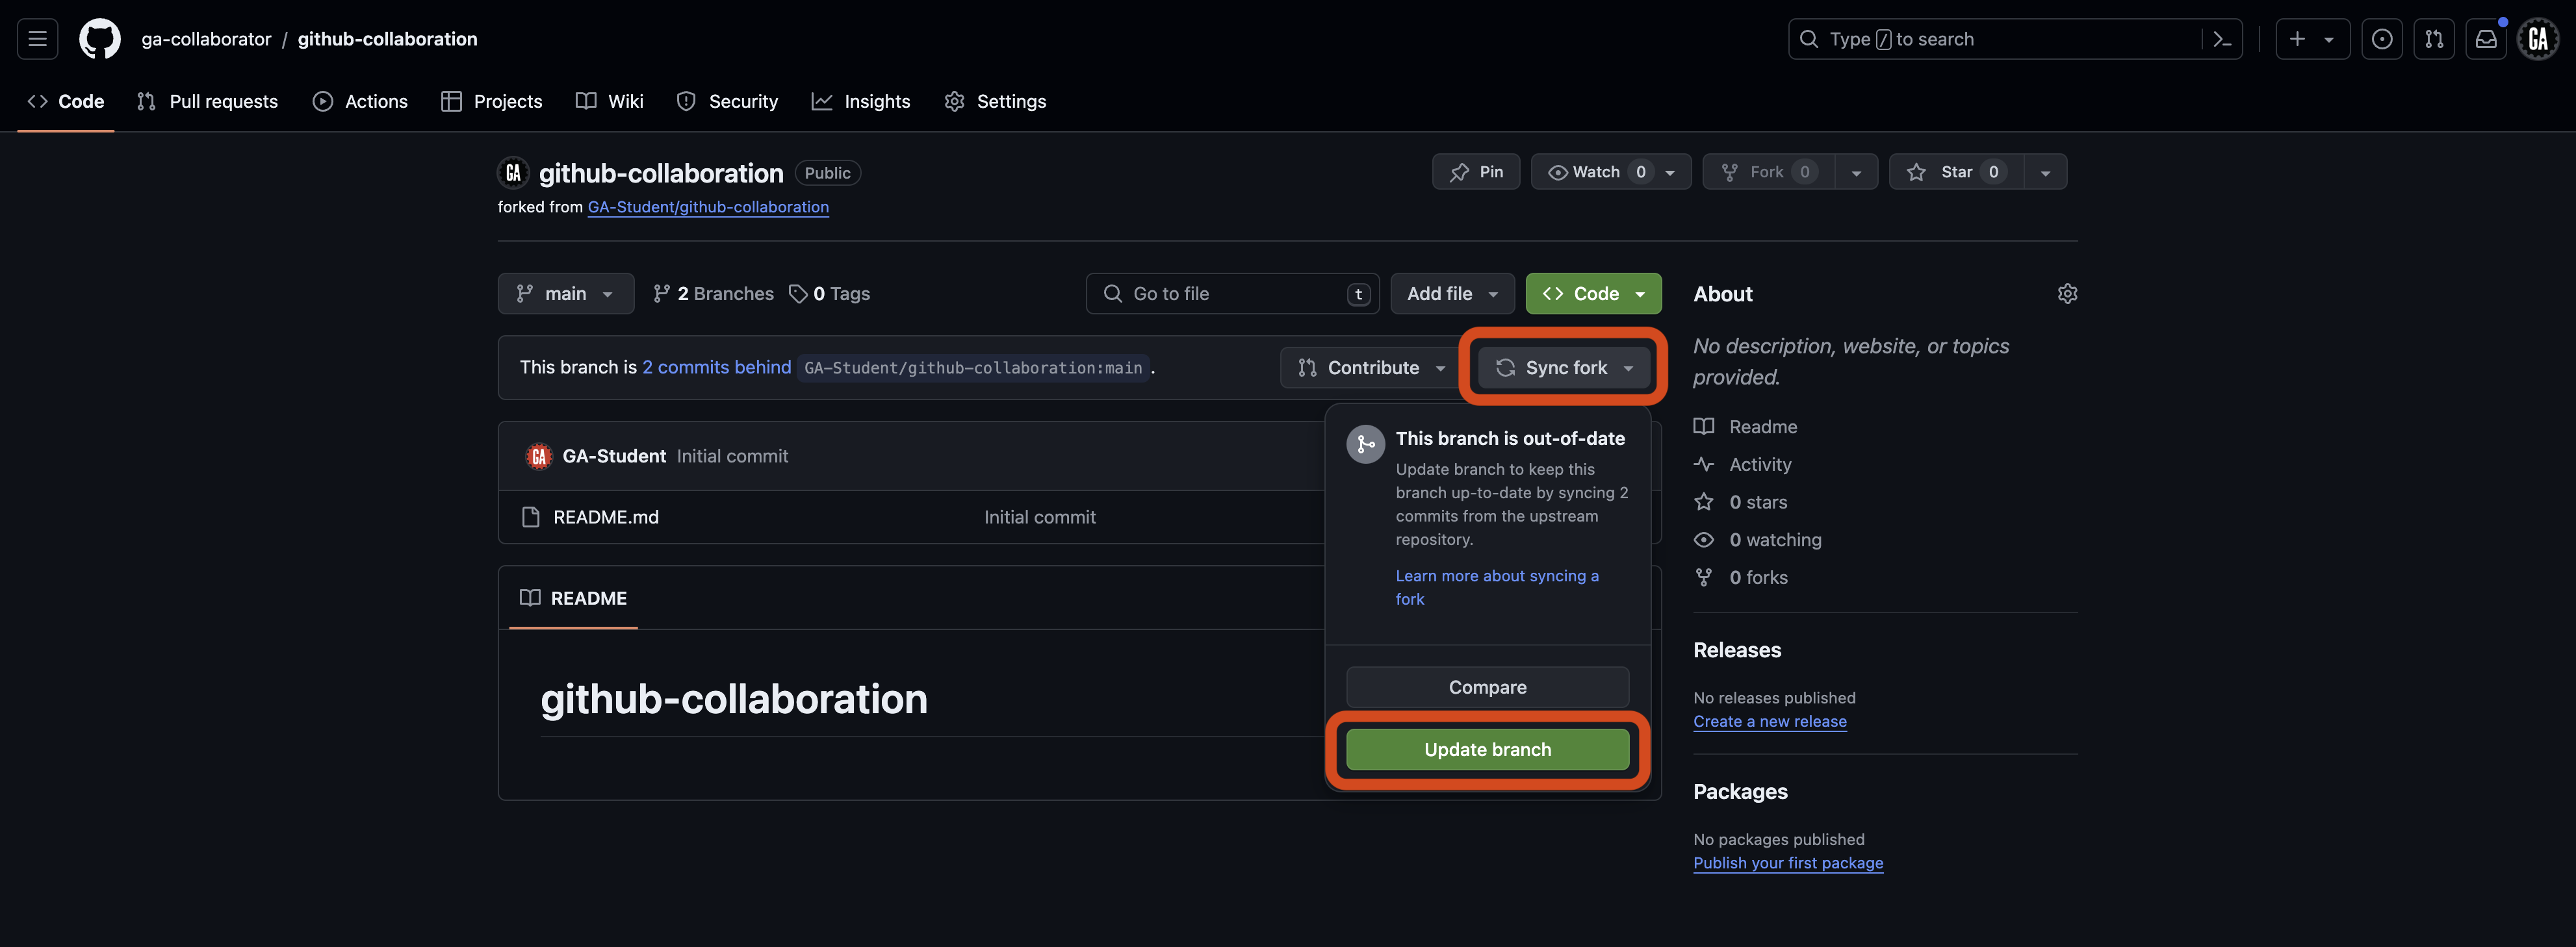
Bring it up to date by selecting the Sync fork button, followed by the Update branch button.
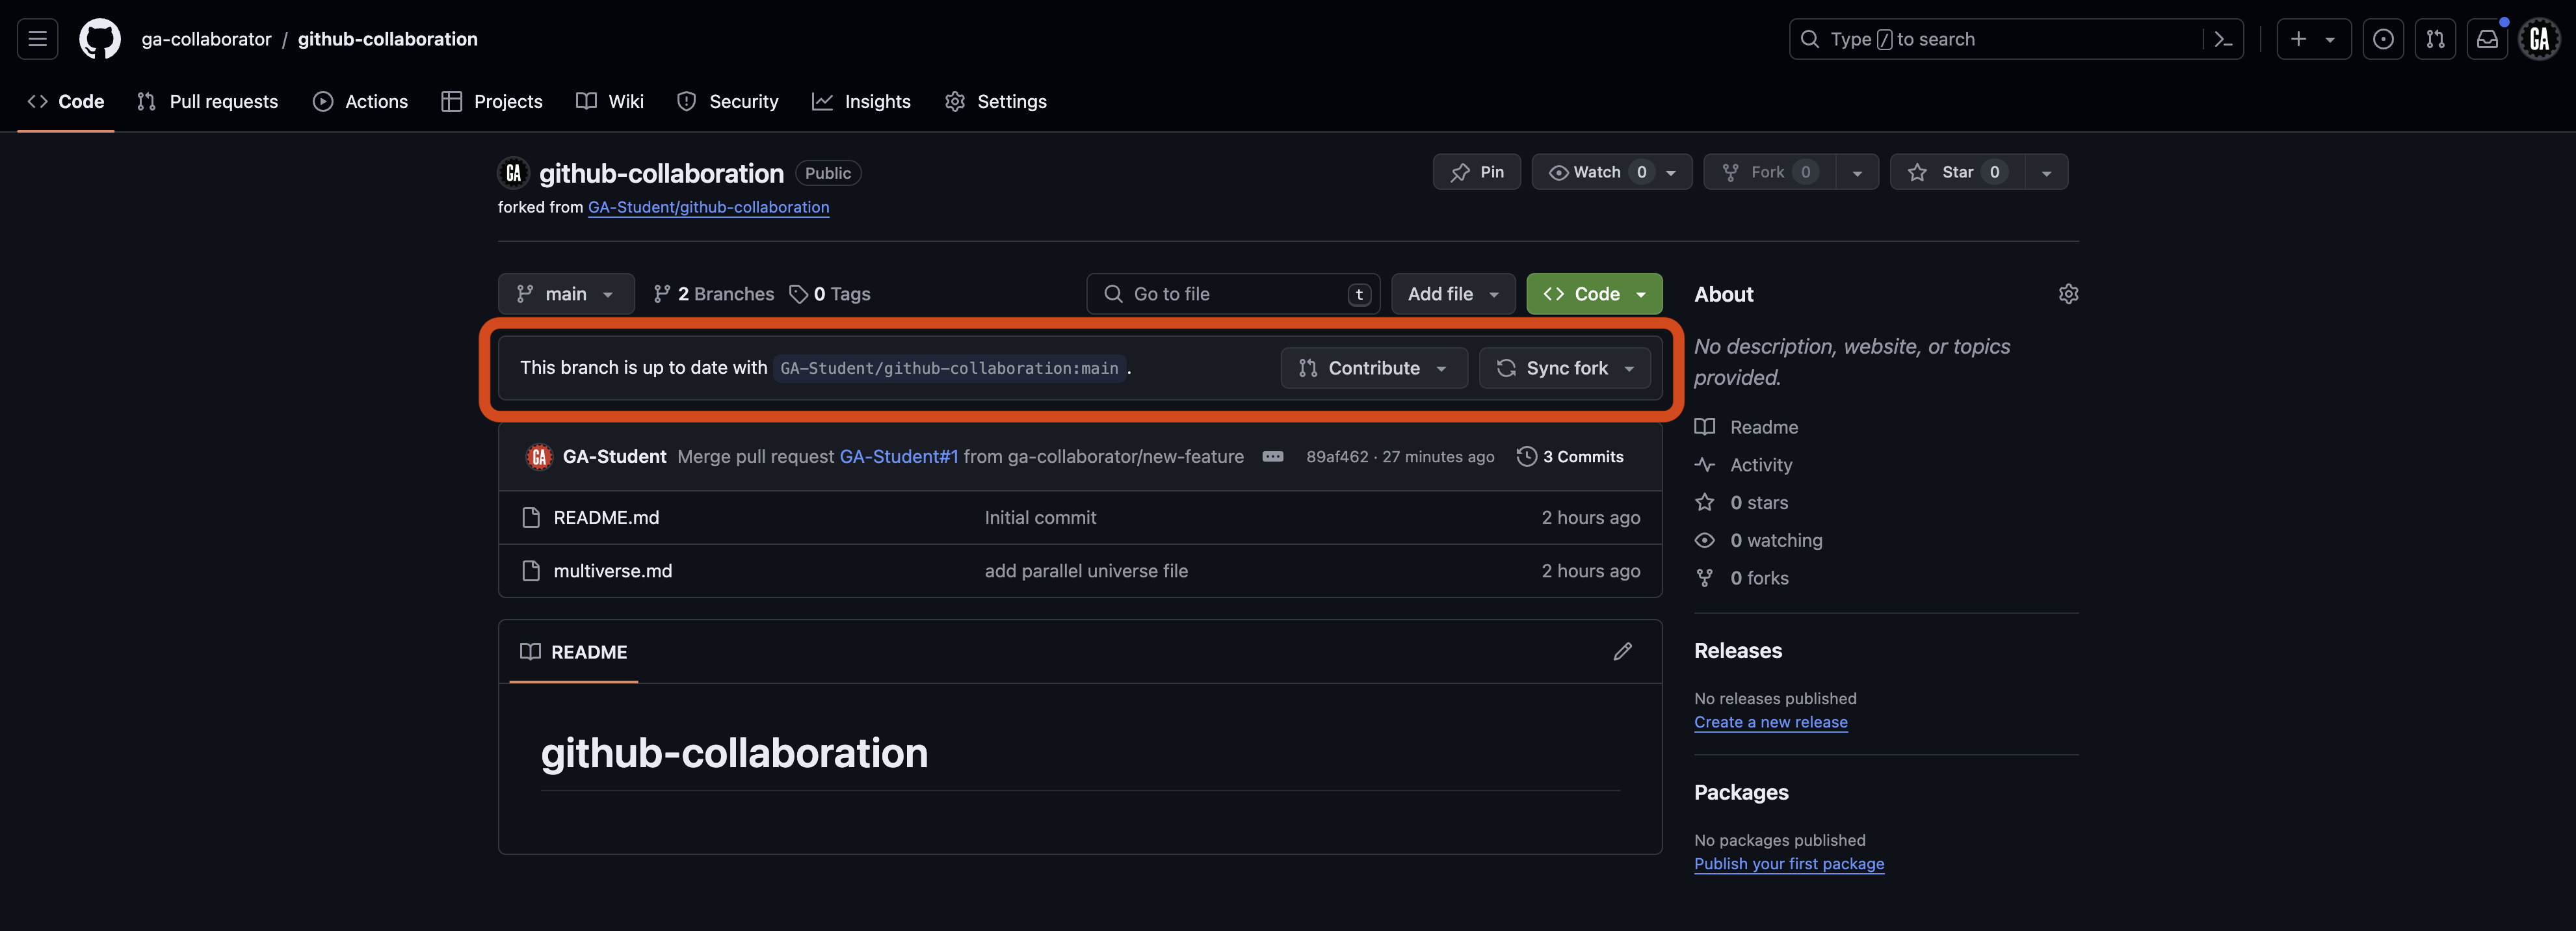
After a moment, the fork should update and indicate that it is up to date as shown below.
Return to your terminal in VS Code. If you have uncommitted work in a feature branch, commit your work first:
git add -A
git commit -m "meaningful commit message"
Checkout the main branch:
git checkout main
Then, pull the code from the main branch of your remote repo:
git pull origin main
Continue to the Next steps section below.
Next steps
Whether you are a programmer or a GitHub manager, the main branch of your local repo will now contain the same code as the main branch of the GitHub manager’s remote repo.
From here, you can take two different paths. You will typically only choose one of these paths each time you’ve pulled code from the main branch of the remote repository:
- Create a new branch: Do this if you are ready to start working on a new feature.
- Checkout an existing feature branch: Do this if you have paused work on a feature and still have more work to do with it.
⚠️ Do not do either of these right now. The notes below are just a quick reference if you need to return to this material.
See the sections below for more details on what action to take for each path.
Create a new branch
Use the same command you used to create a branch before:
git branch <feature-branch-name>
🚨 Replace
<feature-branch-name>(including the<and>) in the above command with an appropriate branch name identifying the feature that the branch implements.
You can now do work in this branch and continue contributing as normal.
Checkout an existing feature branch
Checkout the existing feature branch:
git checkout <feature-branch-name>
🚨 Replace
<feature-branch-name>(including the<and>) with the name of the branch you’ve been working in.
Bring the latest code into the feature branch so that you can use it:
git merge main
This command brings the changes in the main branch into your feature branch.
⚠️ When merging the newest code in the
mainbranch into your feature branch, it’s possible to create merge conflicts. You’ll learn how to resolve merge conflicts in the next section.