Shopping Cart
Reusing the InventoryList Component
Learning objective: By the end of this lesson, students will be able to work with reusable components in React.
Reusable components
Reusable components are a significant strength of React. A reusable component is a piece of UI that can be reused in various parts of an application. They allow us to create multiple instances of the same UI shell, with the displayed data being determined by props.
No special syntax is involved in making a component reusable, but they do require a bit of planning.
Making components reusable
We’ll make our InventoryList component reusable in the following steps.
Currently, the InventoryList component displays an h2 tag reading Inventory List alongside a list of items. With a few changes, the InventoryList component can be used to display items in the shop’s inventory, and items in the user’s cart.
For this to work, we’ll need to add two state variables in Shop.jsx.
shopInventory: An array containing the available items in the shop. We’ll set its initial state to the importedinventoryData, as the shop should start with all available items.userInventoryAn array containing items added to the user’s inventory. We’ll set its initial state to an empty array.
💡 You can remove the existing inventory useState variable. We won’t need it anymore.
After this change and a few changes to props, this will be our new component hierarchy diagram:
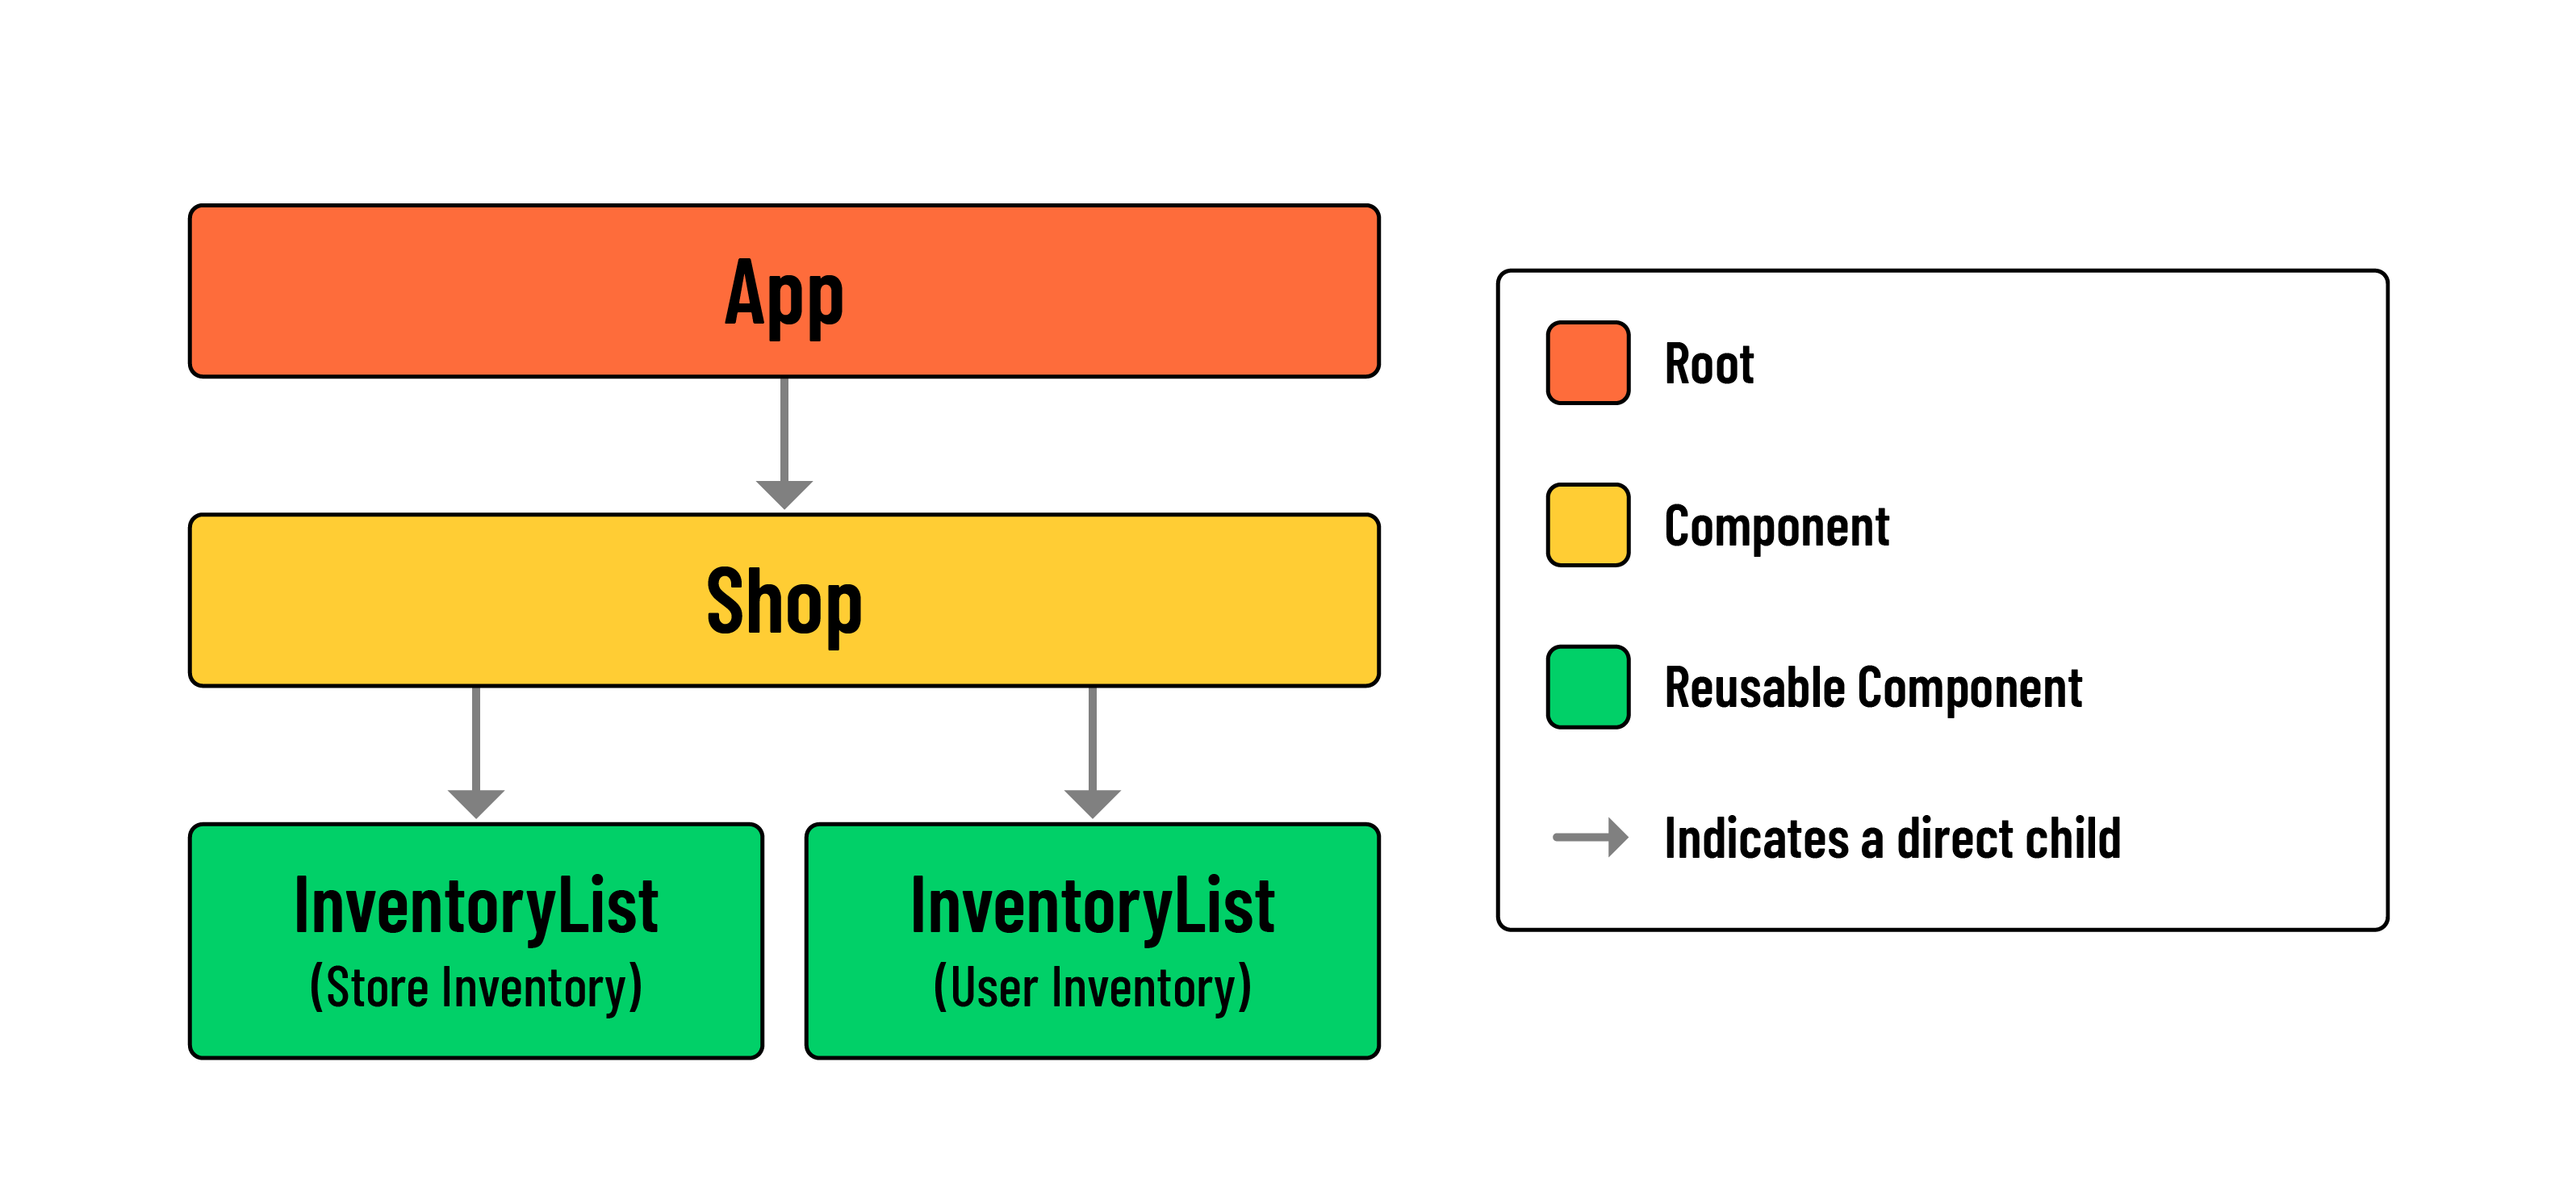
From Shop.jsx, we can pass each piece of state down to two separate instances of the InventoryList. The InventoryList component is already designed to map through the inventory prop data it receives. We need to update the value associated with this prop so that our multiple instances of InventoryList work. We can also provide each InventoryList instance with a distinct title prop.
Time to make the adjustments. Let’s refactor Shop.jsx with the following.
// src/components/Shop/Shop.jsx

// npm modules
import { useState } from 'react';

// components
import InventoryList from '../../components/InventoryList/InventoryList';

// data
import { inventoryData } from '../../data/data';

const Shop = () => {
  // Create state variables for the shop and user inventories.
  const [shopInventory, setShopInventory] = useState(inventoryData);
  const [userInventory, setUserInventory] = useState([]);

  const handleAddItem = () => {
    // We'll refactor this in a bit
  };

  return (
    <main>
      <h1>Shop</h1>
      <section>
        <InventoryList title="Shop Inventory" inventory={shopInventory} />
        <InventoryList title="User Inventory" inventory={userInventory} />
      </section>
    </main>
  );
};

export default Shop;
Head back to InventoryList.jsx. We need to update the <h2> tag to use the title prop.
// src/components/InventoryList/InventoryList.jsx

const InventoryList = (props) => {
  return (
    <div>
      <h2>{props.title}</h2>
      <ul>
        {props.inventory.map((item) => (
          <li key={item._id}>
            <p>{item.name}</p>
            <p>Price: {item.price}</p>
          </li>
        ))}
      </ul>
    </div>
  );
};

export default InventoryList;
Check your browser! You should see two lists - one for the shop’s inventory and another for the user’s inventory. At the moment, only the shop’s inventory will include items. The two lists are stacked on top of one another, so you’ll need to scroll to the bottom of the page to see the user’s inventory.
Some quick styling
Now that we have two list components let’s add some styling so they’re not stacked.
CSS classes are generally preferable to inline styles if their values aren’t being computed, and they help you keep your JSX legible.
To help keep things organized, let’s create a new Shop.css file inside our Shop component directory.
touch src/components/Shop/Shop.css
Next, import ./Shop.css and apply the class name shop-section to the <section> tag.
🧠 We use className instead of class (as class is a reserved word in JavaScript) when applying classes in JSX.
// src/components/Shop/Shop.jsx

// npm modules
import { useState } from 'react';

// components
import InventoryList from '../../components/InventoryList/InventoryList';

// data
import { inventoryData } from '../../data/data';

// css
import './Shop.css';

const Shop = () => {
  const [shopInventory, setShopInventory] = useState(inventoryData);
  const [userInventory, setUserInventory] = useState([]);

  const handleAddItem = () => {
    // We'll refactor this in the following steps
  };

  return (
    <main>
      <h1>Shop</h1>
      <section className="shop-section">
        <InventoryList title="Shop Inventory" inventory={shopInventory} />
        <InventoryList title="User Inventory" inventory={userInventory} />
      </section>
    </main>
  );
};

export default Shop;
In Shop.css, add the following styles:
.shop-section {
  display: flex;
  align-items: flex-start;
  justify-content: center;
  gap: 20px;
}

.shop-section > div {
  min-width: 450px;
}

.shop-section h2 {
  text-align: center;
}
Refresh the browser - you should see each list as a distinct column.
⚠️ Don’t see the changes yet? The module reloader may be waiting for changes in your
Shop.jsxfile before rendering the CSS. You can restart the server to see the changes immediately.